Esprit engine & related systems
PISTON BROKE! (and that's just the driver ;o)
Back in 2005 I'd finally decided to part with the Esprit so I could concentrate on the TVR and I had a local guy who'd expressed a vague interest in buying the car. So I took him out for a spin and I noticed that the Esprit seemed to be running badly. I told him I'd fix it and get back to him.
Cutting a story short I did a compression test, suspected a blown head gasket or similar silliness so I pulled the cylinder head off. Nothing found so I dropped the sump and pulled the pistons and found that large chunks of the thrust side of numbers 1 and 2 pistons had disintegrated. The car has stood for about two months now while I try to decide the best way to fix it... when I do, it'll be up for sale!
UPDATE 16/11/05: IN BITS!
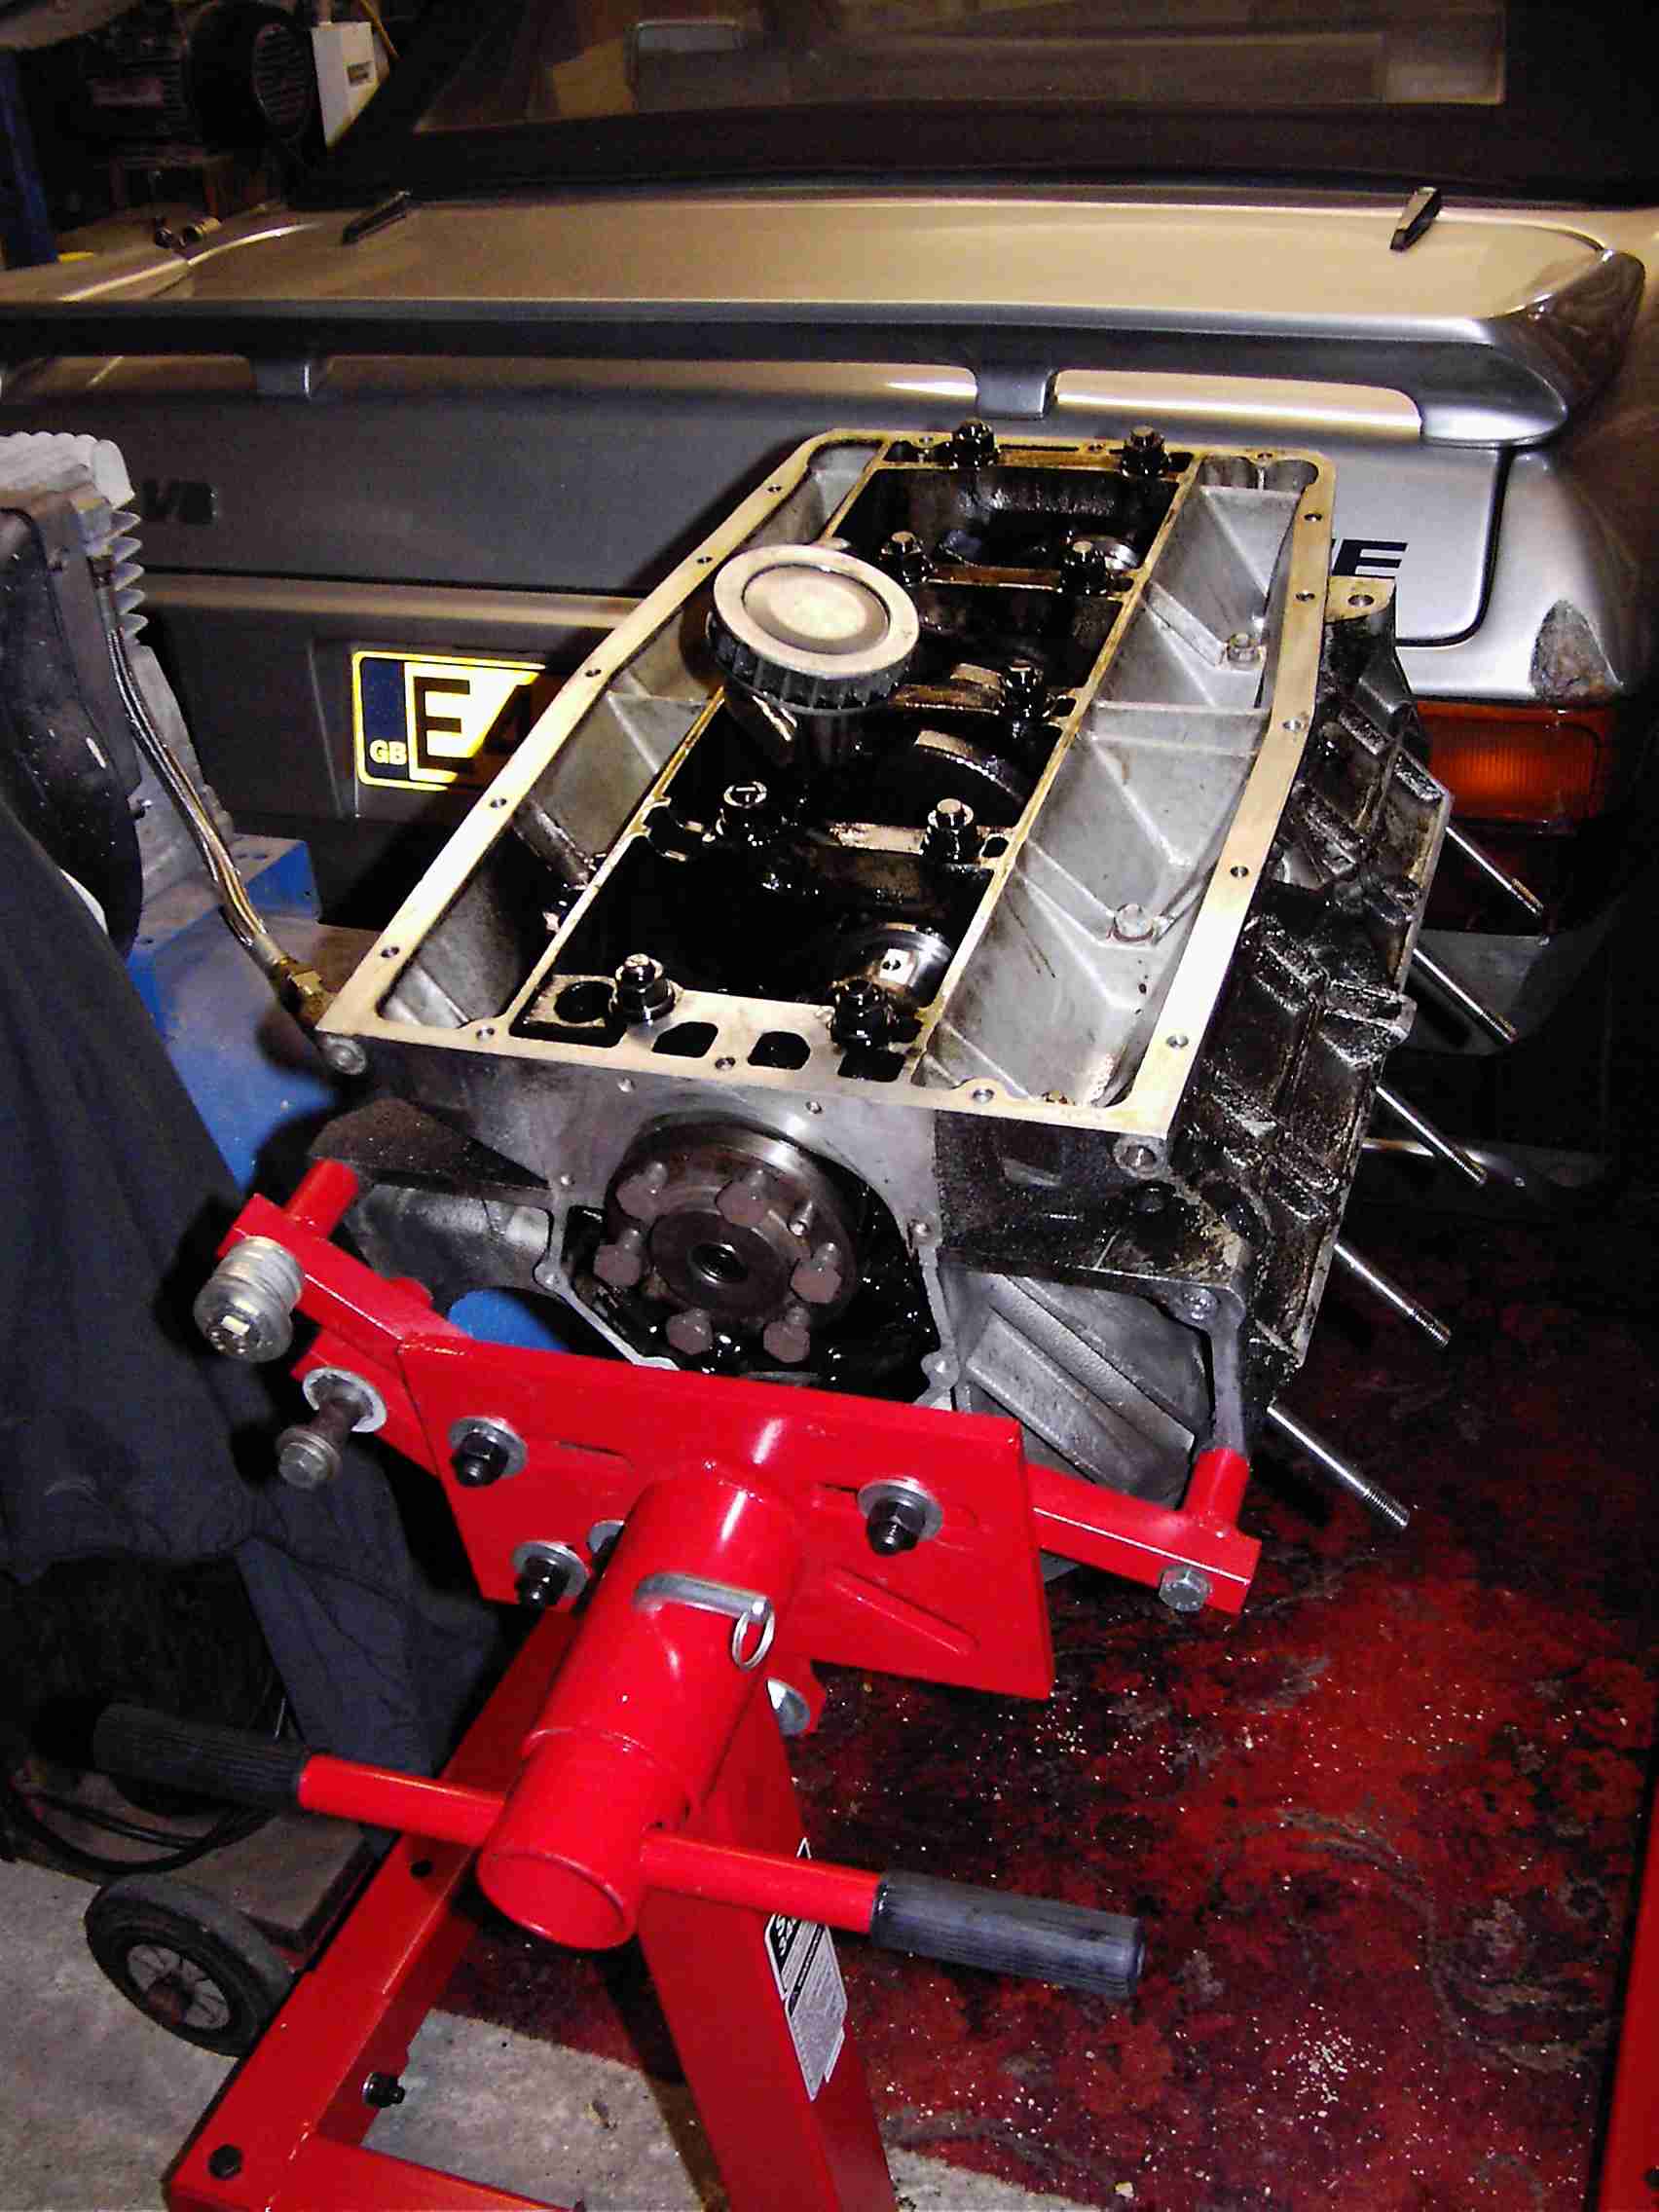
Several months on and the Esprit is still awaiting a new heart. I spoke to a guy who deals in Lotus spares; he offered me an ex-Eclat 2.2 for £800 but also said he could supply new pistons and liners for less than the likes of SJ Sportscars. Even so, by the time you add in all the seals and gaskets to do a rebuild, it's going to be hundreds of £££... but at least the engine would be a known quantity. One small point is that the Esprit engine had a cross-drilled crank where the Eclat didn't, perhaps not important just to get the car running to sell, but if I decided to keep it there'd always be a nagging doubt...! With nothing to lose I decided to continue stripping the engine. I'd got the head and sump off and the pistons out, so there wasn't a lot left. At this time I've removed the alternator, distributor, starter, auxiliary housing, water pump, oil cooler, clutch slave cylinder and crank pulley. Where possible, components have been stripped, degreased and bead-blasted. Sundry brackets, coolant tank etc. have been powdercoated:
Also see here for more details on DIY powdercoating! The head and cam housings await further attention, but in essence I'm just about ready to pull the block out. My plan is to see if it can be done without disturbing the transmission: with the engine mountings removed I'm hoping the block will slide far enough forward to disengage it from the input shaft and then it can be craned out. Watch this space... ;)
The crank bearings are all in very good shape: by the look of the big end shells it seems the engine may have had a recent (in mileage terms) rebuild; it's a shame so much of it was put back together with silicon sealant... :-(
UPDATE 11/01/06: The moment is at hand!
After sporadic forays under the Esprit stripping bits off willy-nilly, I'd got to the stage where I thought I might be able to lift out the engine. So I moved stuff round and dragged the crane out, and that was when I realised that the jib wasn't going to be long enough. Doh... not only that, but the tailgate needs to come off and I couldn't do it by myself. (Edit: Actually, it was possible without removing the tailgate; I just disconnected the gas rams and got an assistant to hold the tailgate vertical while I pulled the engine and box out!)
What with one thing and another I decided I may as well do the job properly and take the engine out with the gearbox, so a couple of nights back I braved the chill and crawled underneath the car again. I disconnected the driveshafts and swung the calipers out of the way, then decided I may as well strip the brake discs off as well, to clean them up and to save weight on the lift.
Unfortunately, the discs won't come off because the caliper carriers are in the way. The carriers are bolted to the transmission mountings, but the bolt heads are between the mounting and the transmission (and are as tight as buggery). So the mountings need to come off the transmission (and hence the chassis) in order to remove the discs...! You can change the pads in 10 minutes, but it looks like you need 10 bloody hours to change the discs... :( Luckily these discs haven't done many miles and are only rusted due to lack of use, so they'll be going back on. Just as well, given the cost of new ones...!
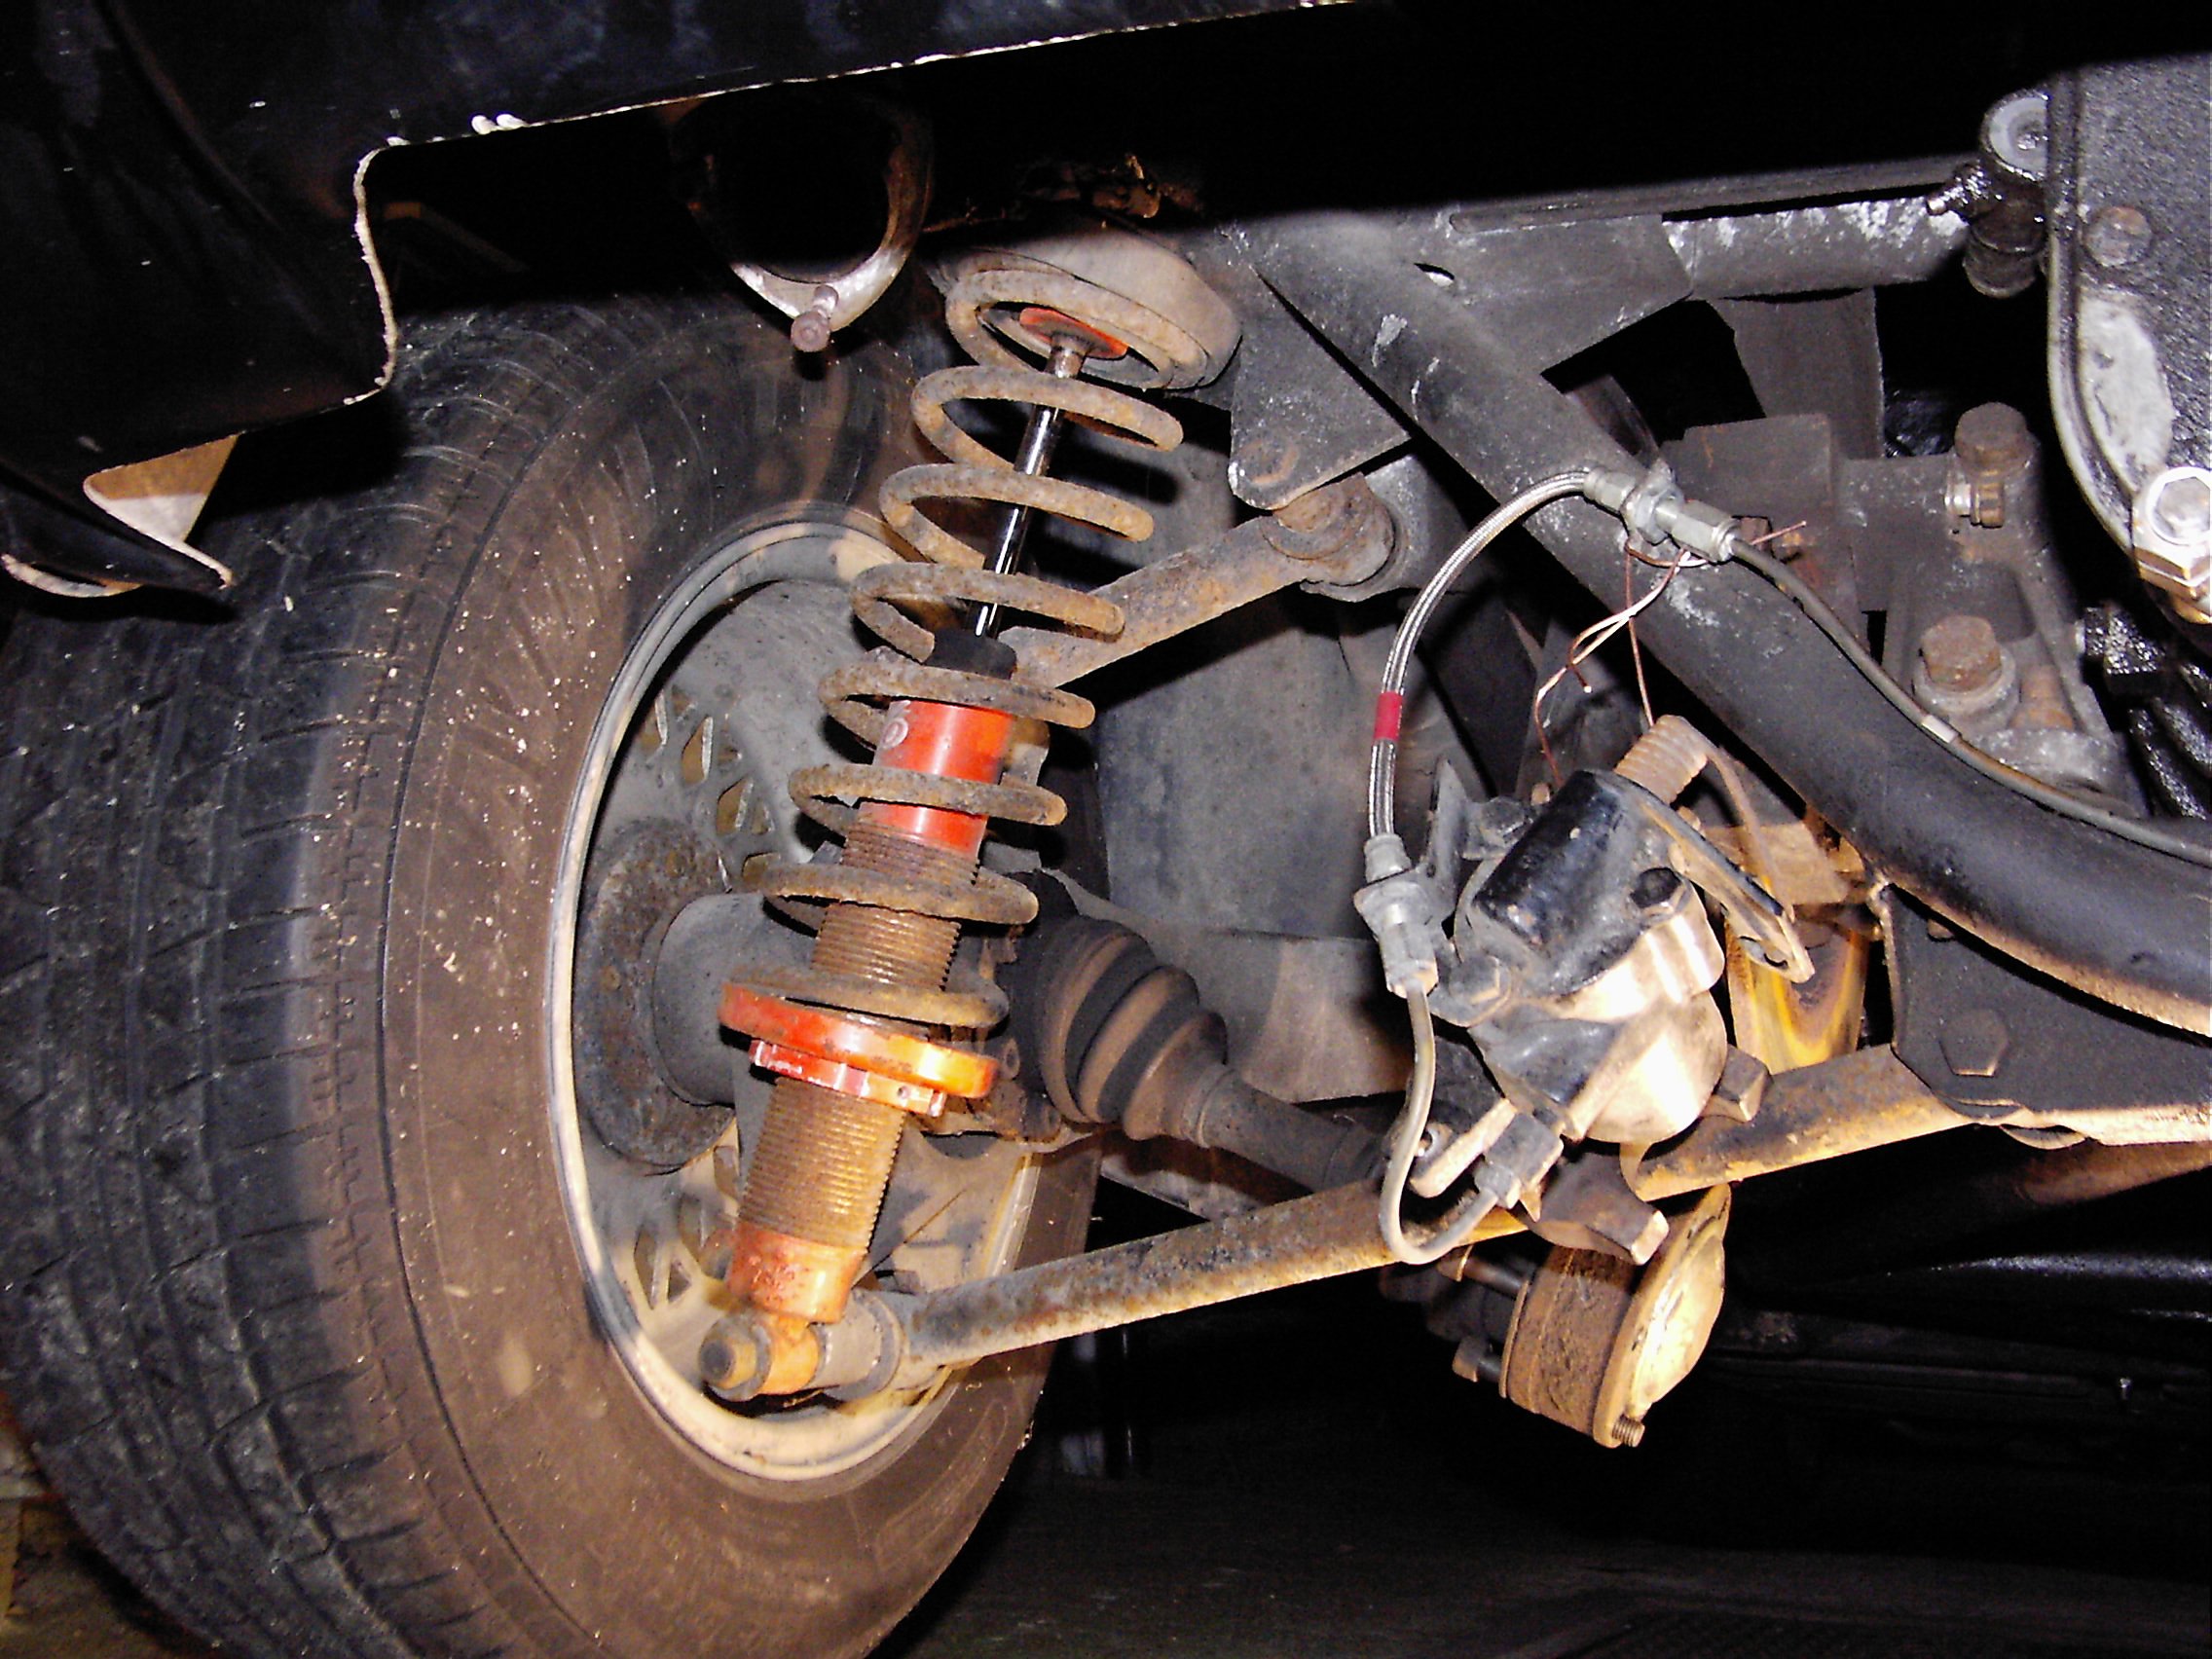
Needless to say, I'm already planning a rear suspension rebuild once the engine and 'box are out of the way...!
Gratuitous suspension porn... :-D On the early Esprit the driveshaft acted as the top suspension link: luckily by the time the S3 came along some sense had been applied and a top link had been added; you can see it hiding behind the shock absorber.
UPDATE 05/04/06: Progress report...
I resorted to borrowing a mate's 2-ton long-reach engine crane, and I can safely say that if you have an Esprit or a TVR wedge, one of these should be high on your shopping list!
It's a fairly simple matter, once everything's stripped off the Esprit engine and the mountings unbolted from the chassis, to lash a rope round the engine and 'box and hoist it out. As I said above, I disconnected the gas struts and got someone to hold the tailgate out of the way while I pumped the crane up.
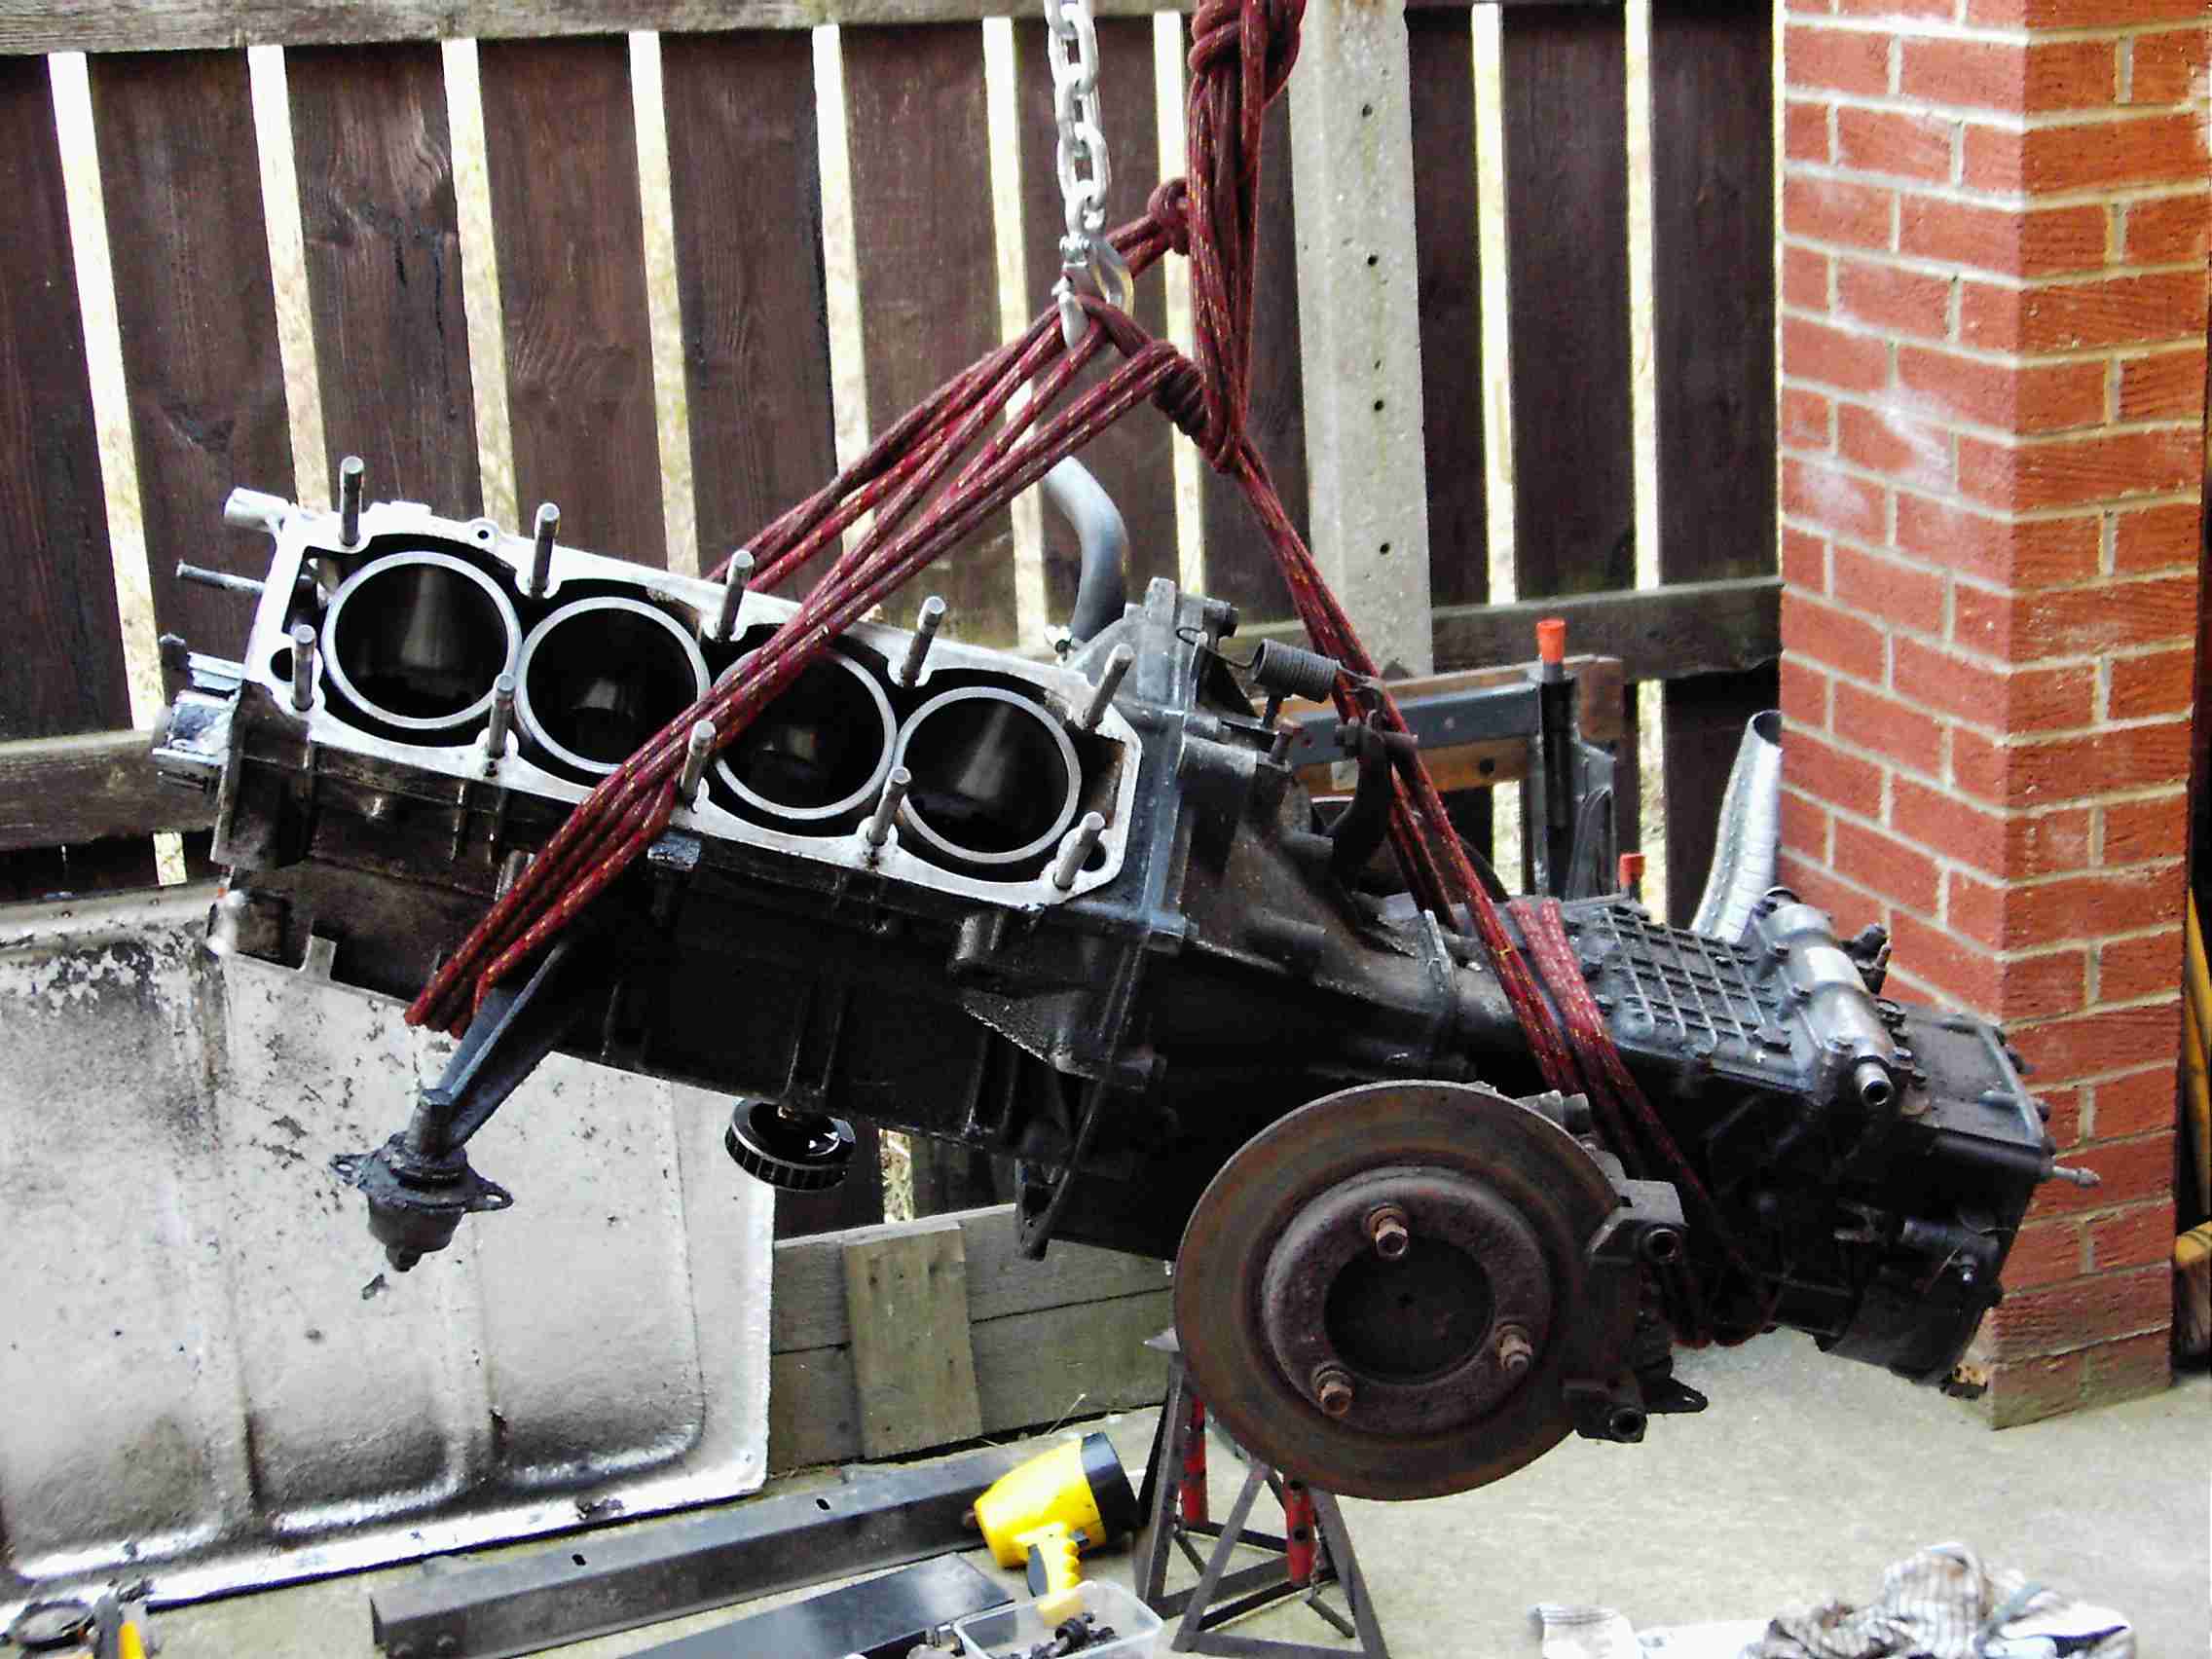
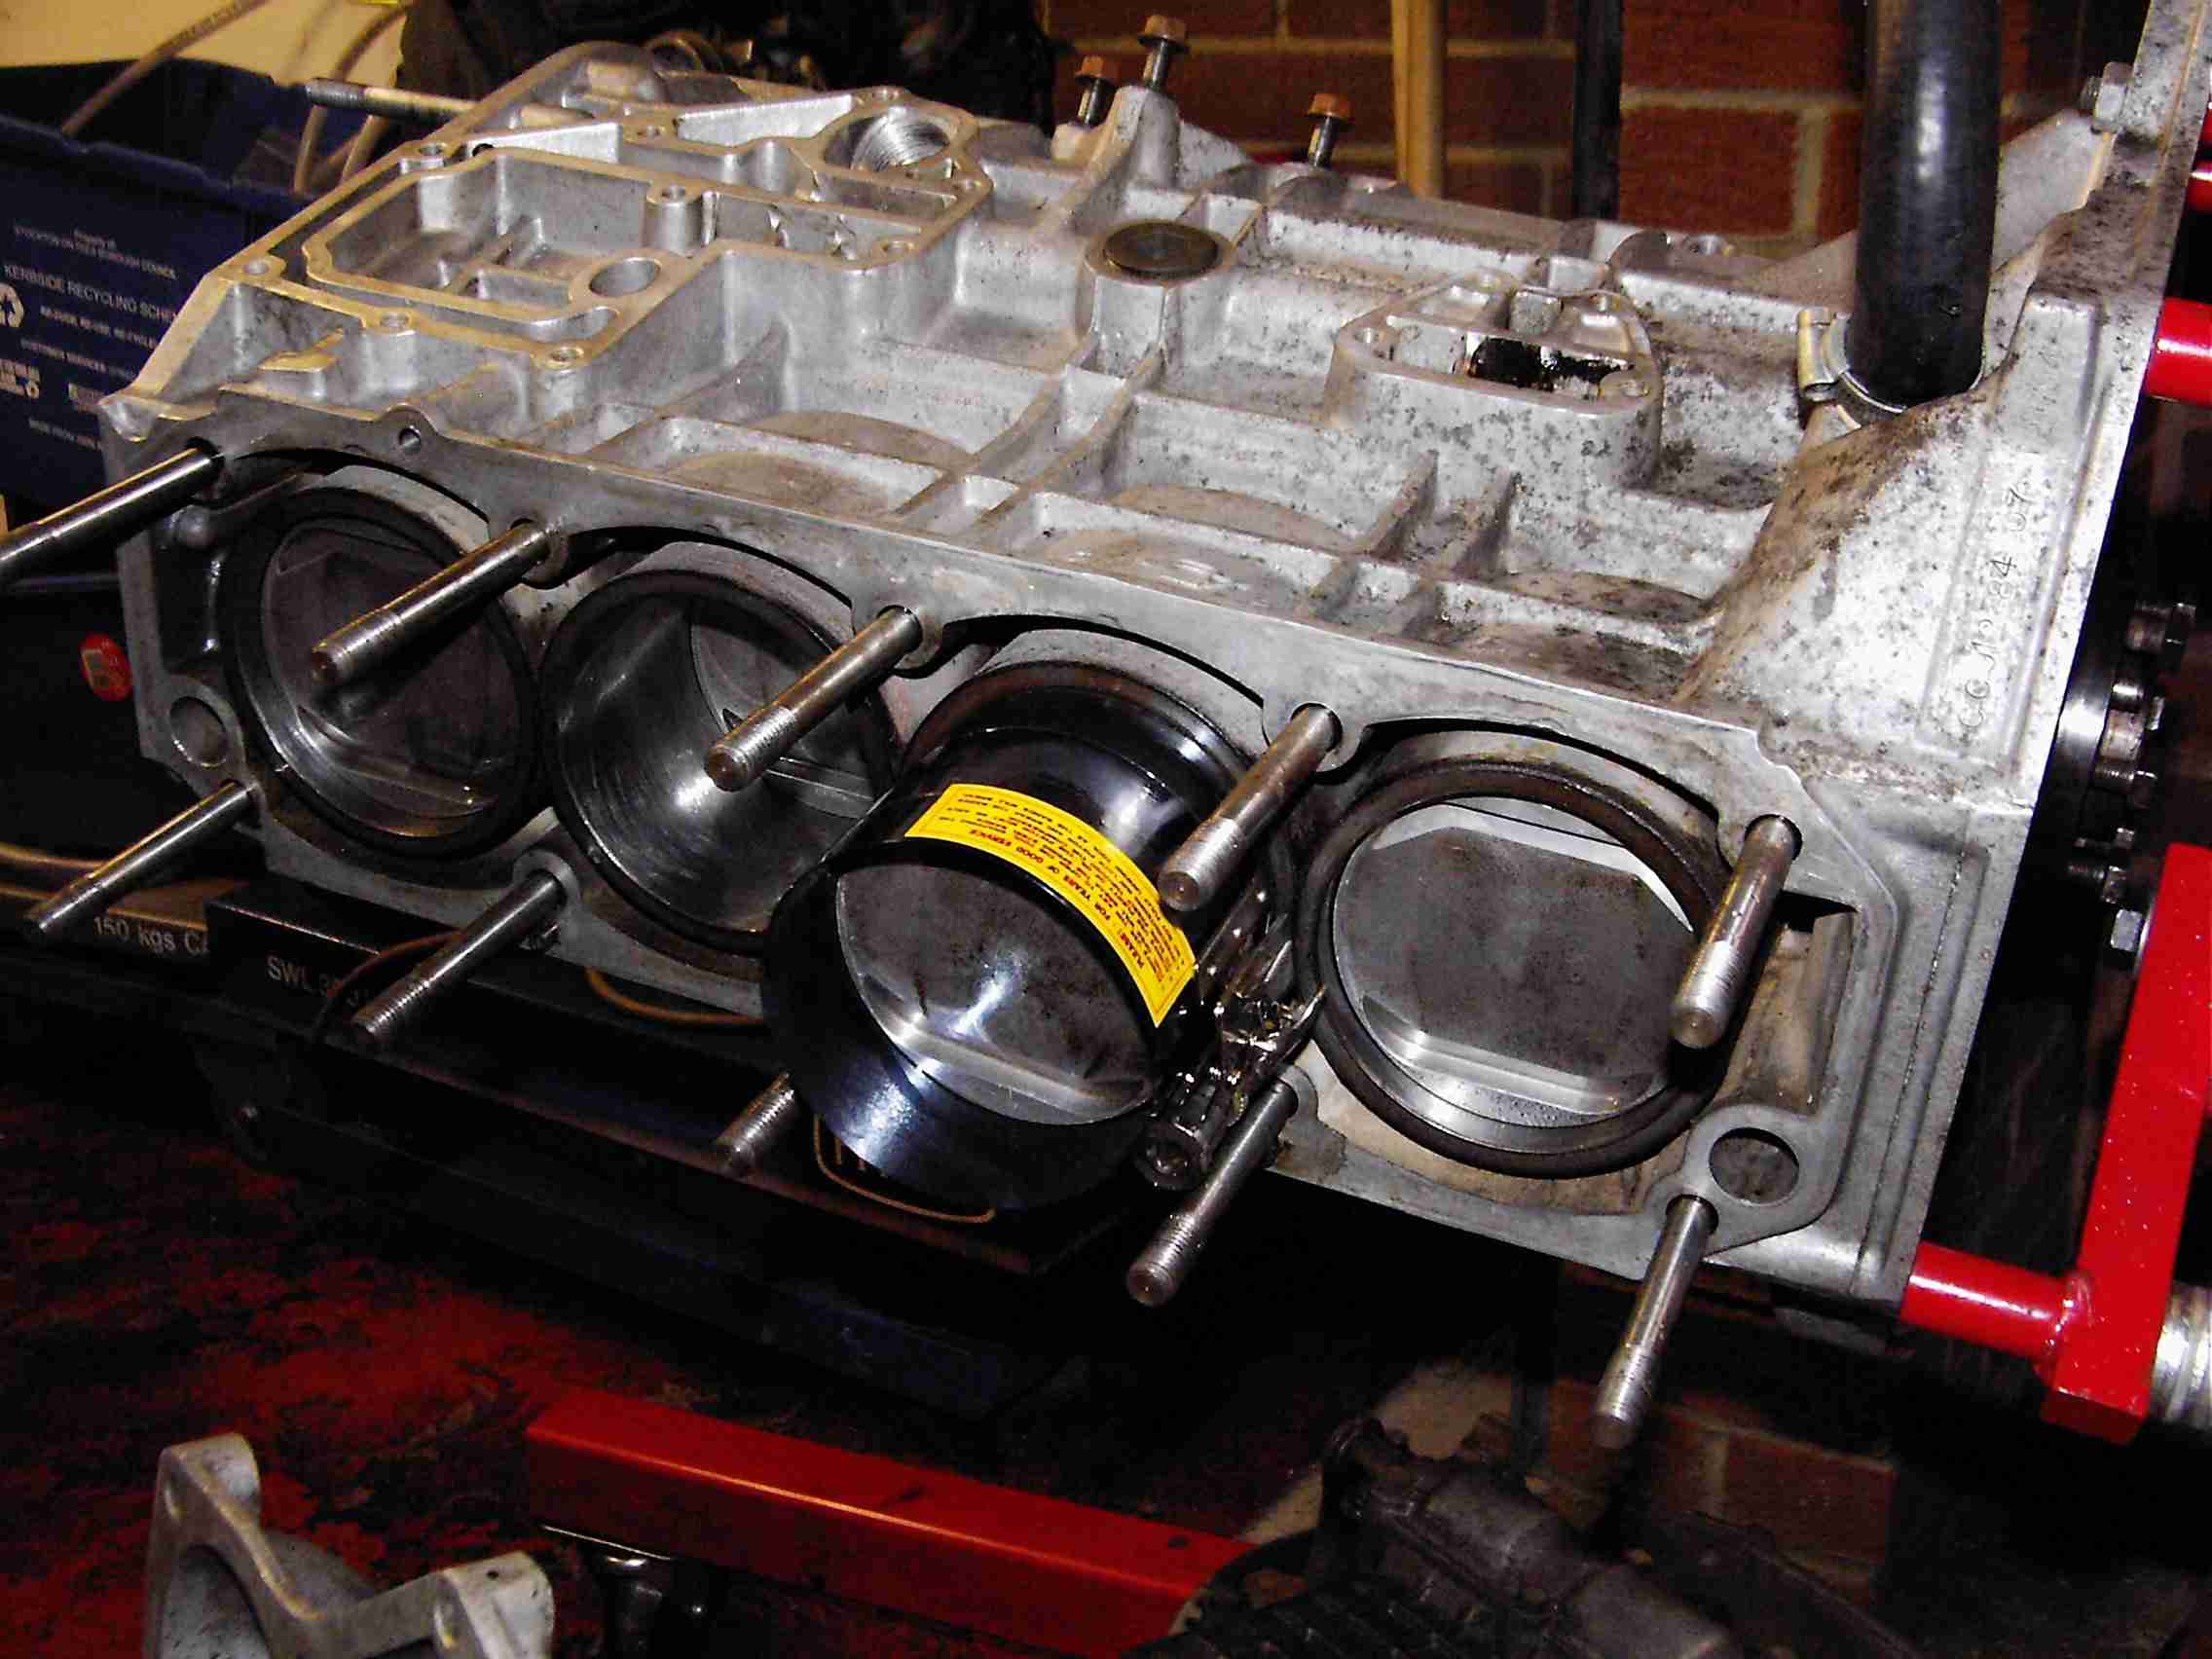
Yes, I know: the book says use cylinder liner clamps! Believe me, those liners are going nowhere.
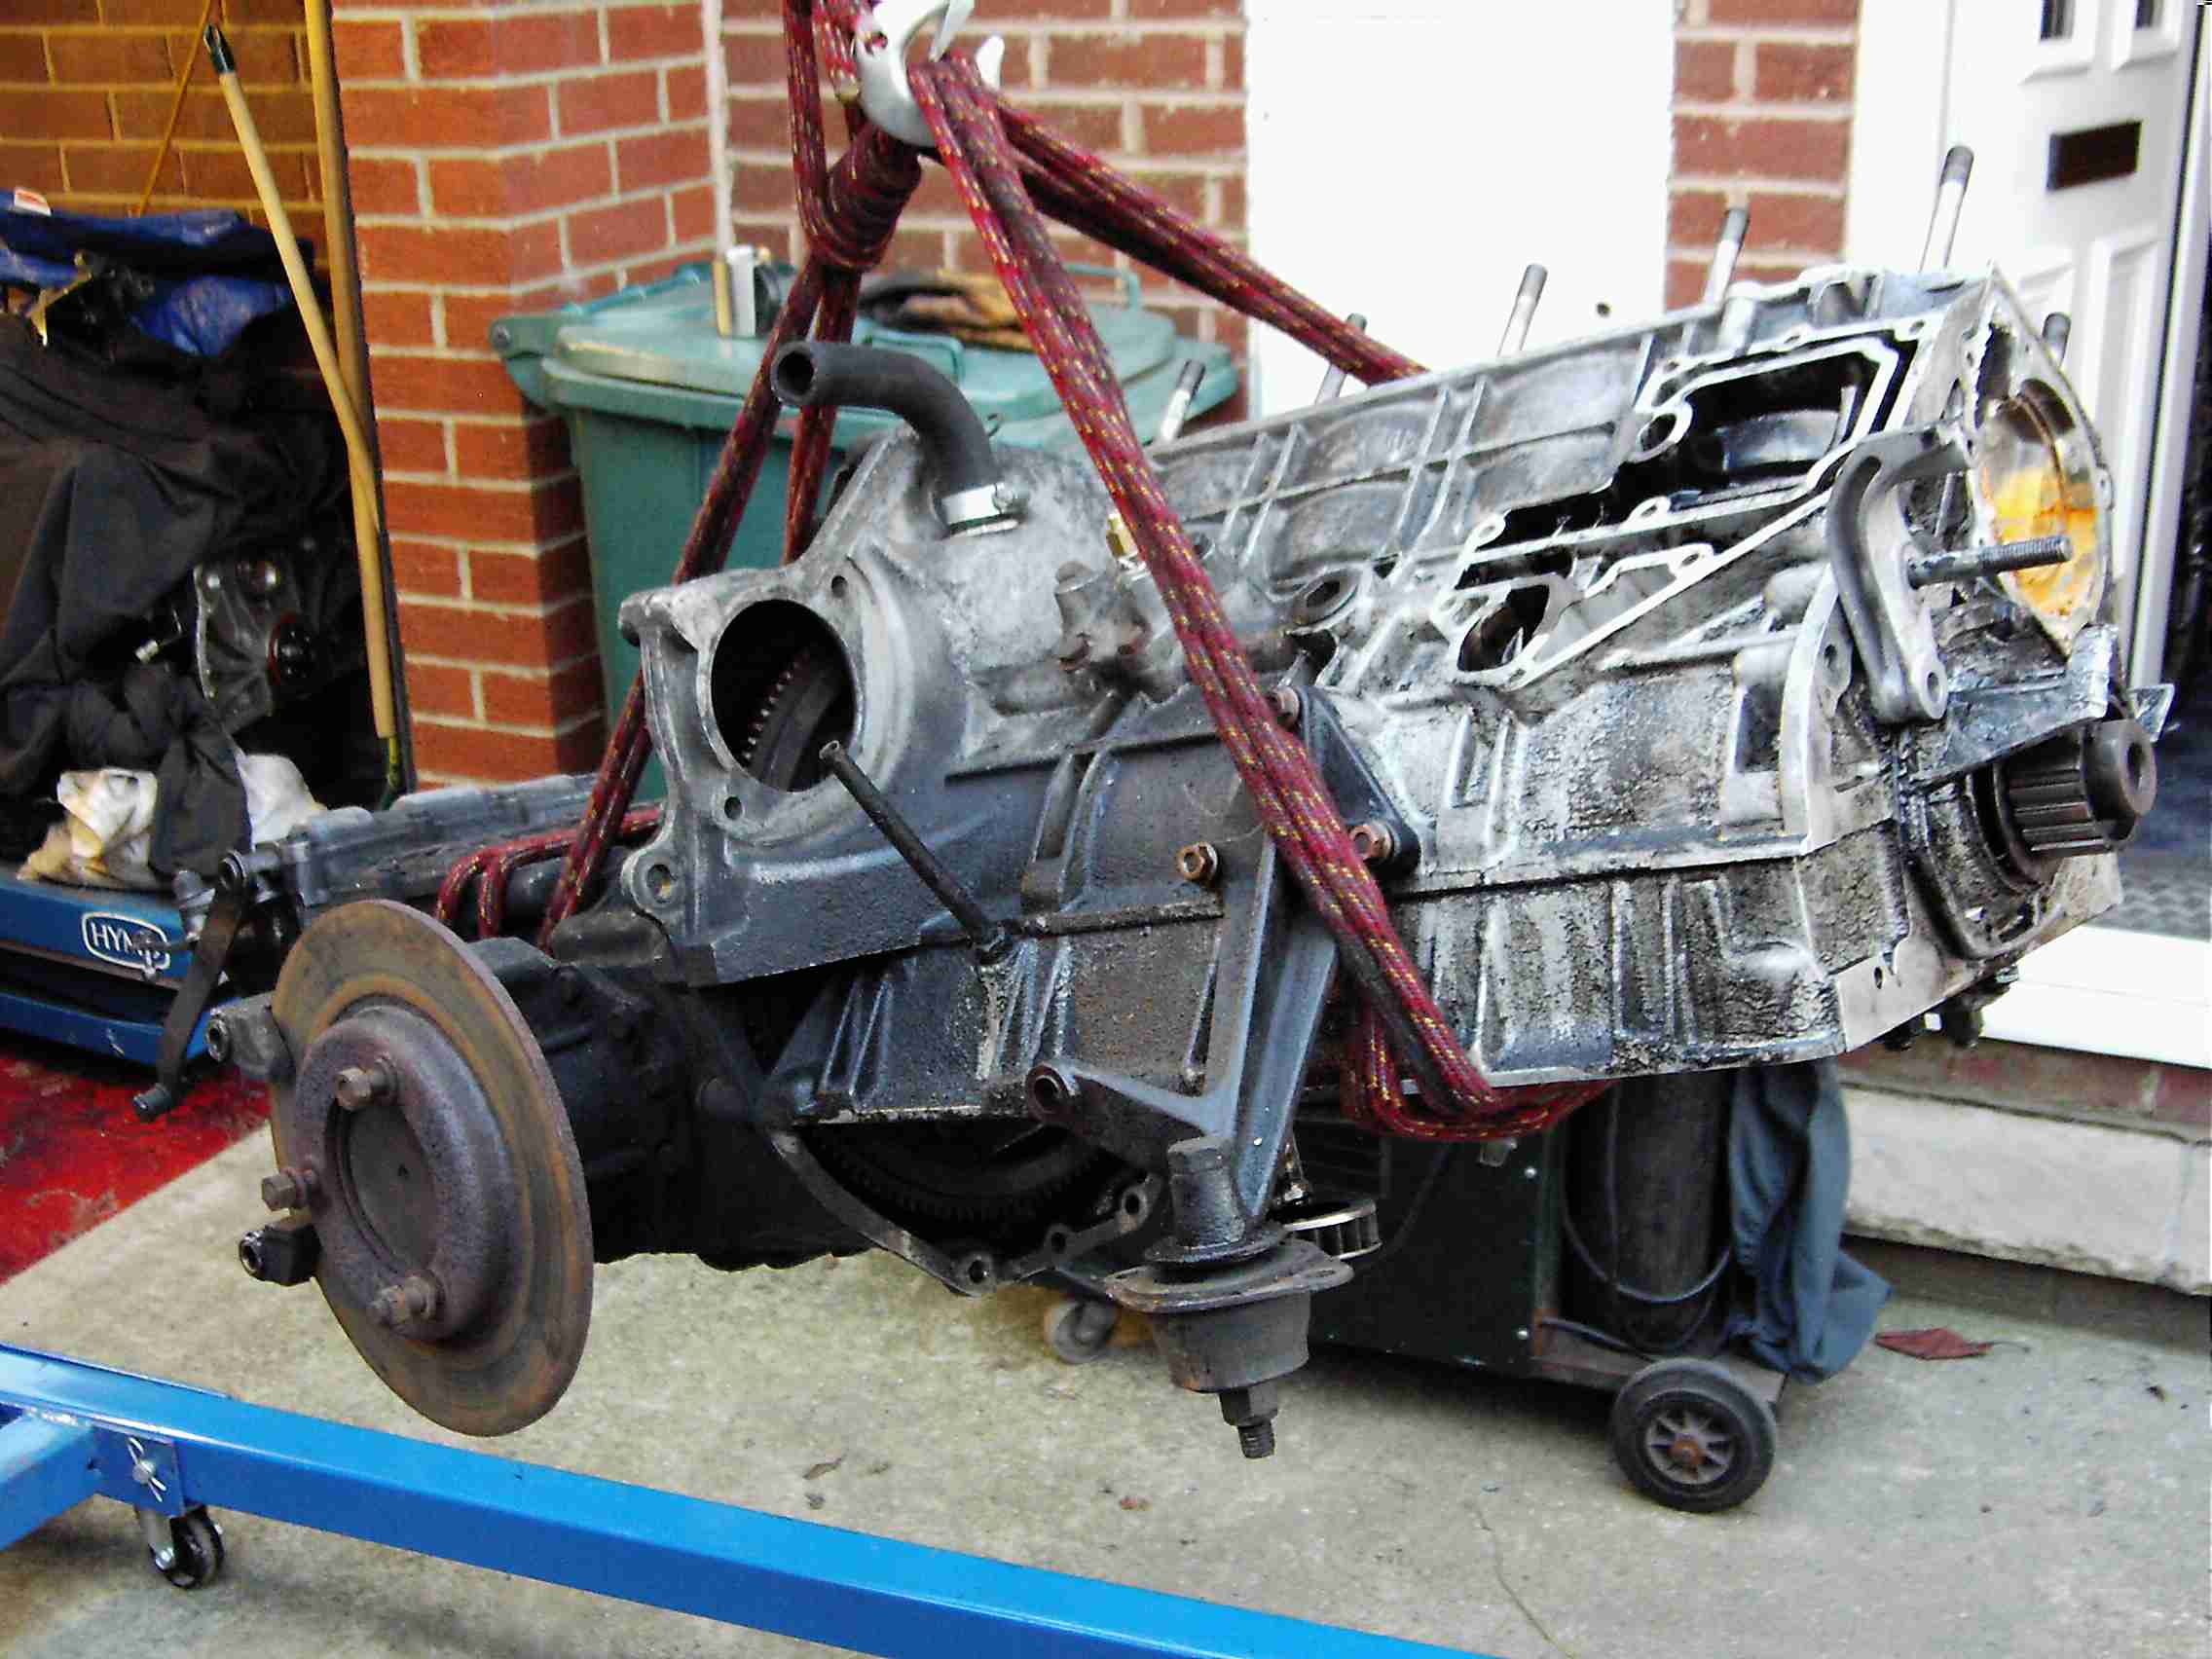
Next I had to split the engine and box, and what a gut-buster THAT was. Nobody told me the transmission weighs 61Kg, and the engine even stripped this far must be somewhere similar.
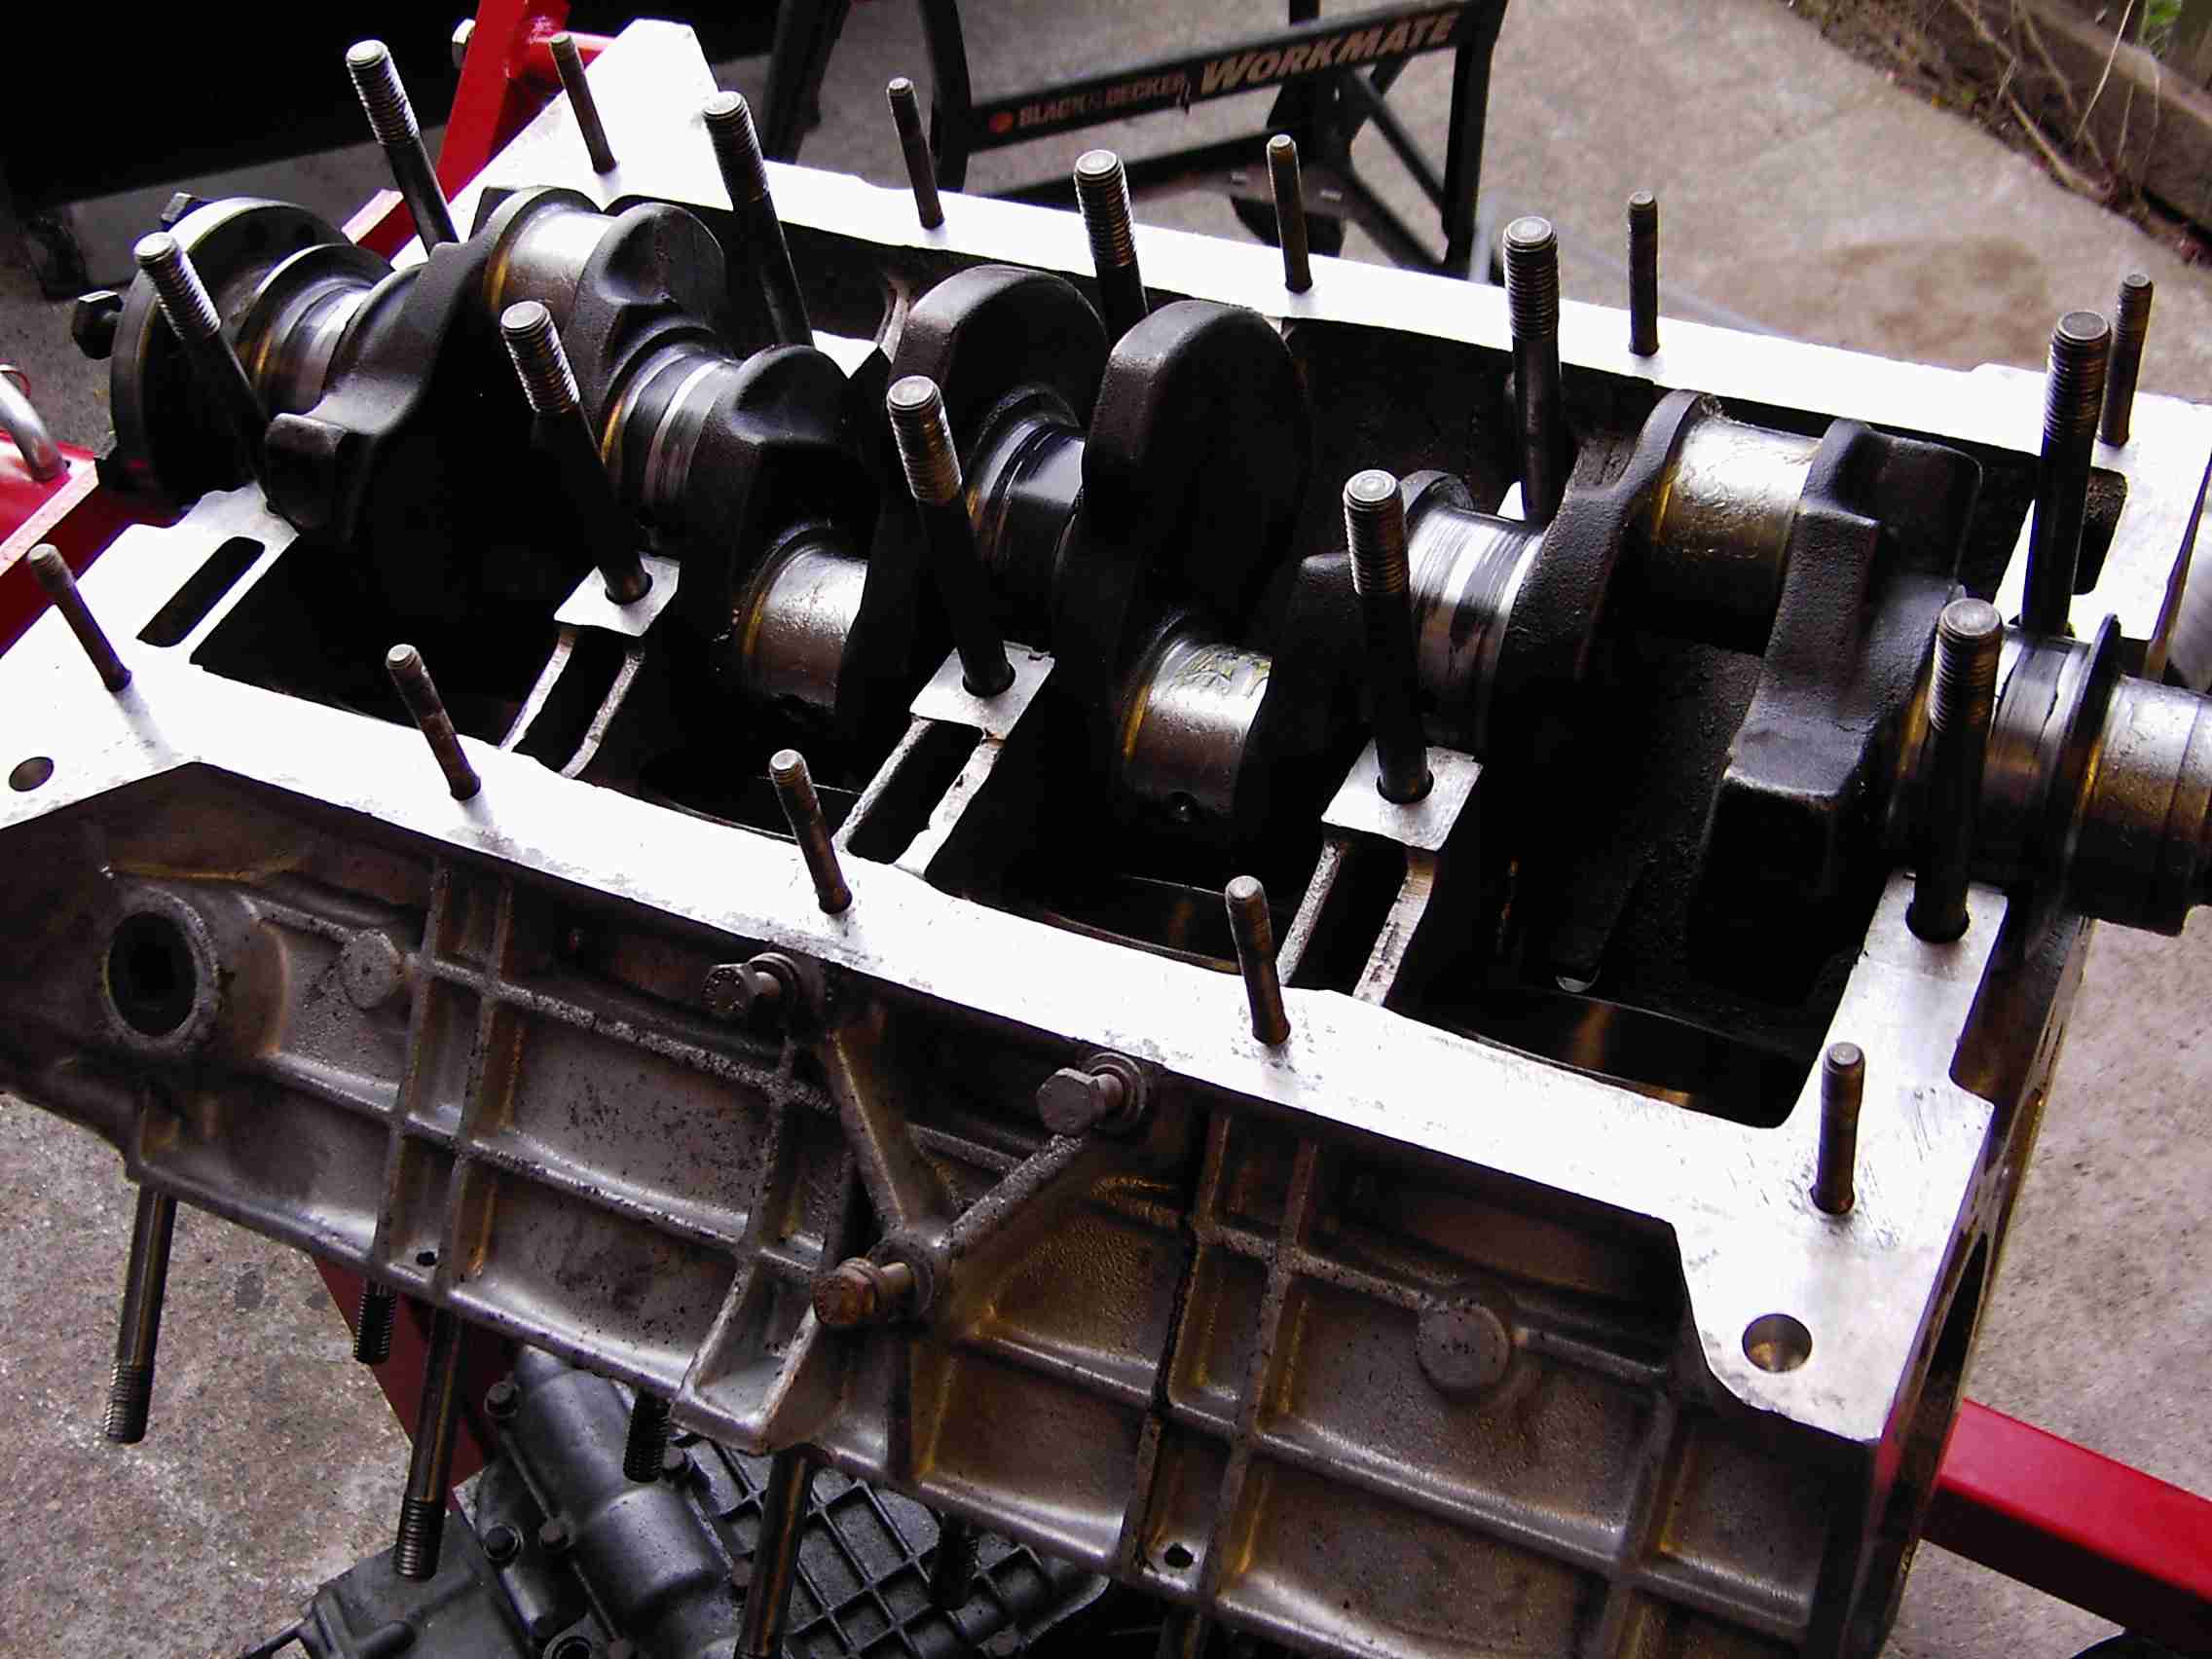
Once separated, I removed the clutch and flywheel, then hoisted the engine up and bolted it to the engine stand, so I could remove the main bearing ladder and crankshaft...
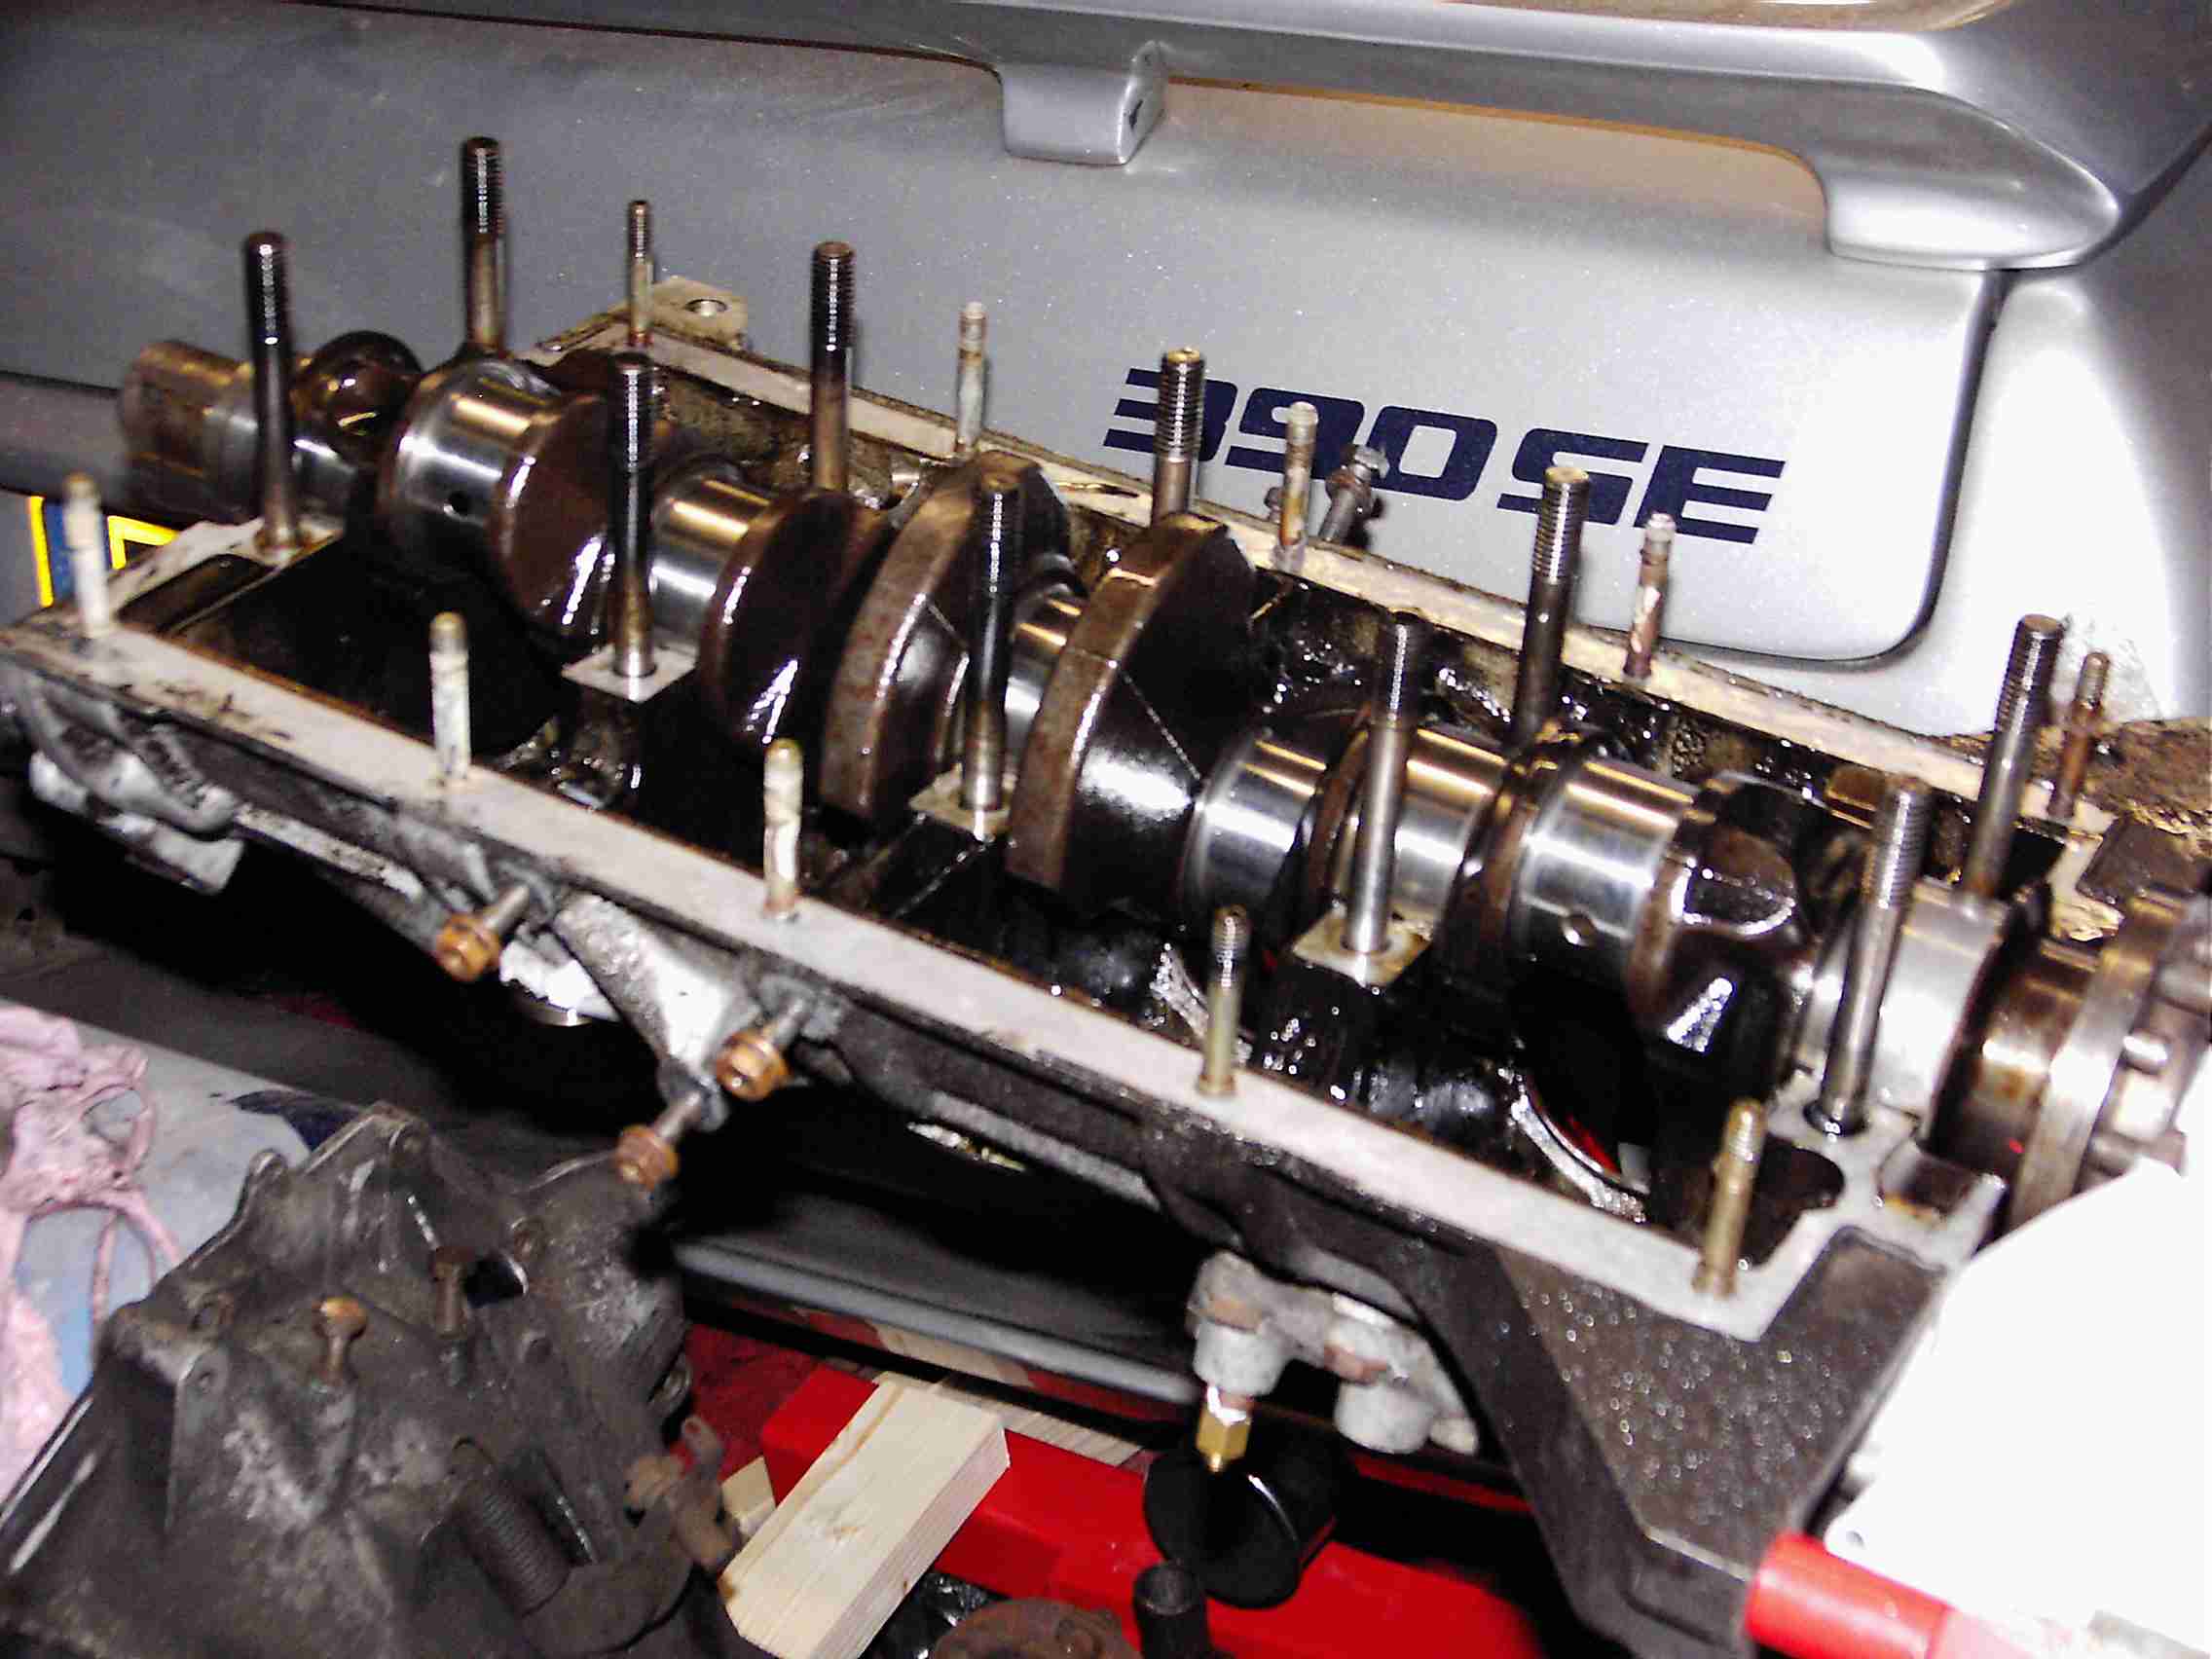
Needless to say, some bits then found their way into the degreaser and came out a little cleaner:
Incidentally, on the subject of sumps, the sump drain plug is a bog-standard plumbing fitment! Something like a 1/2" bsp blanking plug, costs a quid or so from B&Q, about a tenner from Lotus...
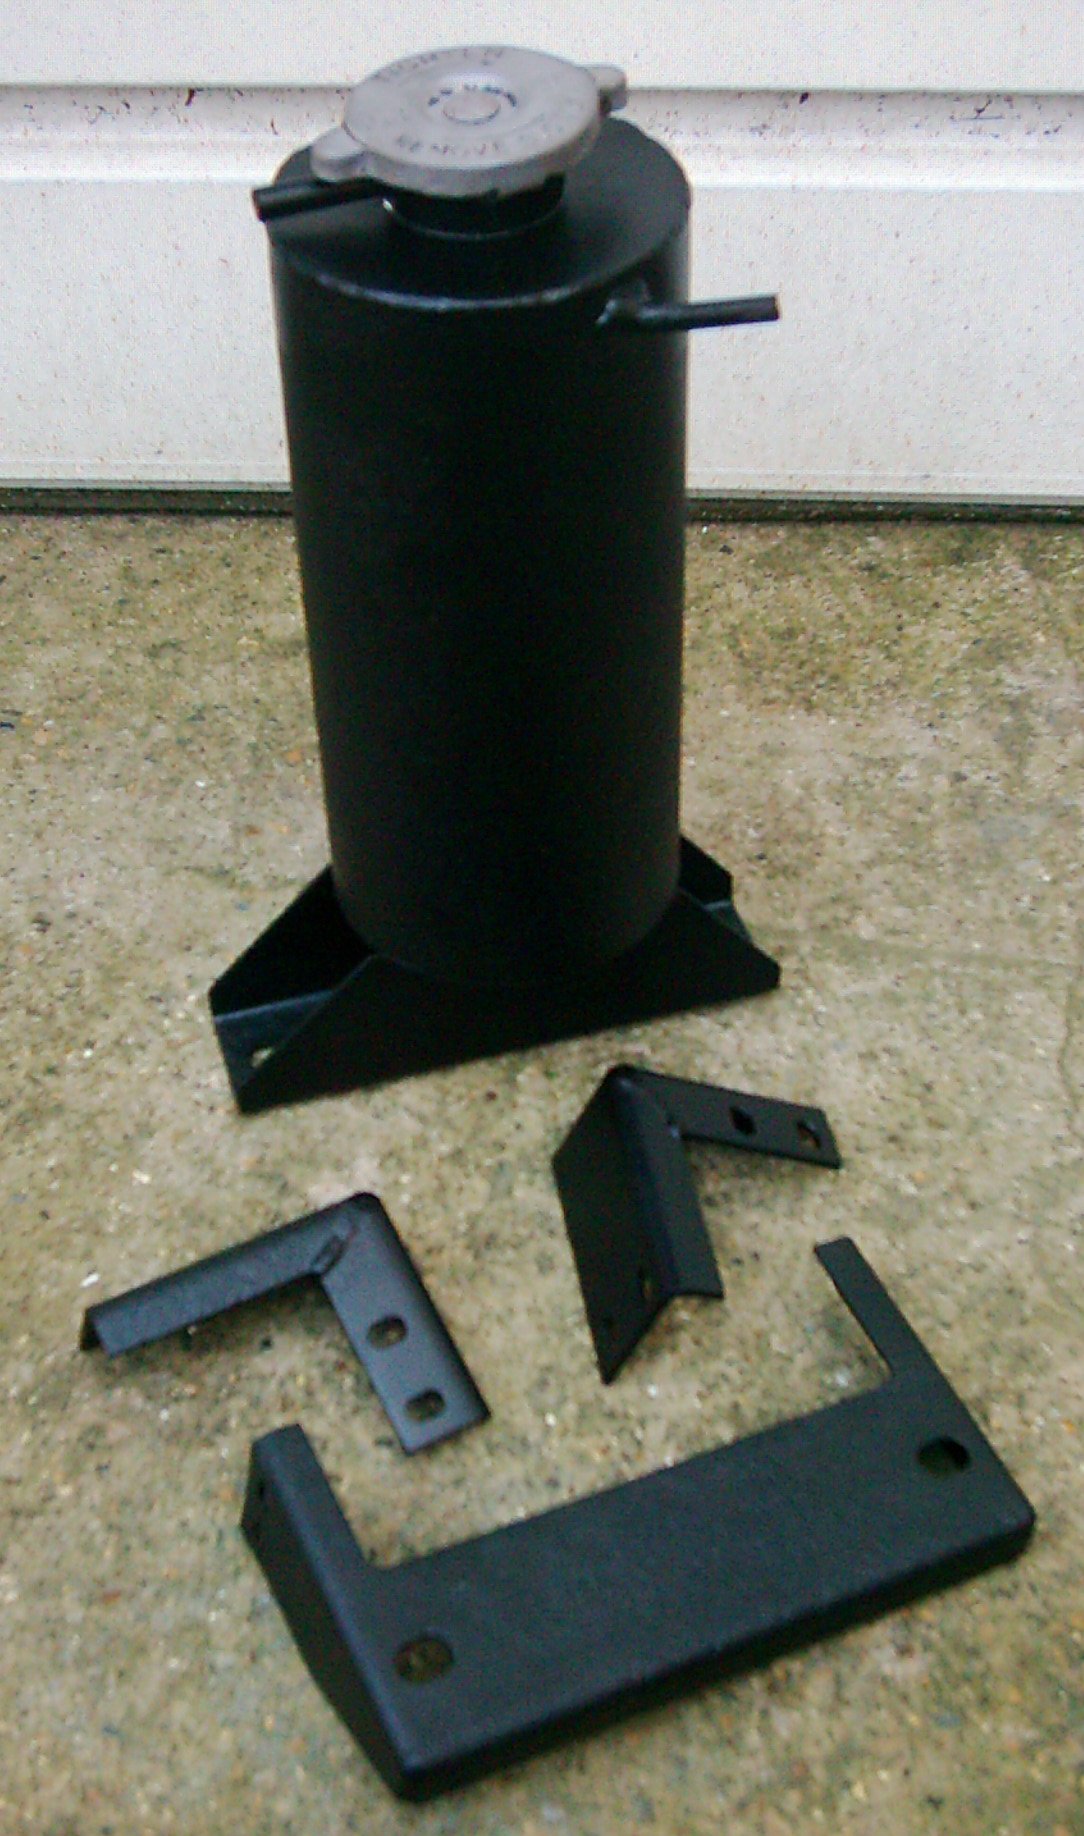
Once I'd got the engine out of the way, I turned my attention to the transmission. You may recall that I'd had to leave the brake discs on as I couldn't undo the caliper bracket bolts. With the gearbox on the floor I had to use a 30" cracking bar to loosen them off due to them being corroded into the alloy brackets that also mount the transmission to the car. These mountings and the caliper carriers were duly blasted and the carriers powder-coated:
![]()
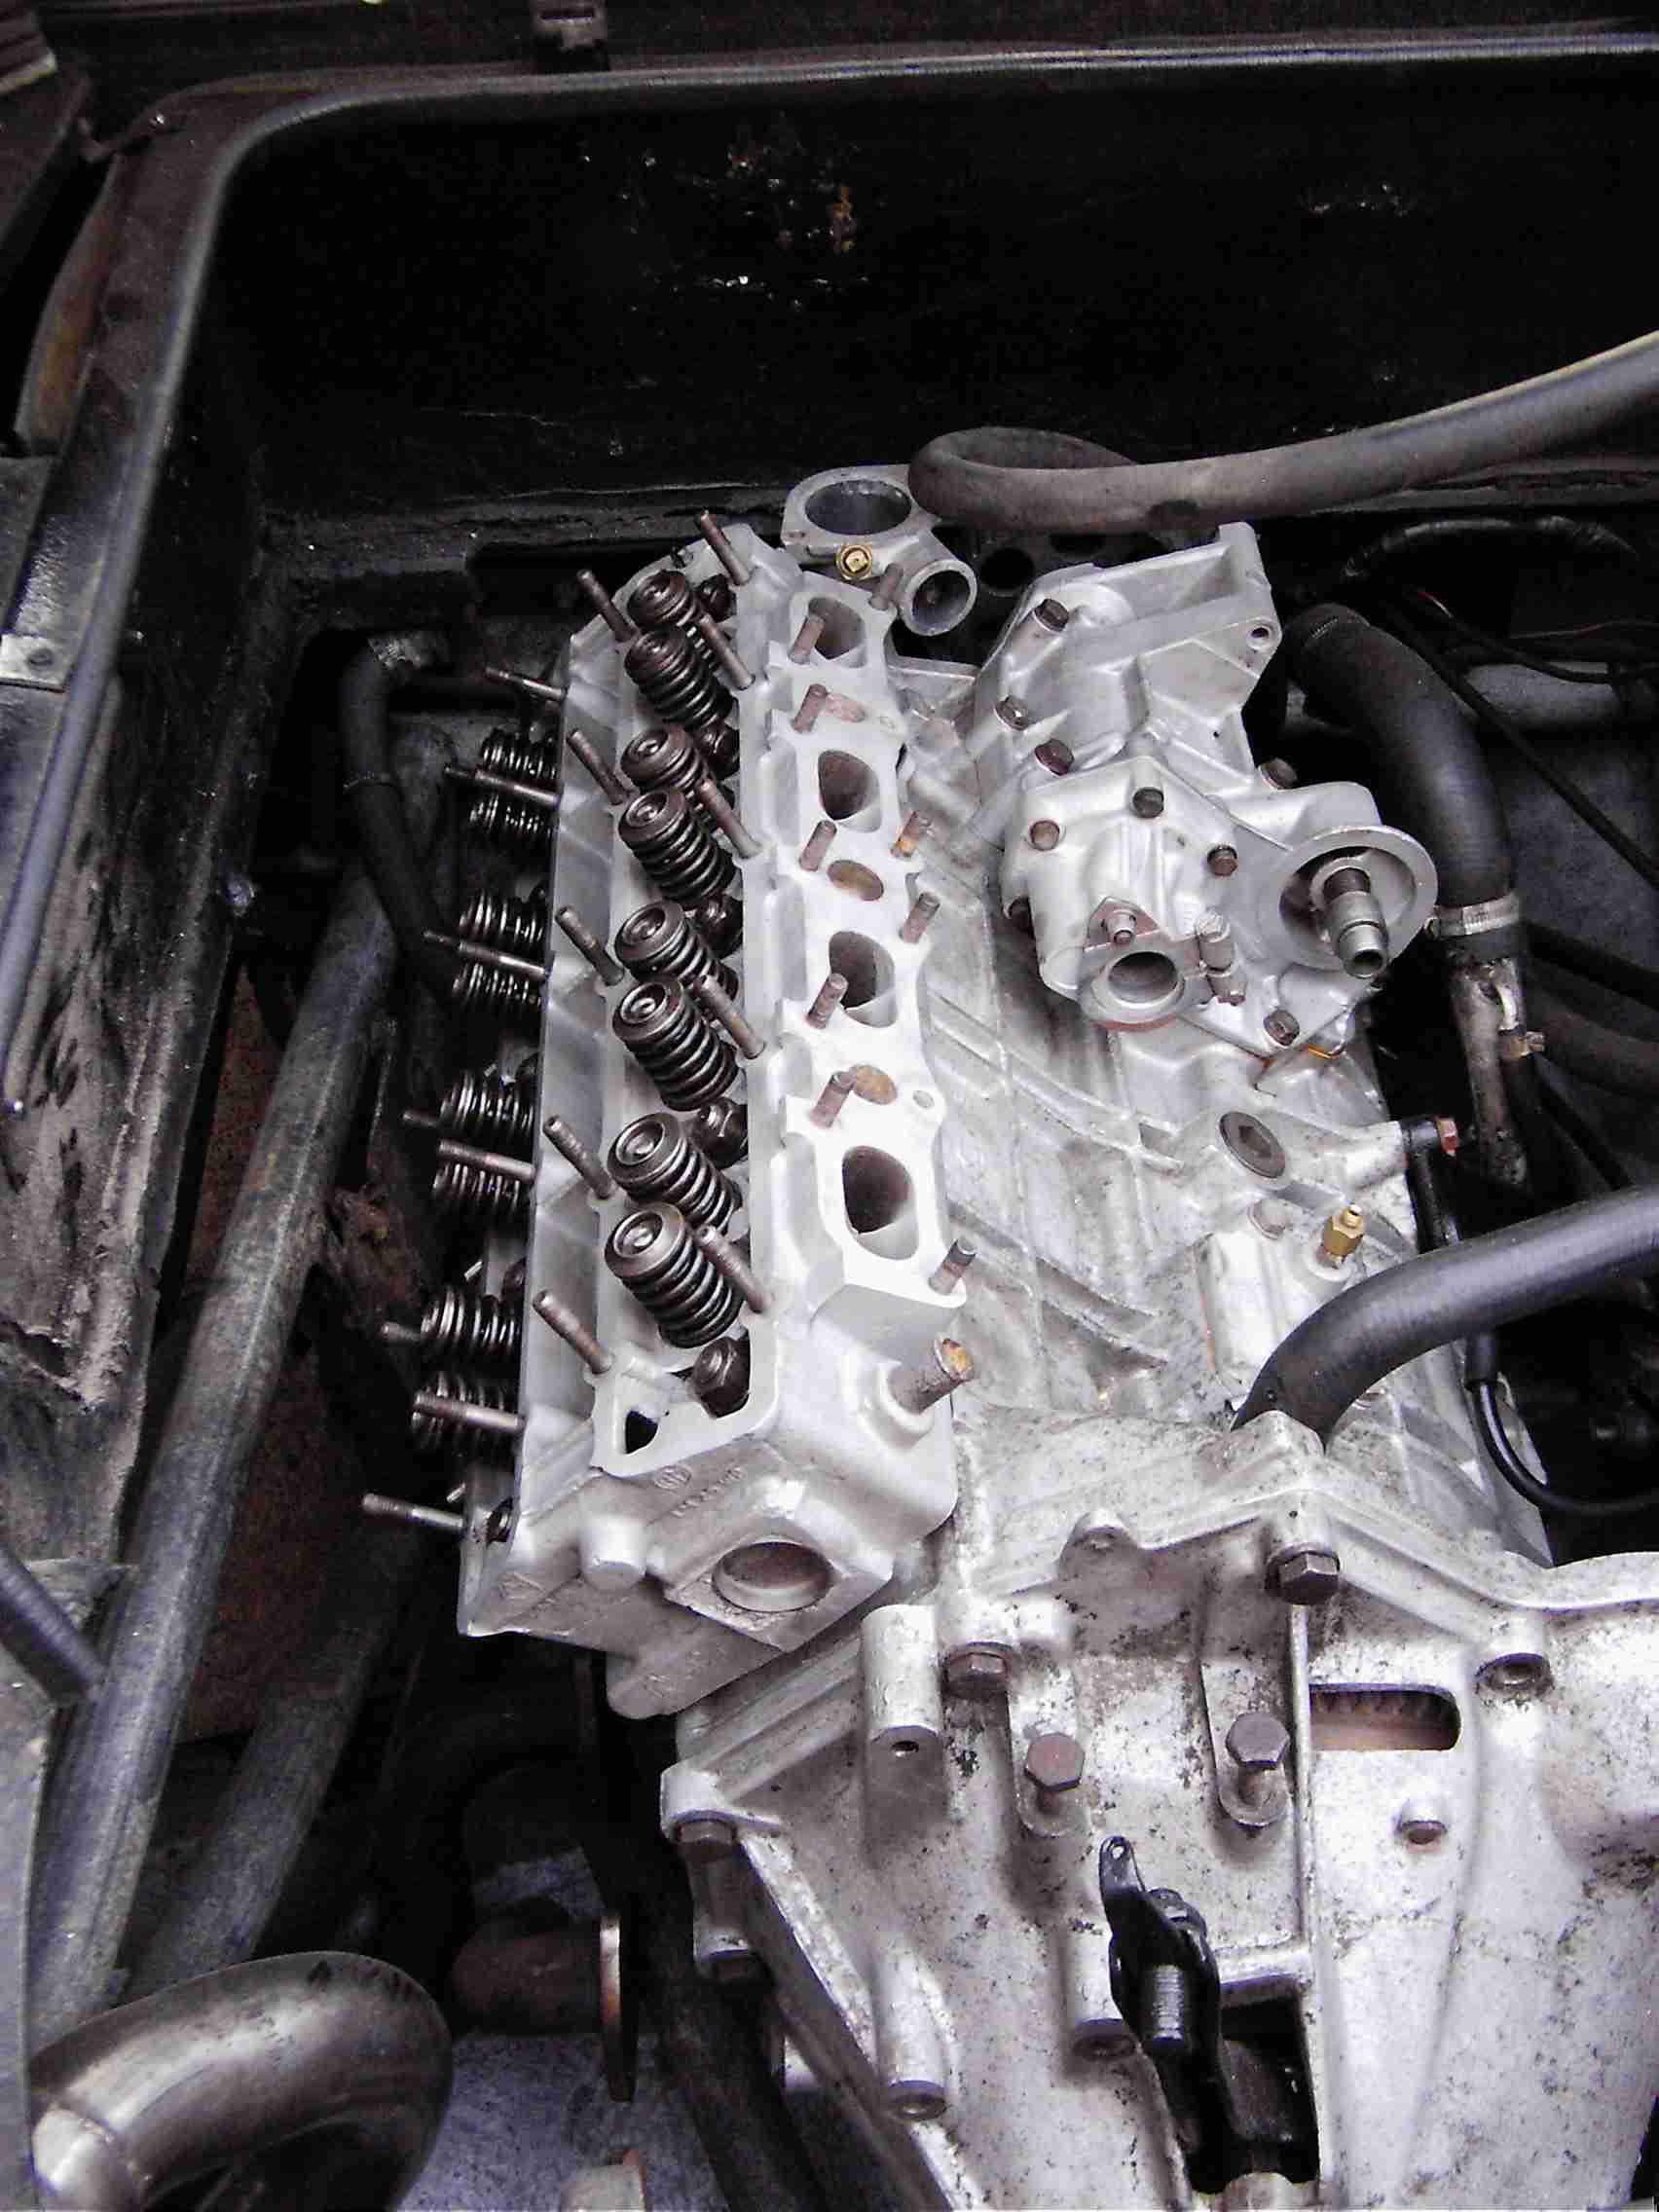
Meanwhile, the cylinder head was also in need of an overhaul:
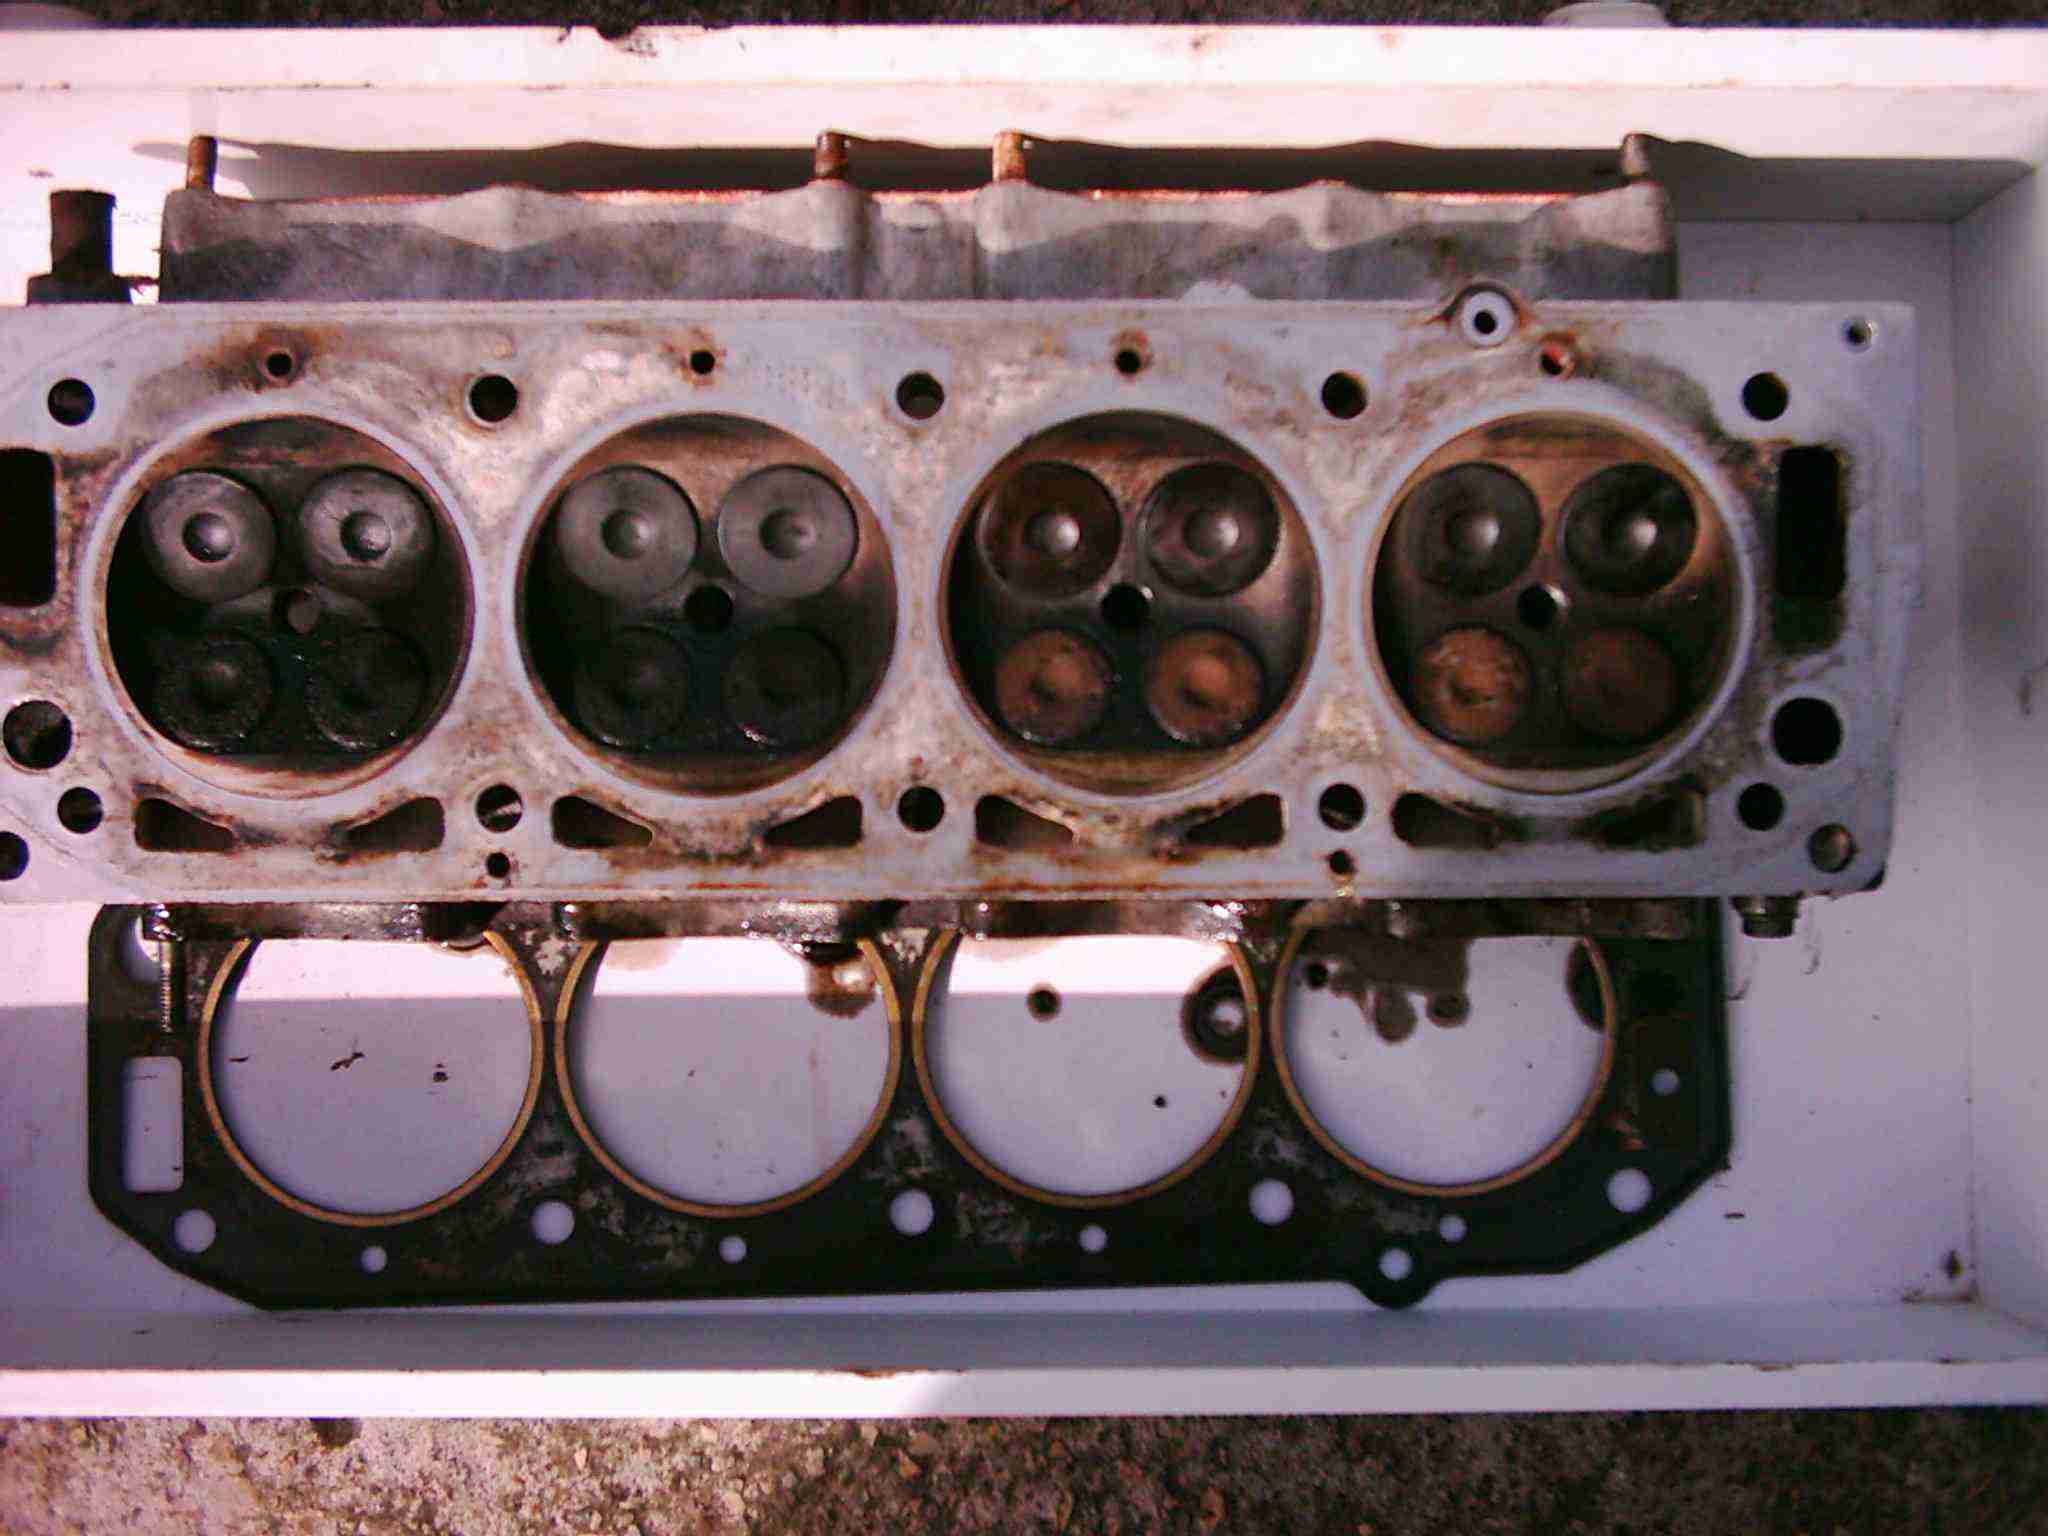
You can see that the two left-most cylinders were oiled-up because of the broken pistons in the other two bores. Needless to say, all the valves were taken out, the whole thing cleaned up and blasted and reassembled, checking the valve train components for wear and grinding the valves in etc.
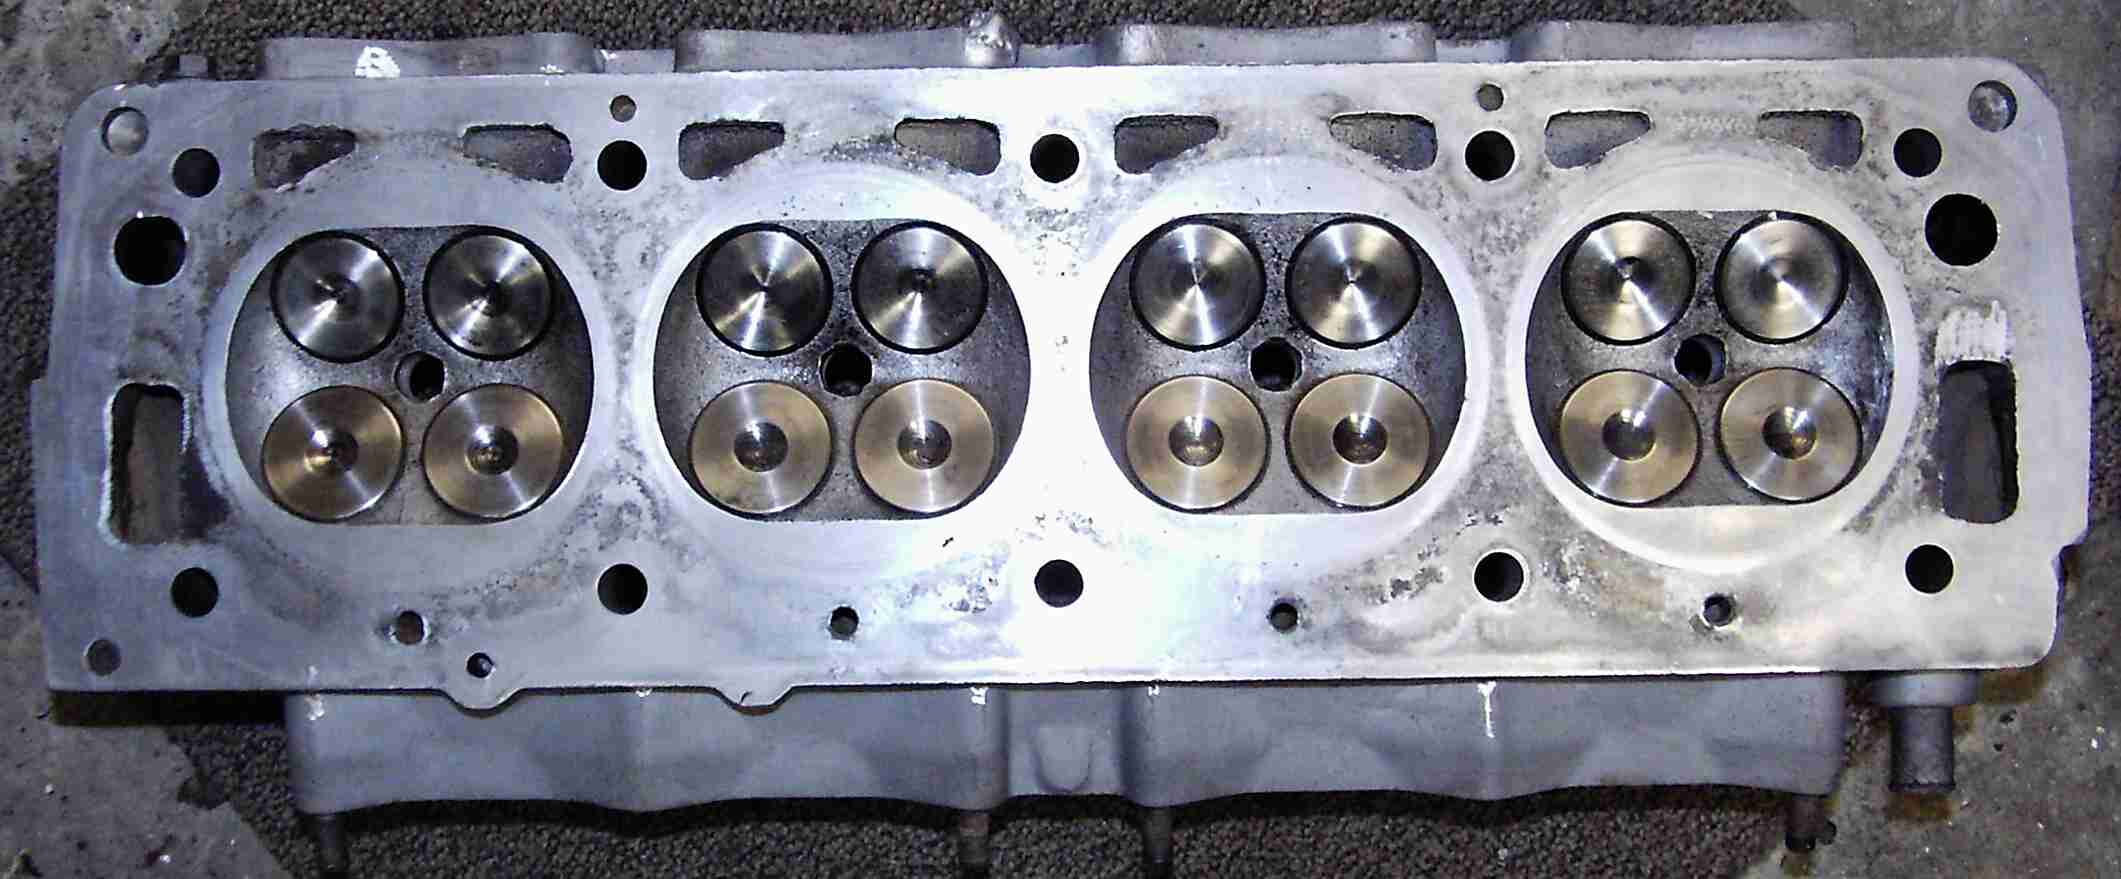
Obviously some wear was detected in the form of valve guide play (not excessive, I hasten to add), compressed valve springs, stripped threads etc. One snapped stud was ground and drilled out. At this time I happened across a spare cylinder head from a 2L car (on Ebay!) so I bought it. One of the camshafts was in a shocking state - it had been welded back together - and evidently the engine it came from had major trauma as every single inlet valve was bent to some degree. The good news is that none of the valve guides or seats appear to be damaged, and the head has also never been skimmed (whereas my 'original' one has). This gives me a serviceable spare in case any problems surface after my rebuild. One coolant tapping will need drilling and a suitable hose connector fitting, and of course the valve train will need swapping, but other than that it's well worth the £30 I paid! Meanwhile, the rebuilt original head looks like this:

The transmission was grubbier than a grubby thing. However the output shaft bearings seemed fine and the selector mechanism was nice and crisp. The scary thing is the input shaft. On most gearboxes the input shaft travels right through the gearbox and is supported by some fairly huge bearings. On the Citroen C35, the input shaft is a short component that is splined into the 'real' input shaft, spring-loaded toward the flywheel and held in place by a circlip. This arrangement means it can move around, giving the impression it's snapped! Apart from this movement, the fit in the splines is good and the machined end to the shaft, where it locates into the crankshaft spigot bearing, is also unworn. Even the Nylatron washer that prevents the splines from working their way into the crank, is present and correct. I'll change it anyway, as it'd be foolish not to. I also noticed that the spigot bearing was missing a needle roller and some of the others seem loose, so I've obtained a new one of those too. If you fancy doing a full strip and rebuild, by the way, all the gaskets and oil seals etc. will set you back £240 or so. My bill from SJ Sportscars was a bit higher because I opted for a braided stainless clutch hose and some other odds and ends. So, back to the transmission:
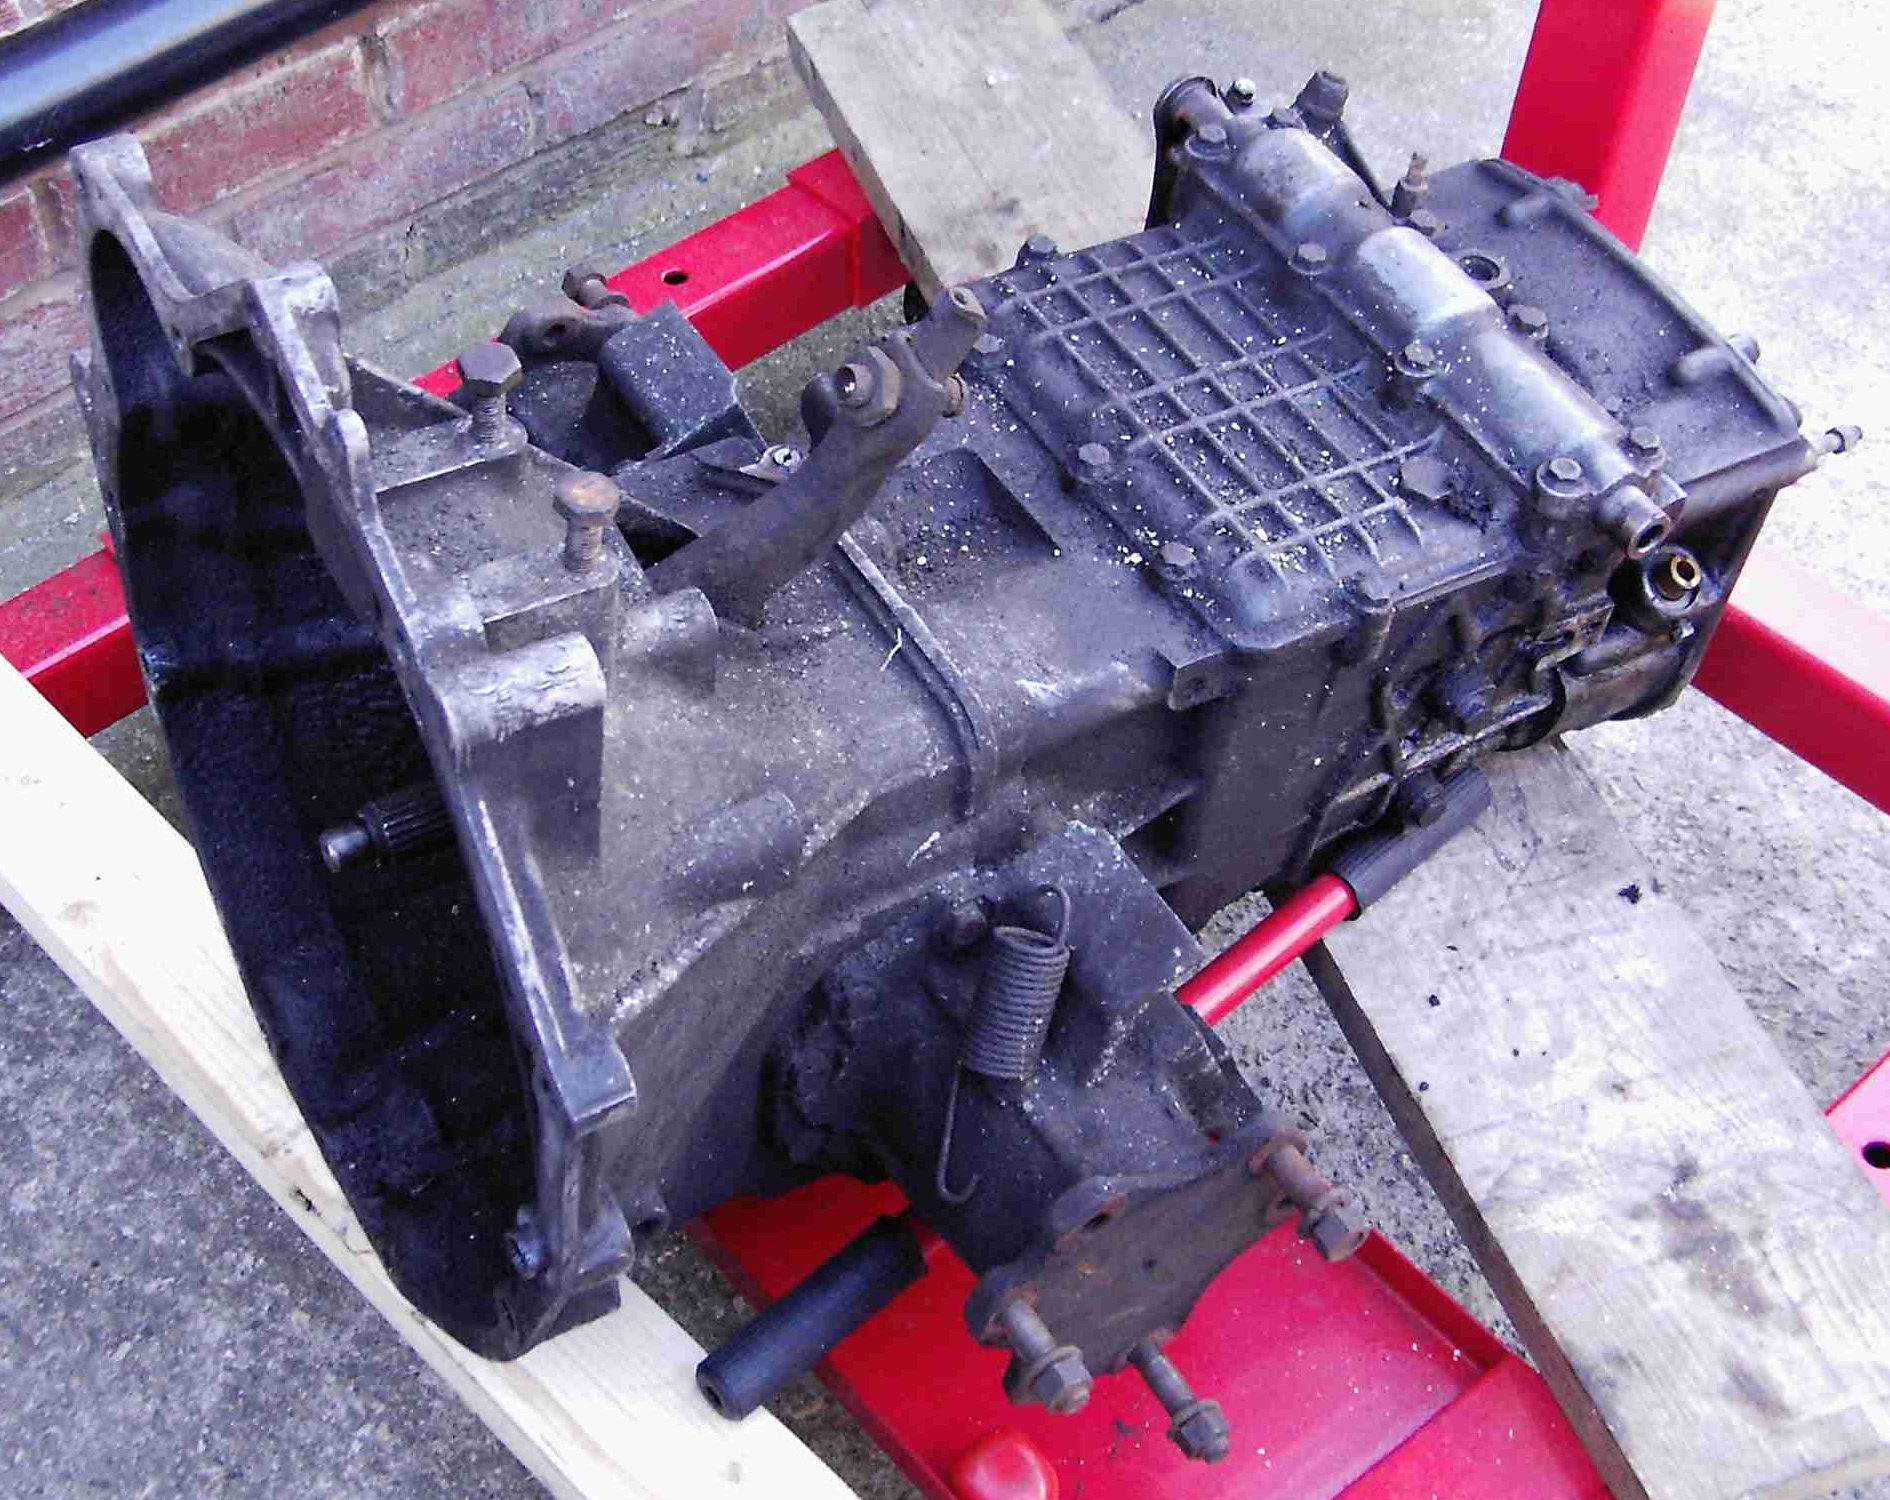
Contrast the pic above with the one below, after I spent an afternoon with degreaser and a brush...
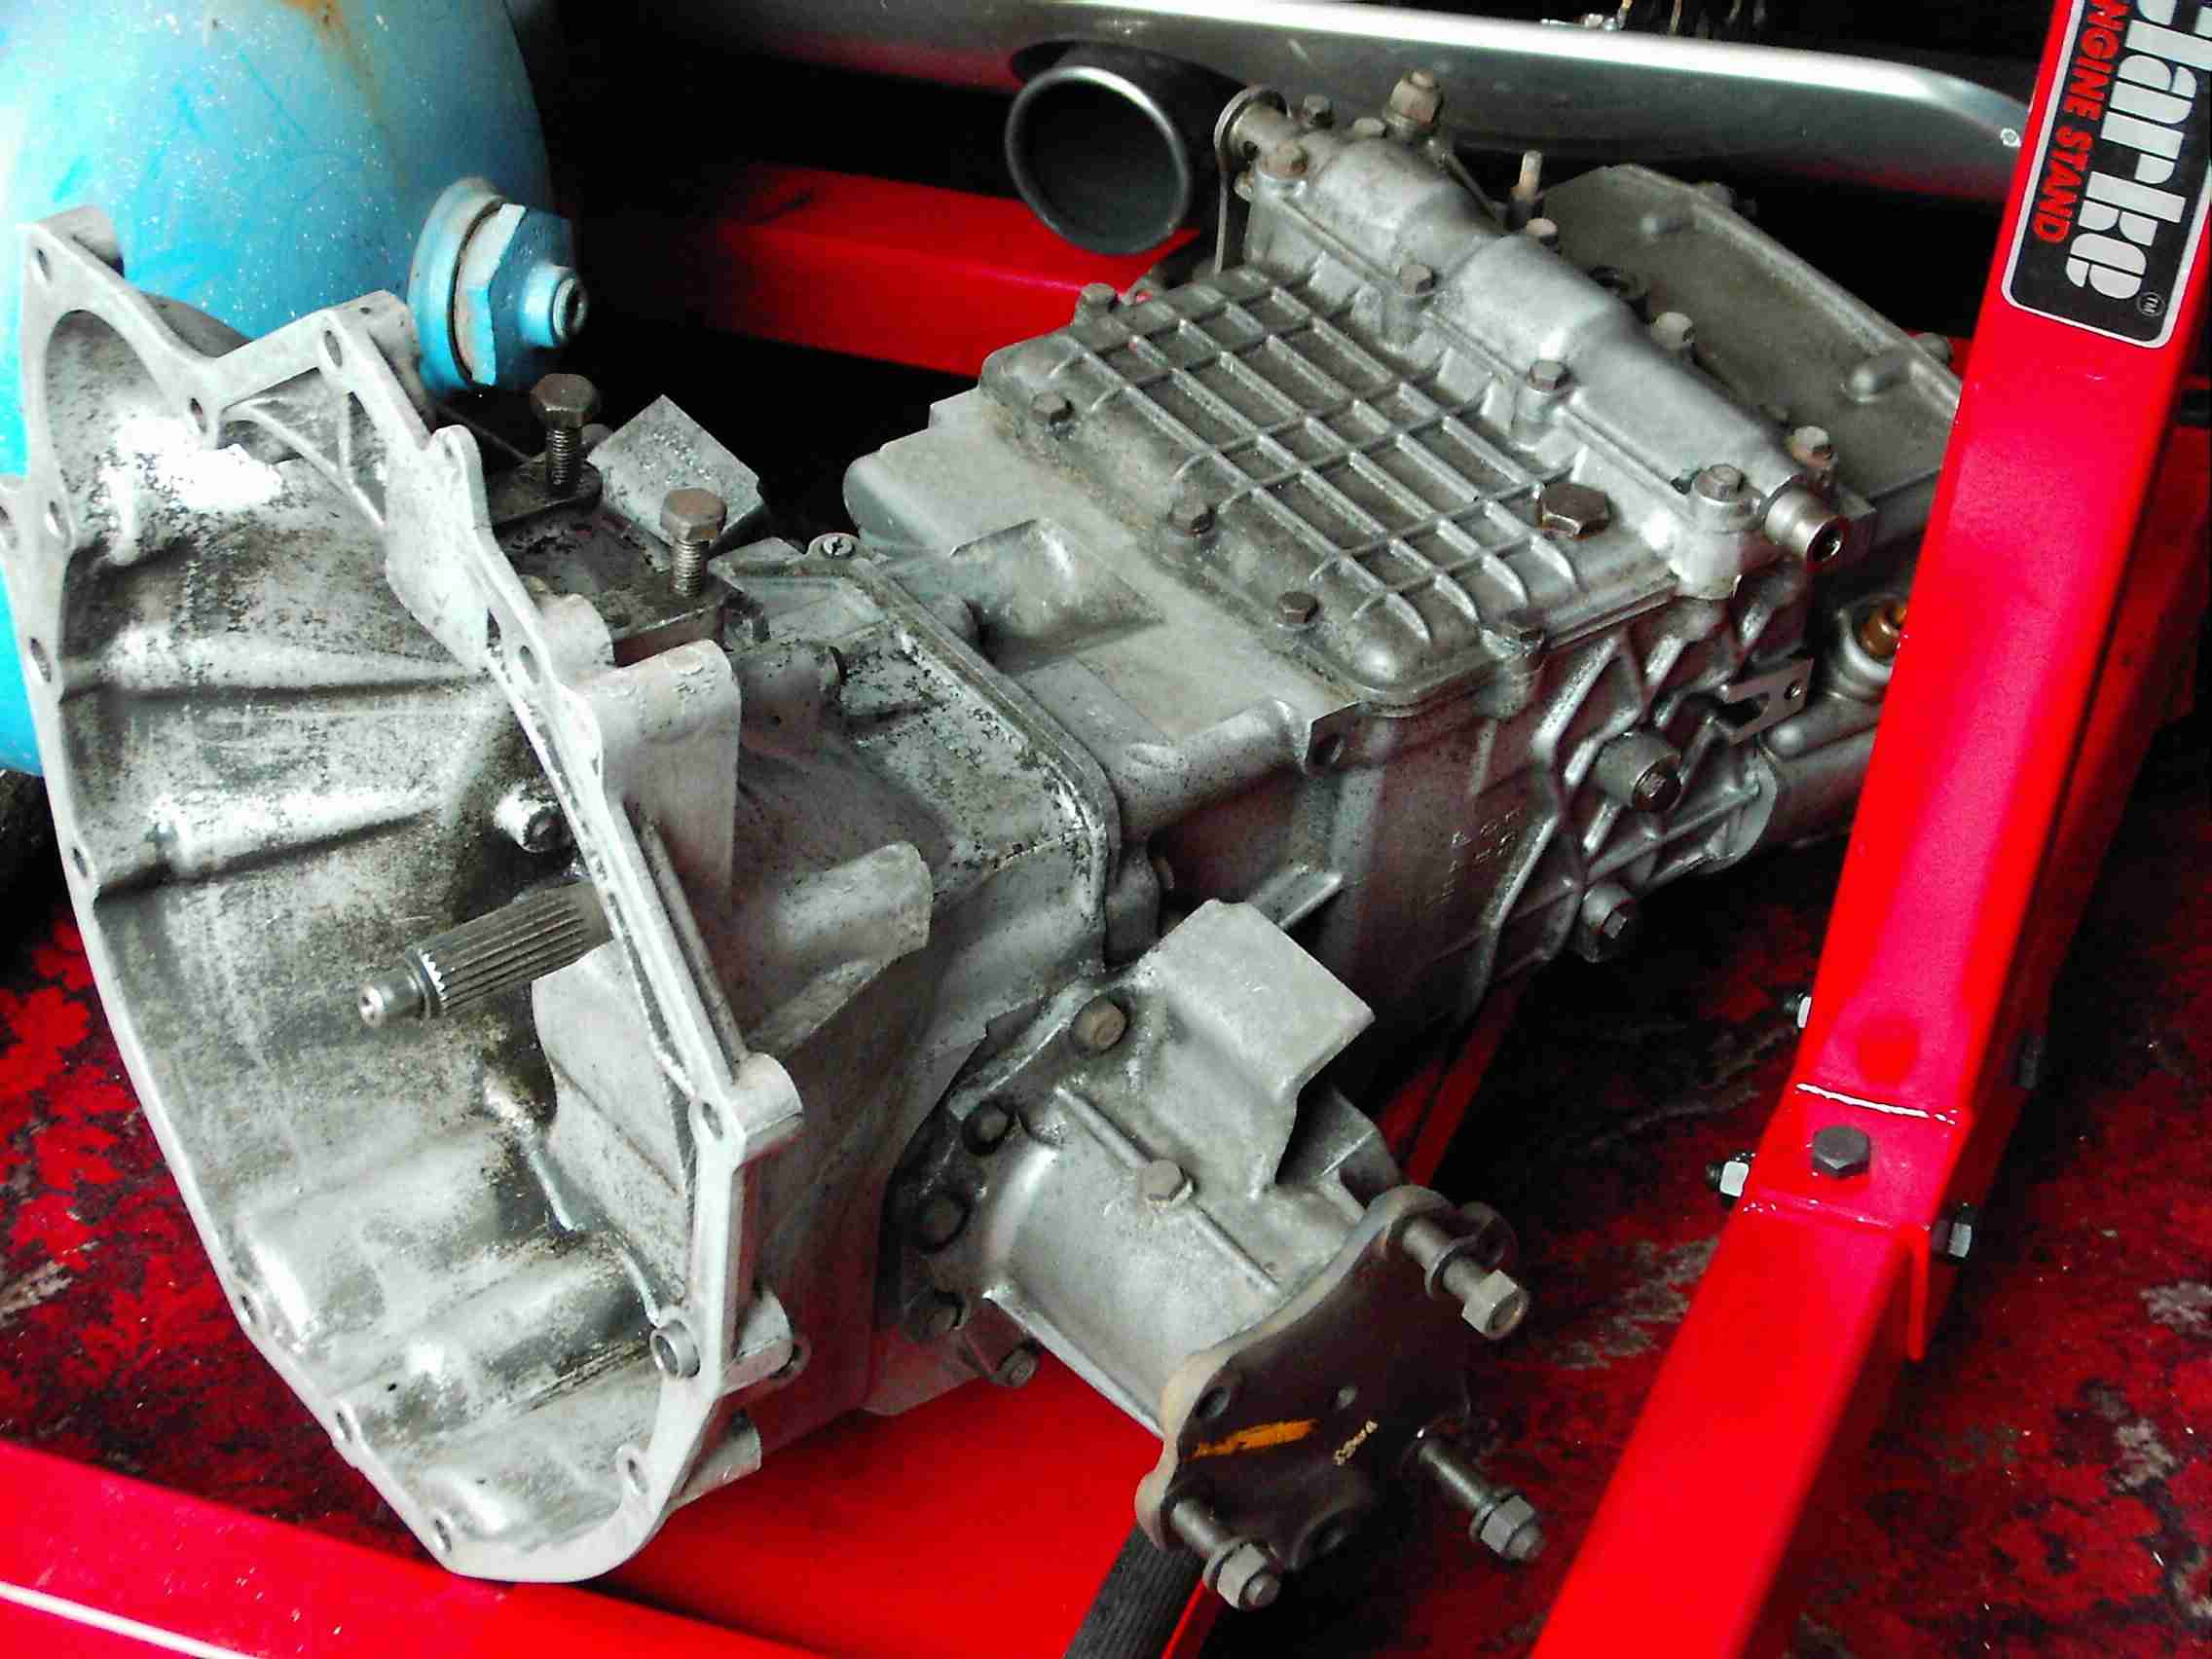
I really couldn't be bothered to get it any cleaner!
UPDATE 26/04/06:
Anyway, back to the engine. How to turn a pile of cleaned-up parts back into a Lotus twincam:-
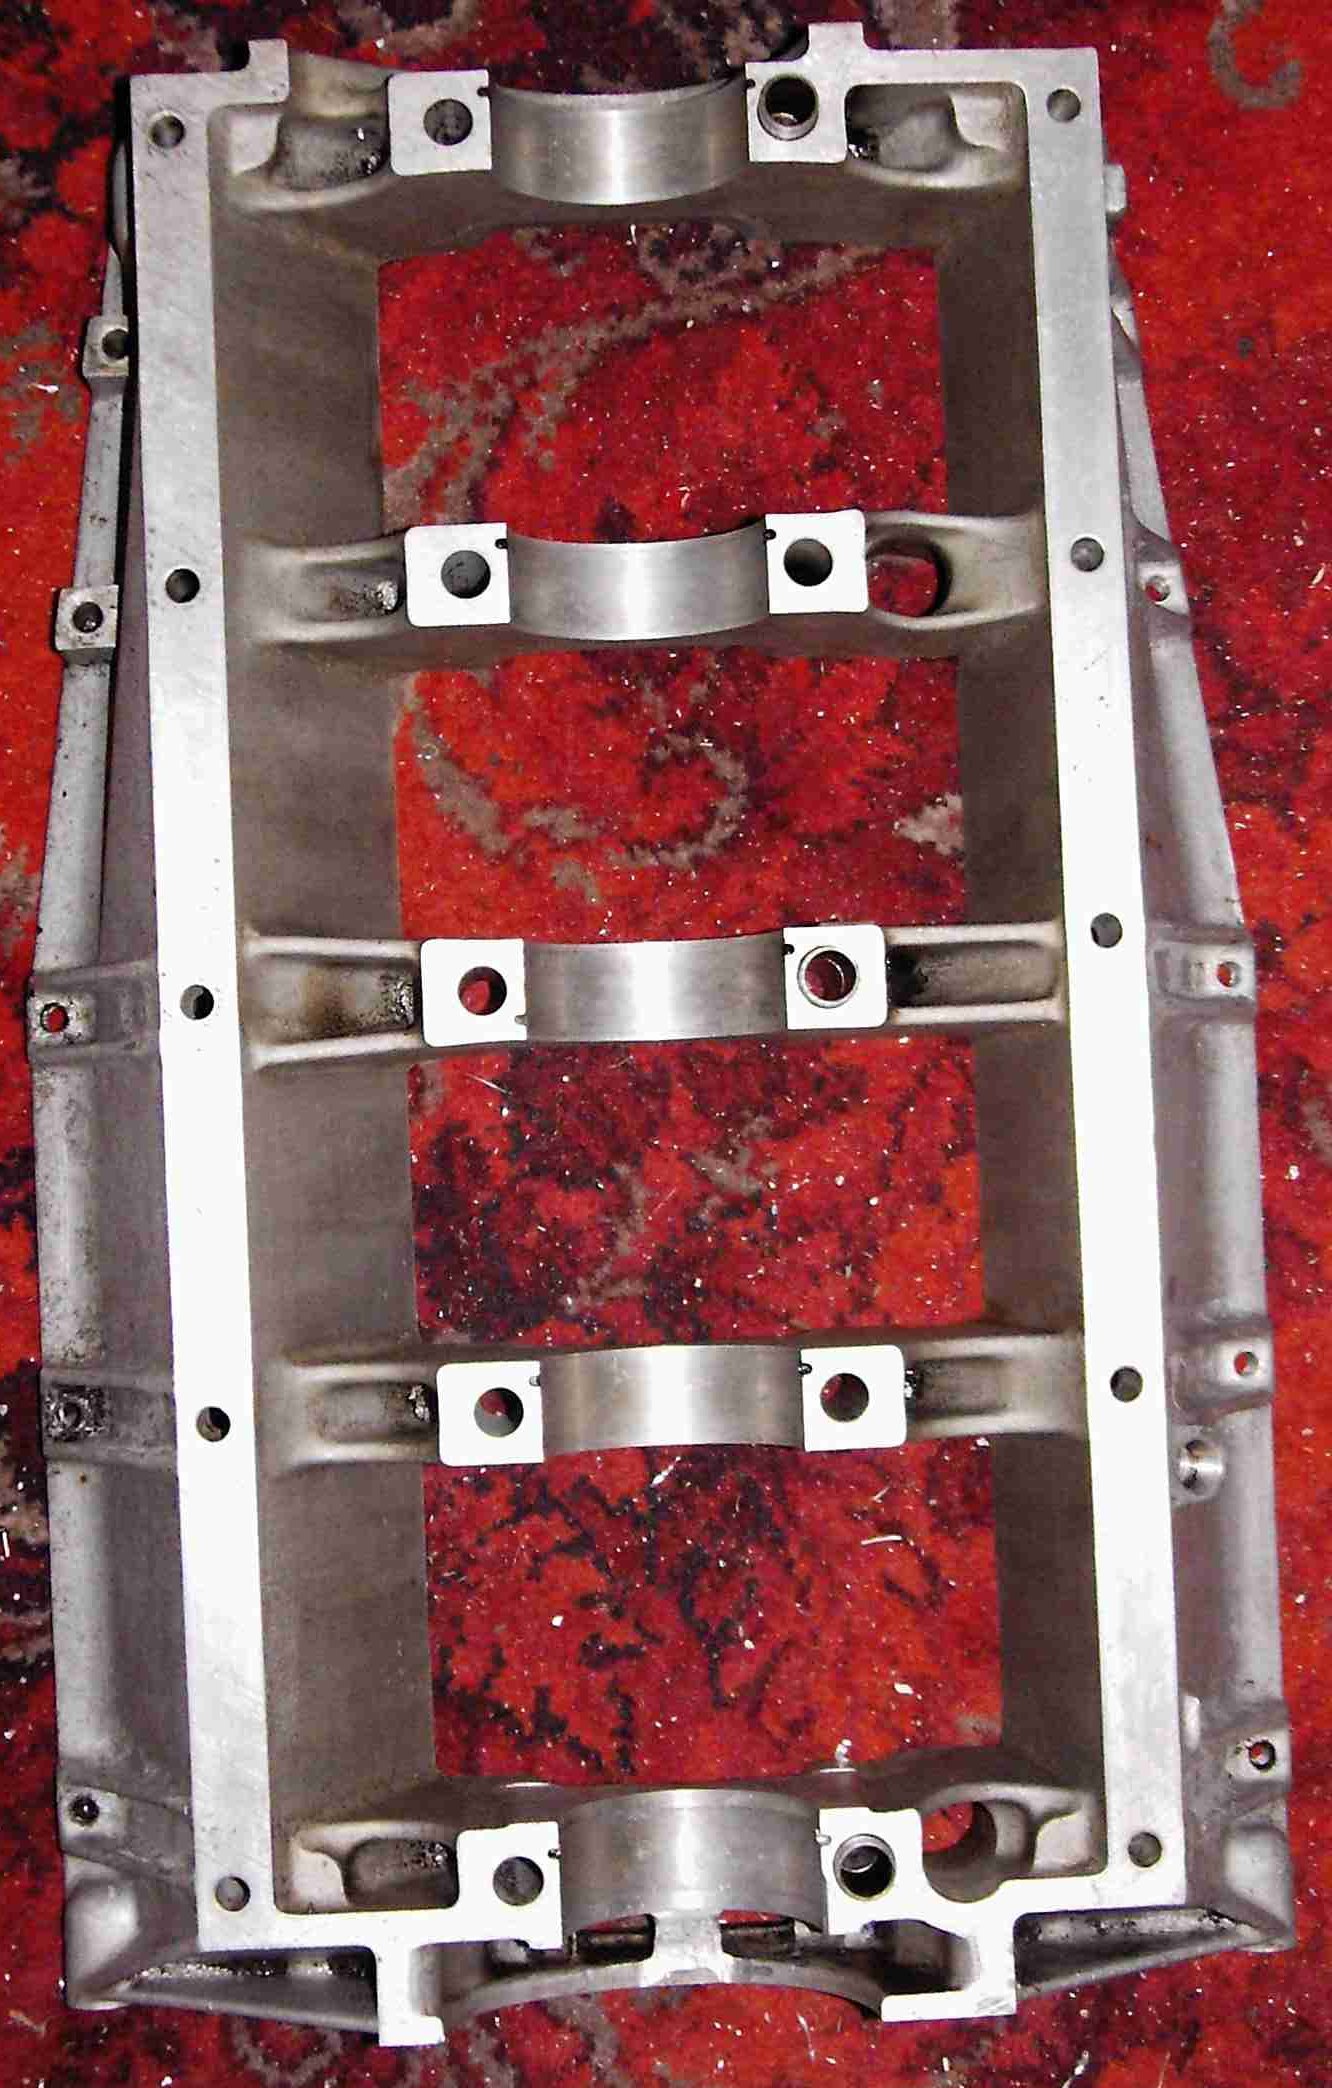
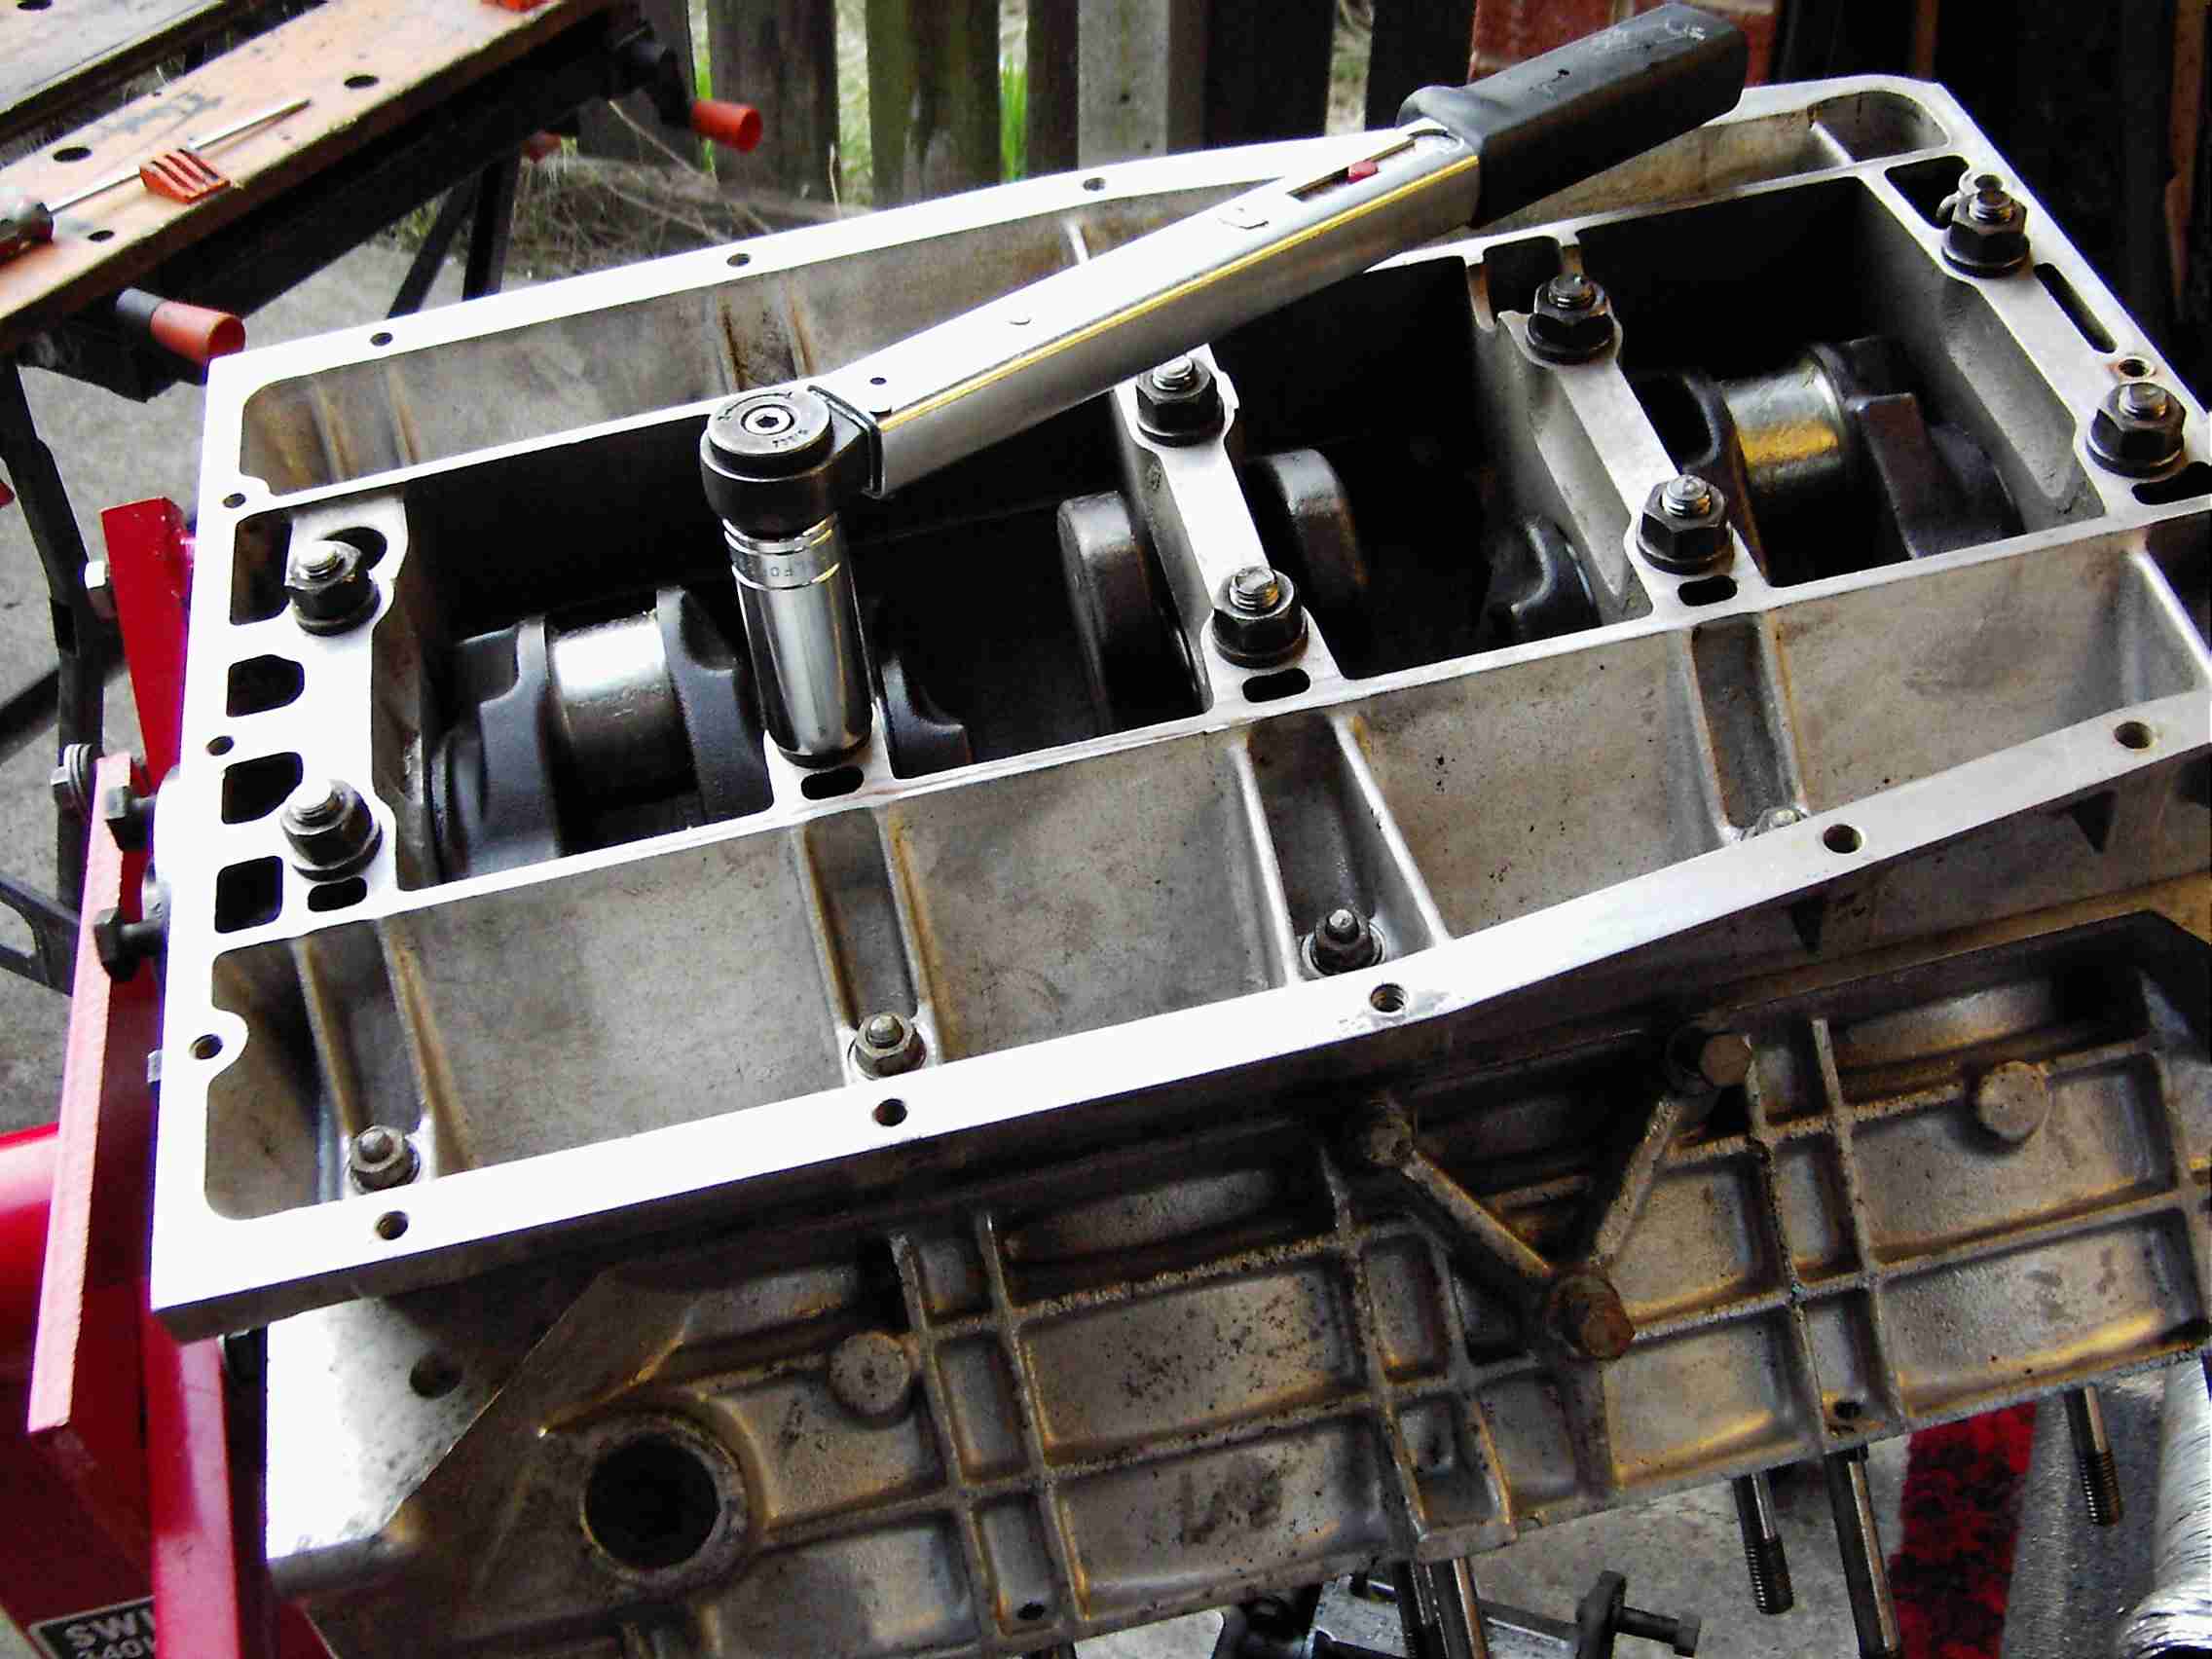
1. Install upper bearing shells and crank (note storage grease on big-ends, Graphogen on main journals)
2. Install lower bearing shells and bearing ladder; torque down
3. Install big-end shells and use ring compressor to reinstall pistons and rods (cylinder bores have been honed)
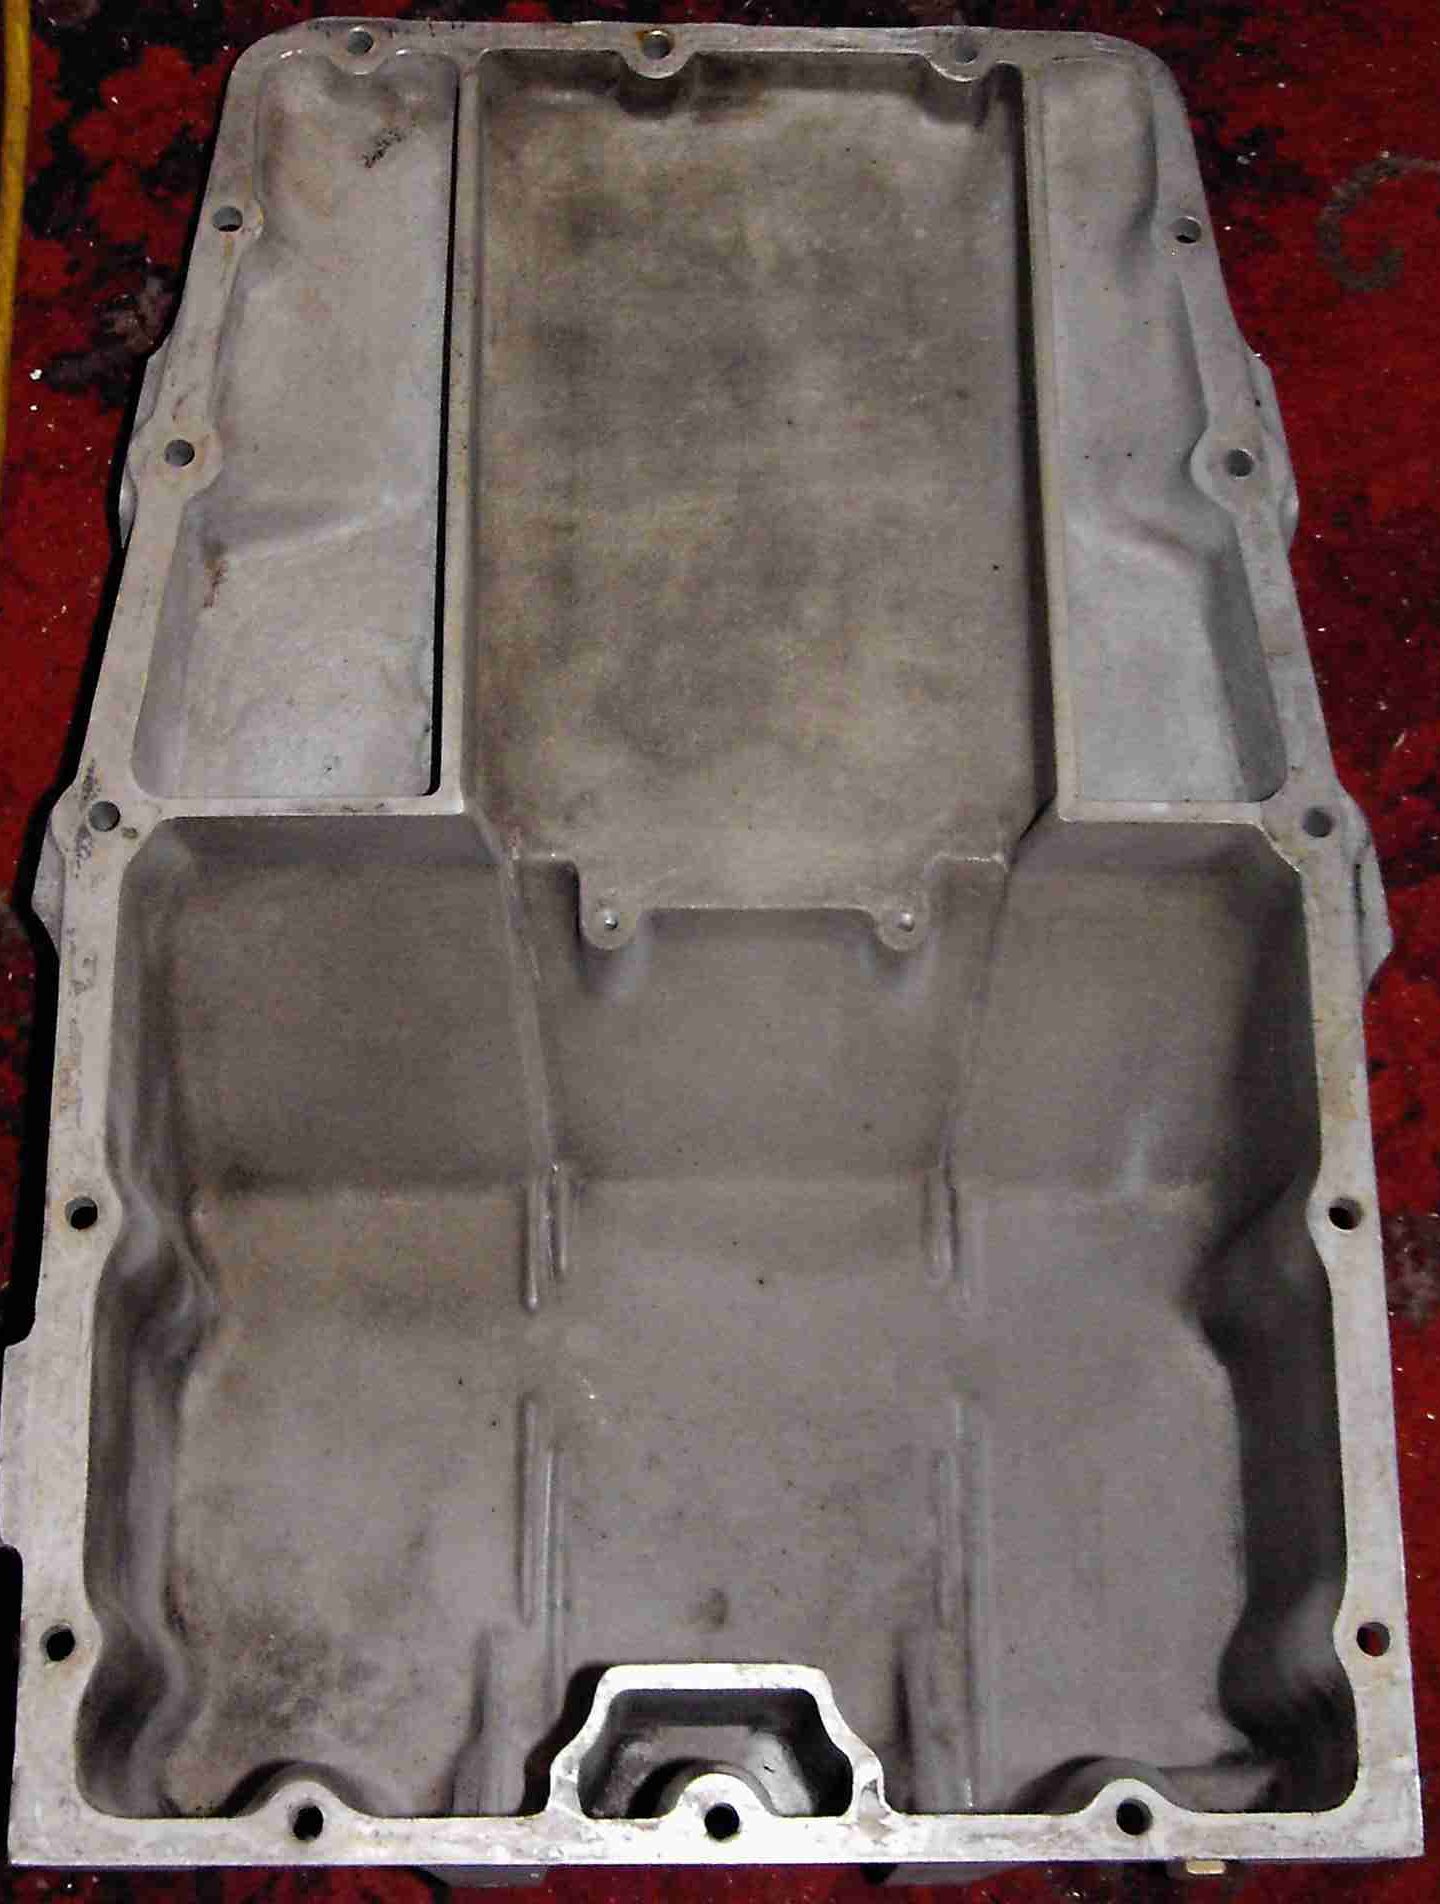
4. Refit oil pickup, sump baffle and sump. Seems I didn't take a picture! OK then: reassemble the oil pump and auxiliary housing (with new seals, obviously) and refit. The brownish stain is where I got carried away with the Wellseal...! Water pump also refitted in this shot (with the engine at an odd angle...)
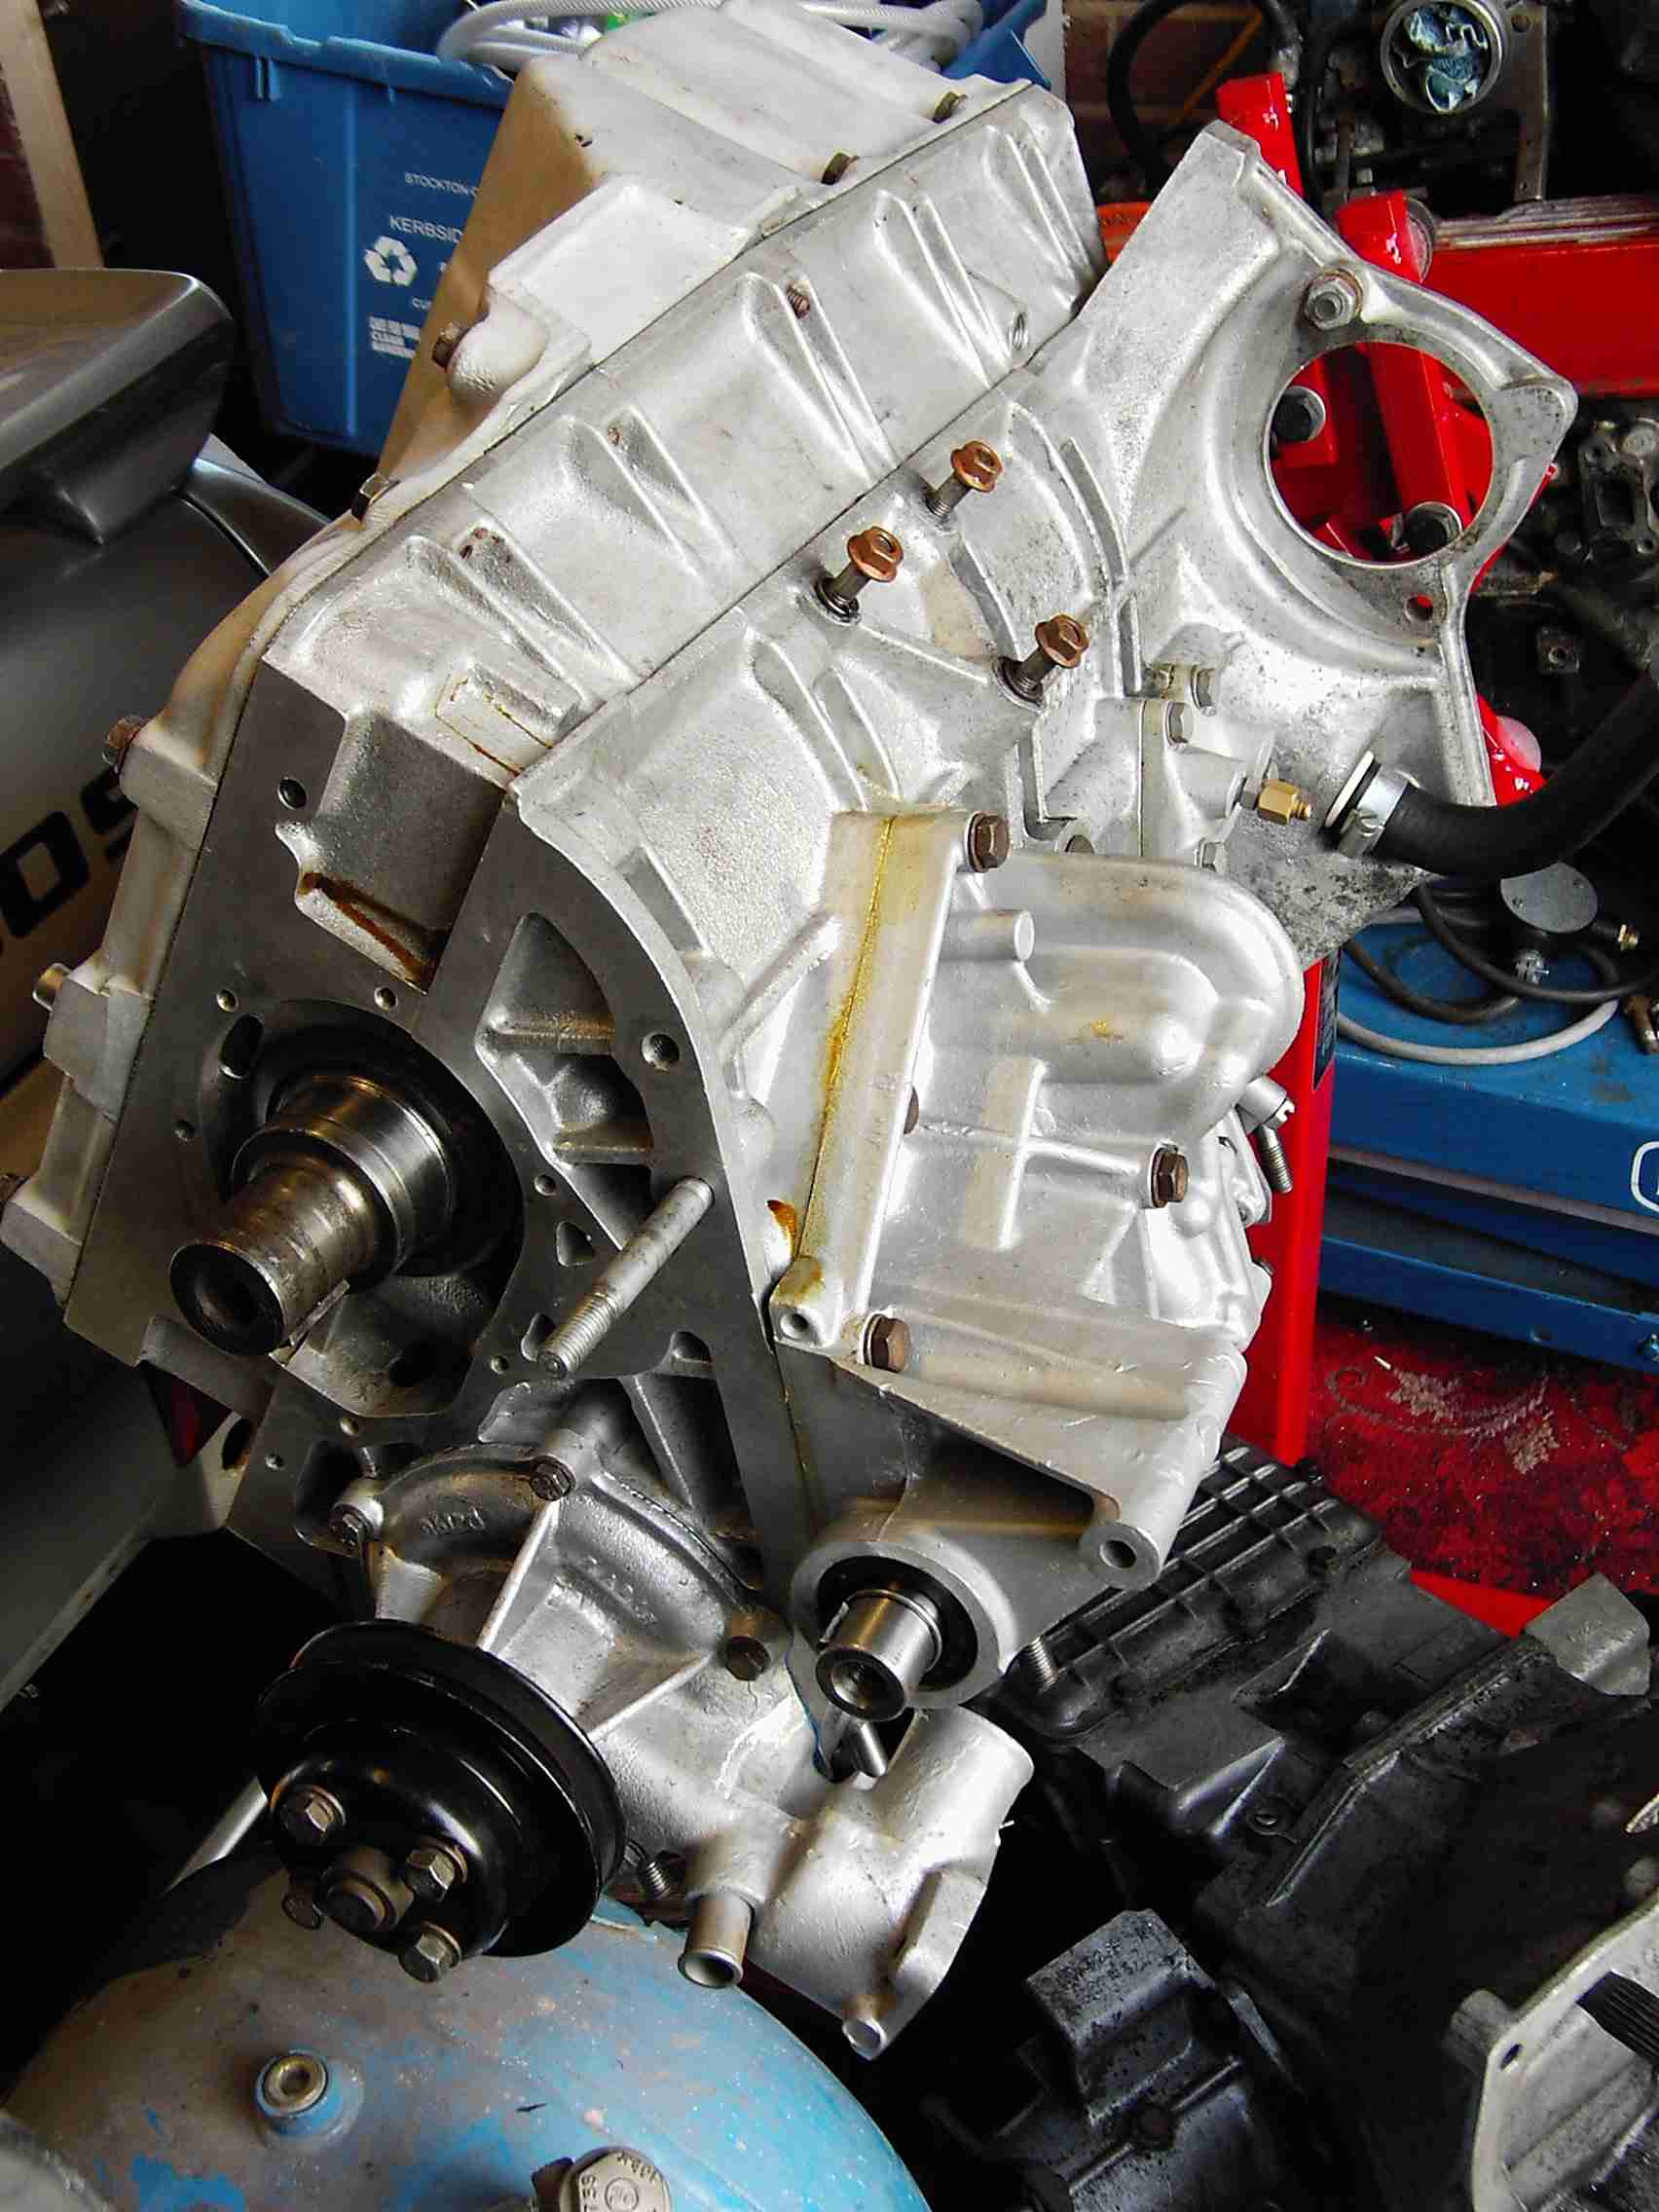
Another view of the sump and auxiliary housing:
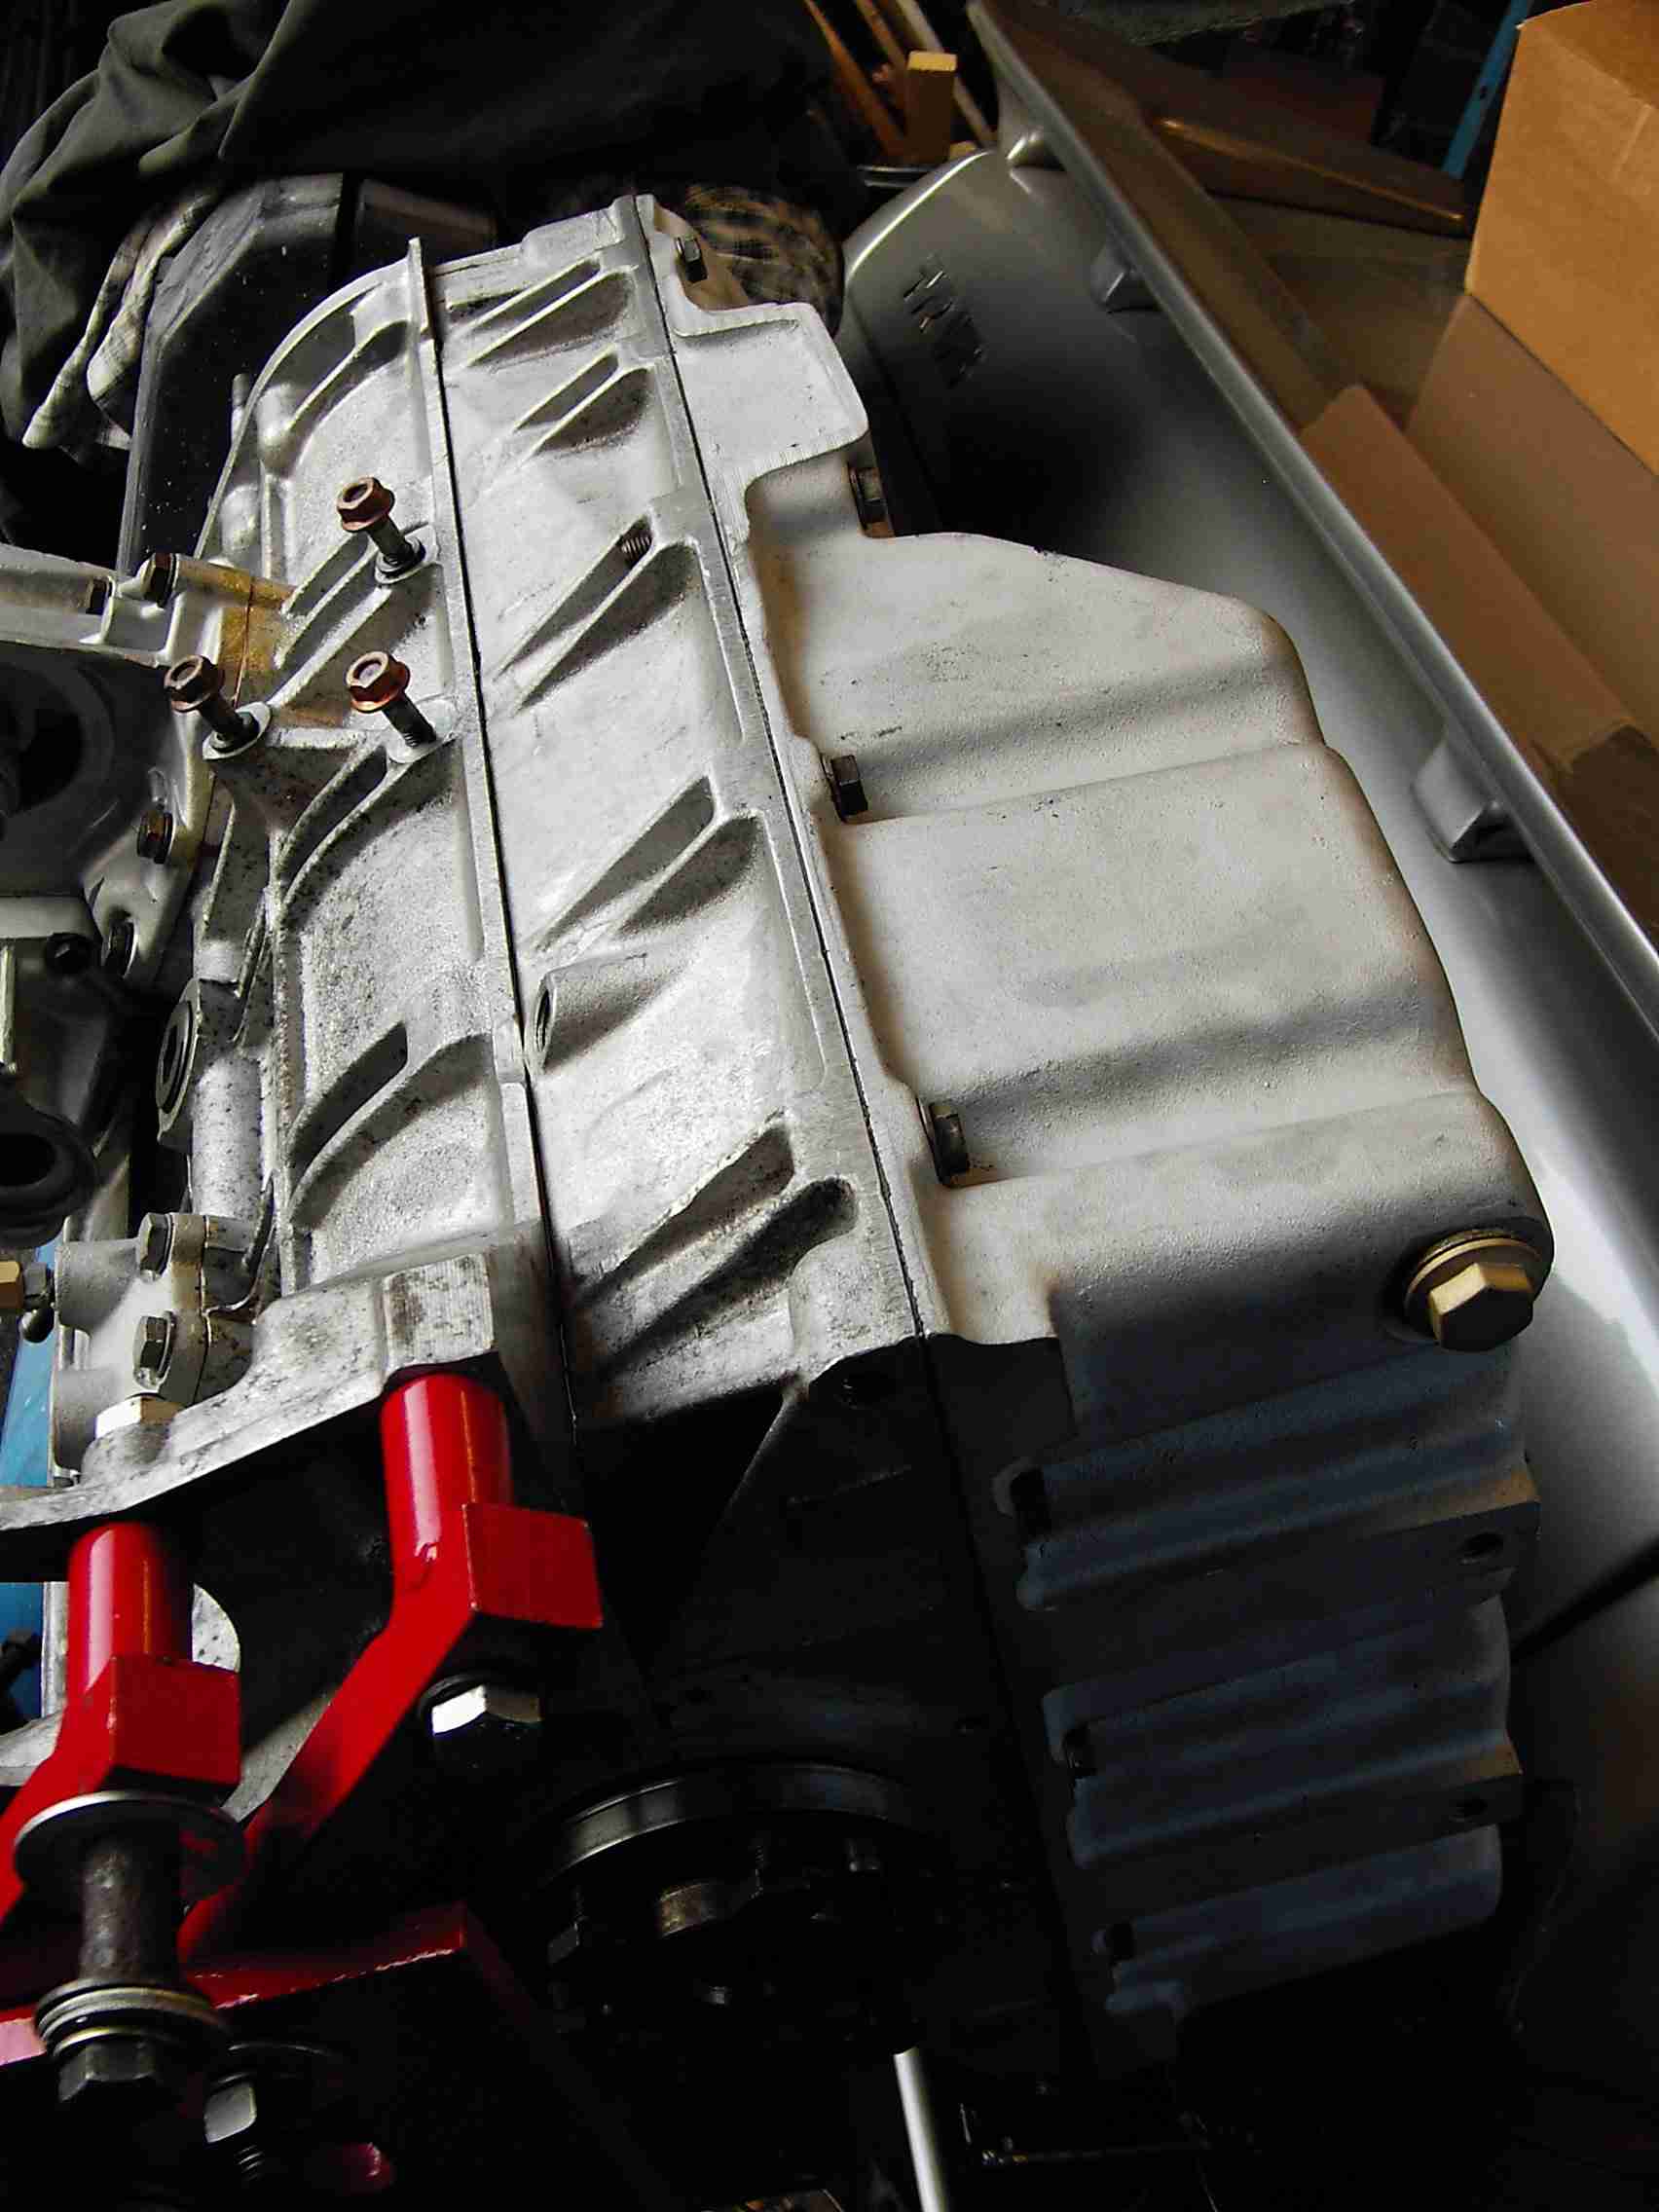
...and a slightly more conventional angle:
Lots of clean alloy! Seems a shame to hide it away...
One job that I did do out of sequence was the refitting of the crank spigot bearing. I read somewhere that the bearing can end up further into the crank than it's supposed to be and there's a recommendation to fit a spacer. A quick session on the Boxie produced such a component and both it and the new spigot bearing were soon installed:
![]()
The front and rear crank oil seals are, of course, supposed to be fitted using a selection of Lotus' special tools. I didn't have any of them. The main principle is that the seals have to end up absolutely concentric with the crank otherwise oil will find its way past. The factory tools consist of a cylinder of very thin metal which is a snug fit over the crank end and simultaneously expands the seal's inner lip, creating an equal clearance all the way round until the housing bolts have been tightened. I created the same effect with a sheet of plastic cut from an oil can, lubricated with silicon grease.
The cam carriers (or 'towers', if you prefer) were stripped and cleaned; new seals were fitted and the cams checked for straightness and lobe equality. I suppose if there had been a problem, the engine would have complained by now!
UPDATE 28/07/06 : BACK ON THE ROAD!
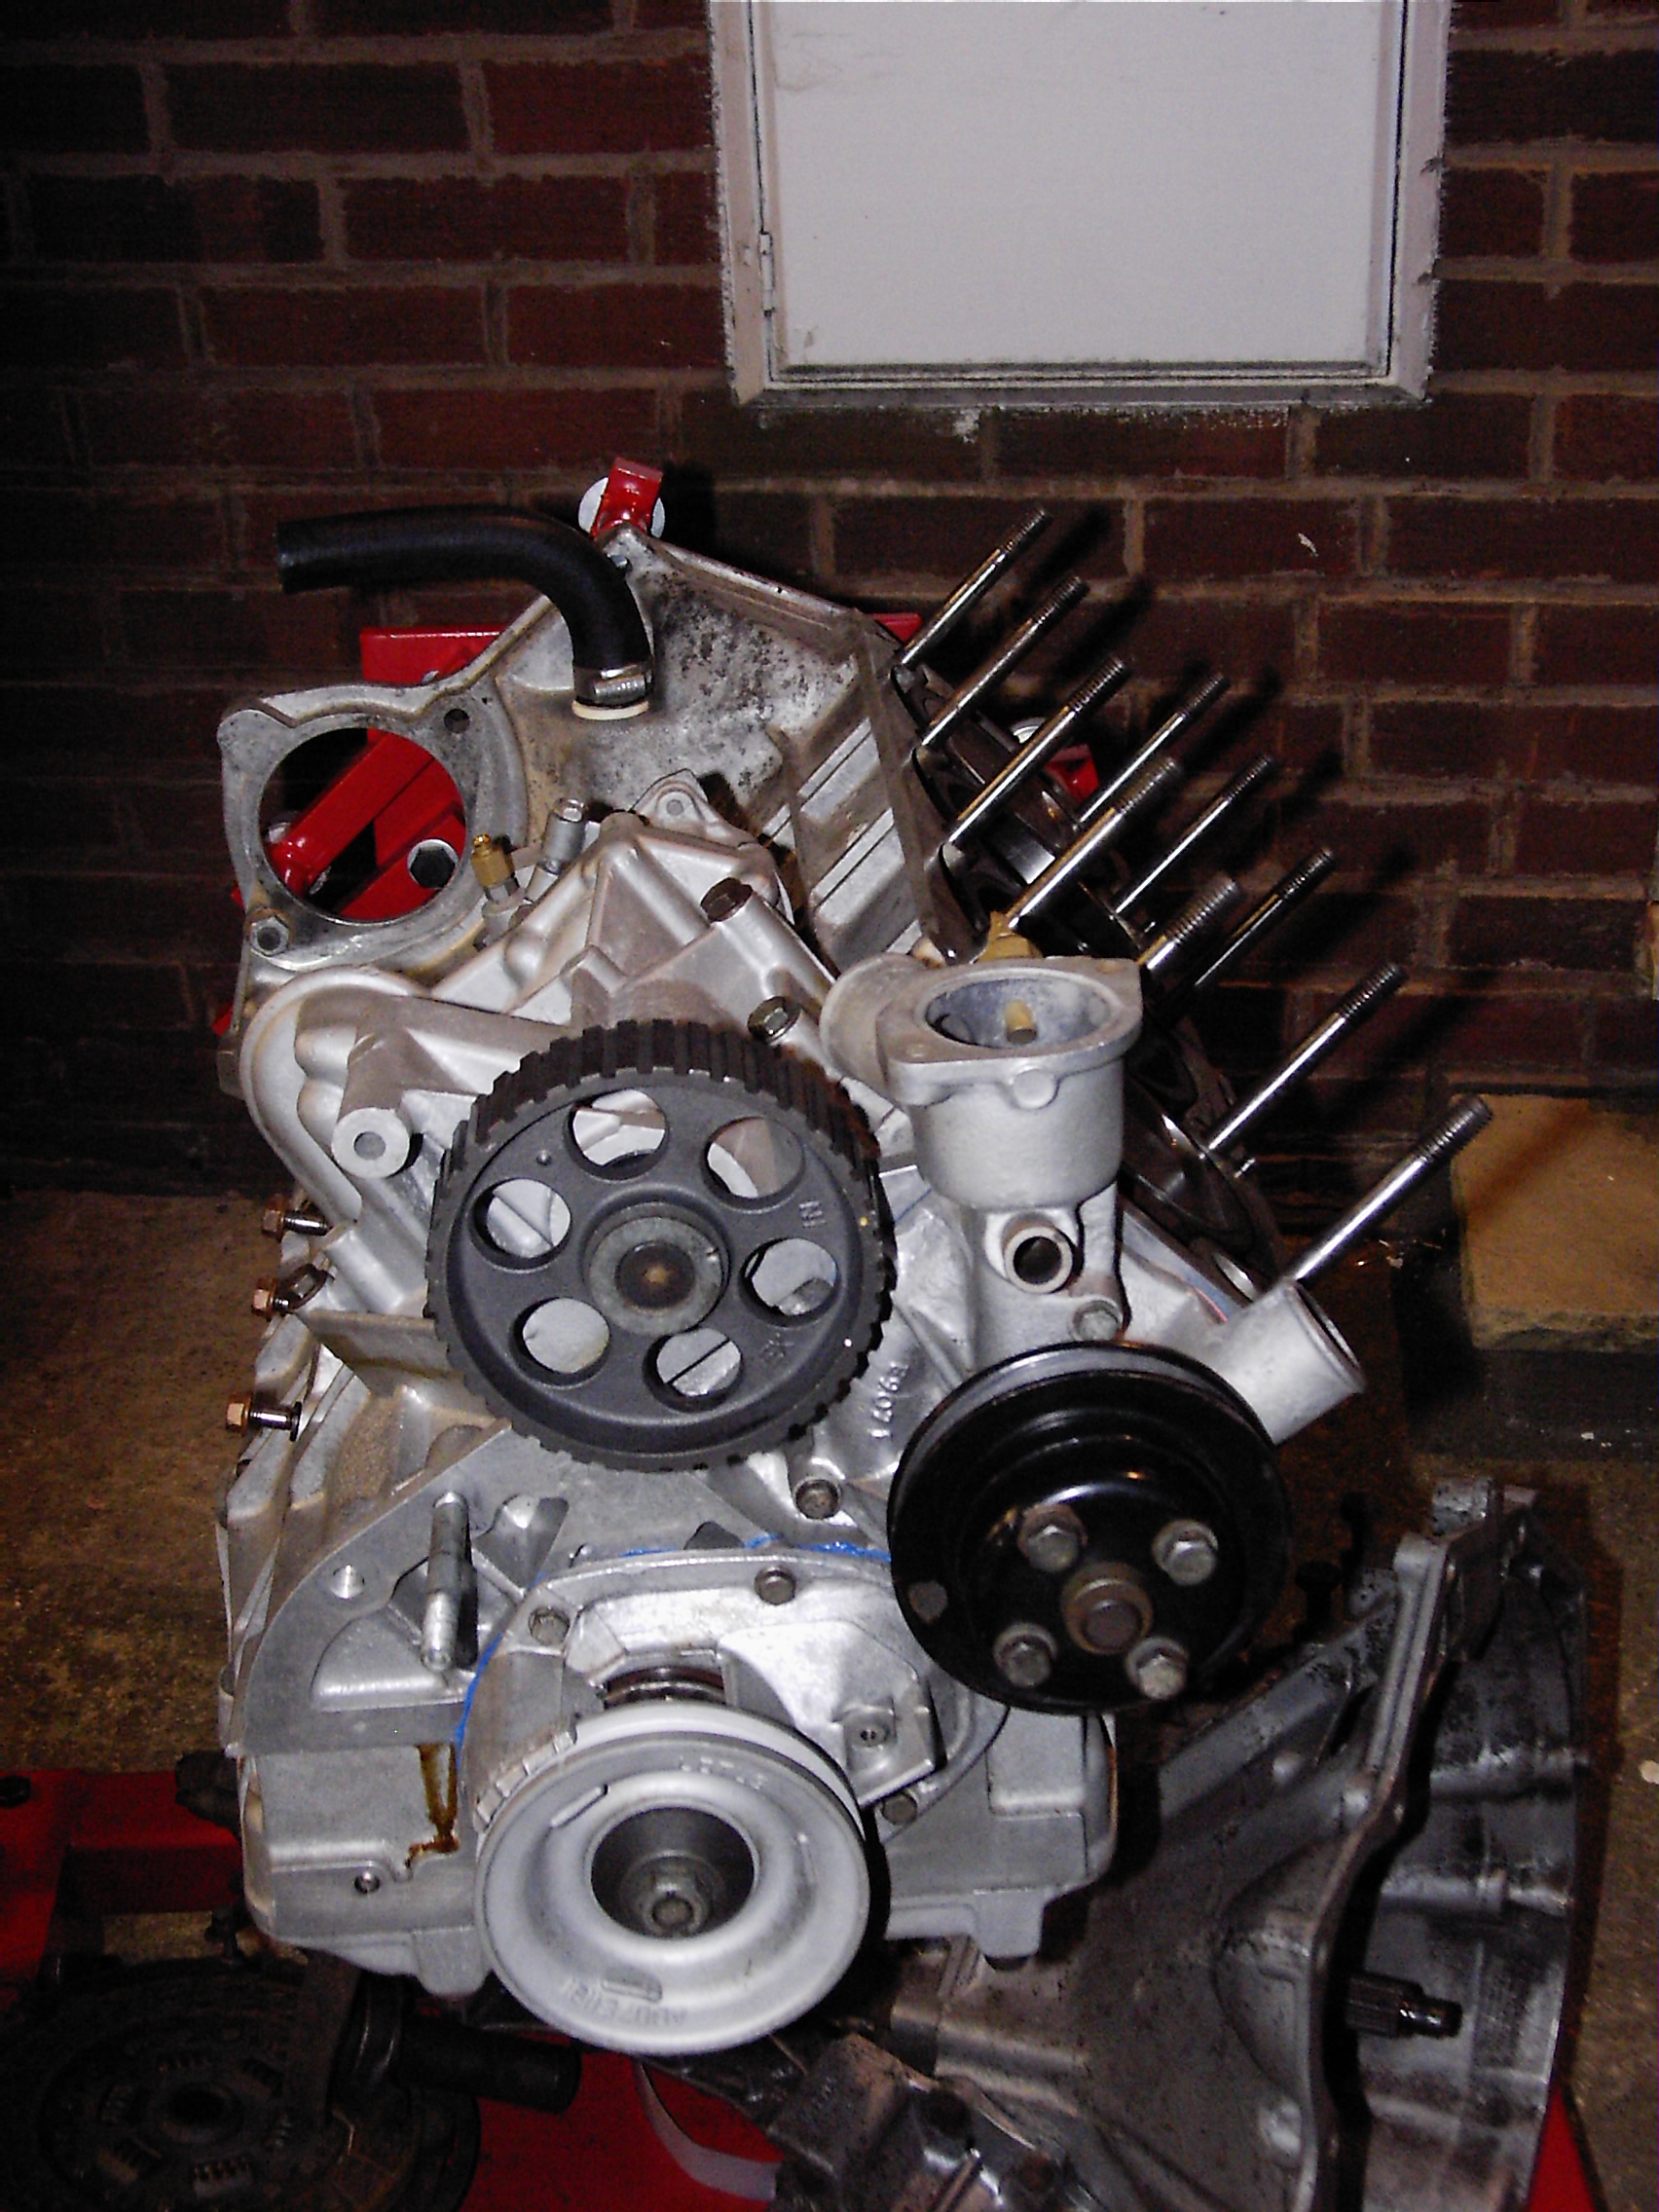
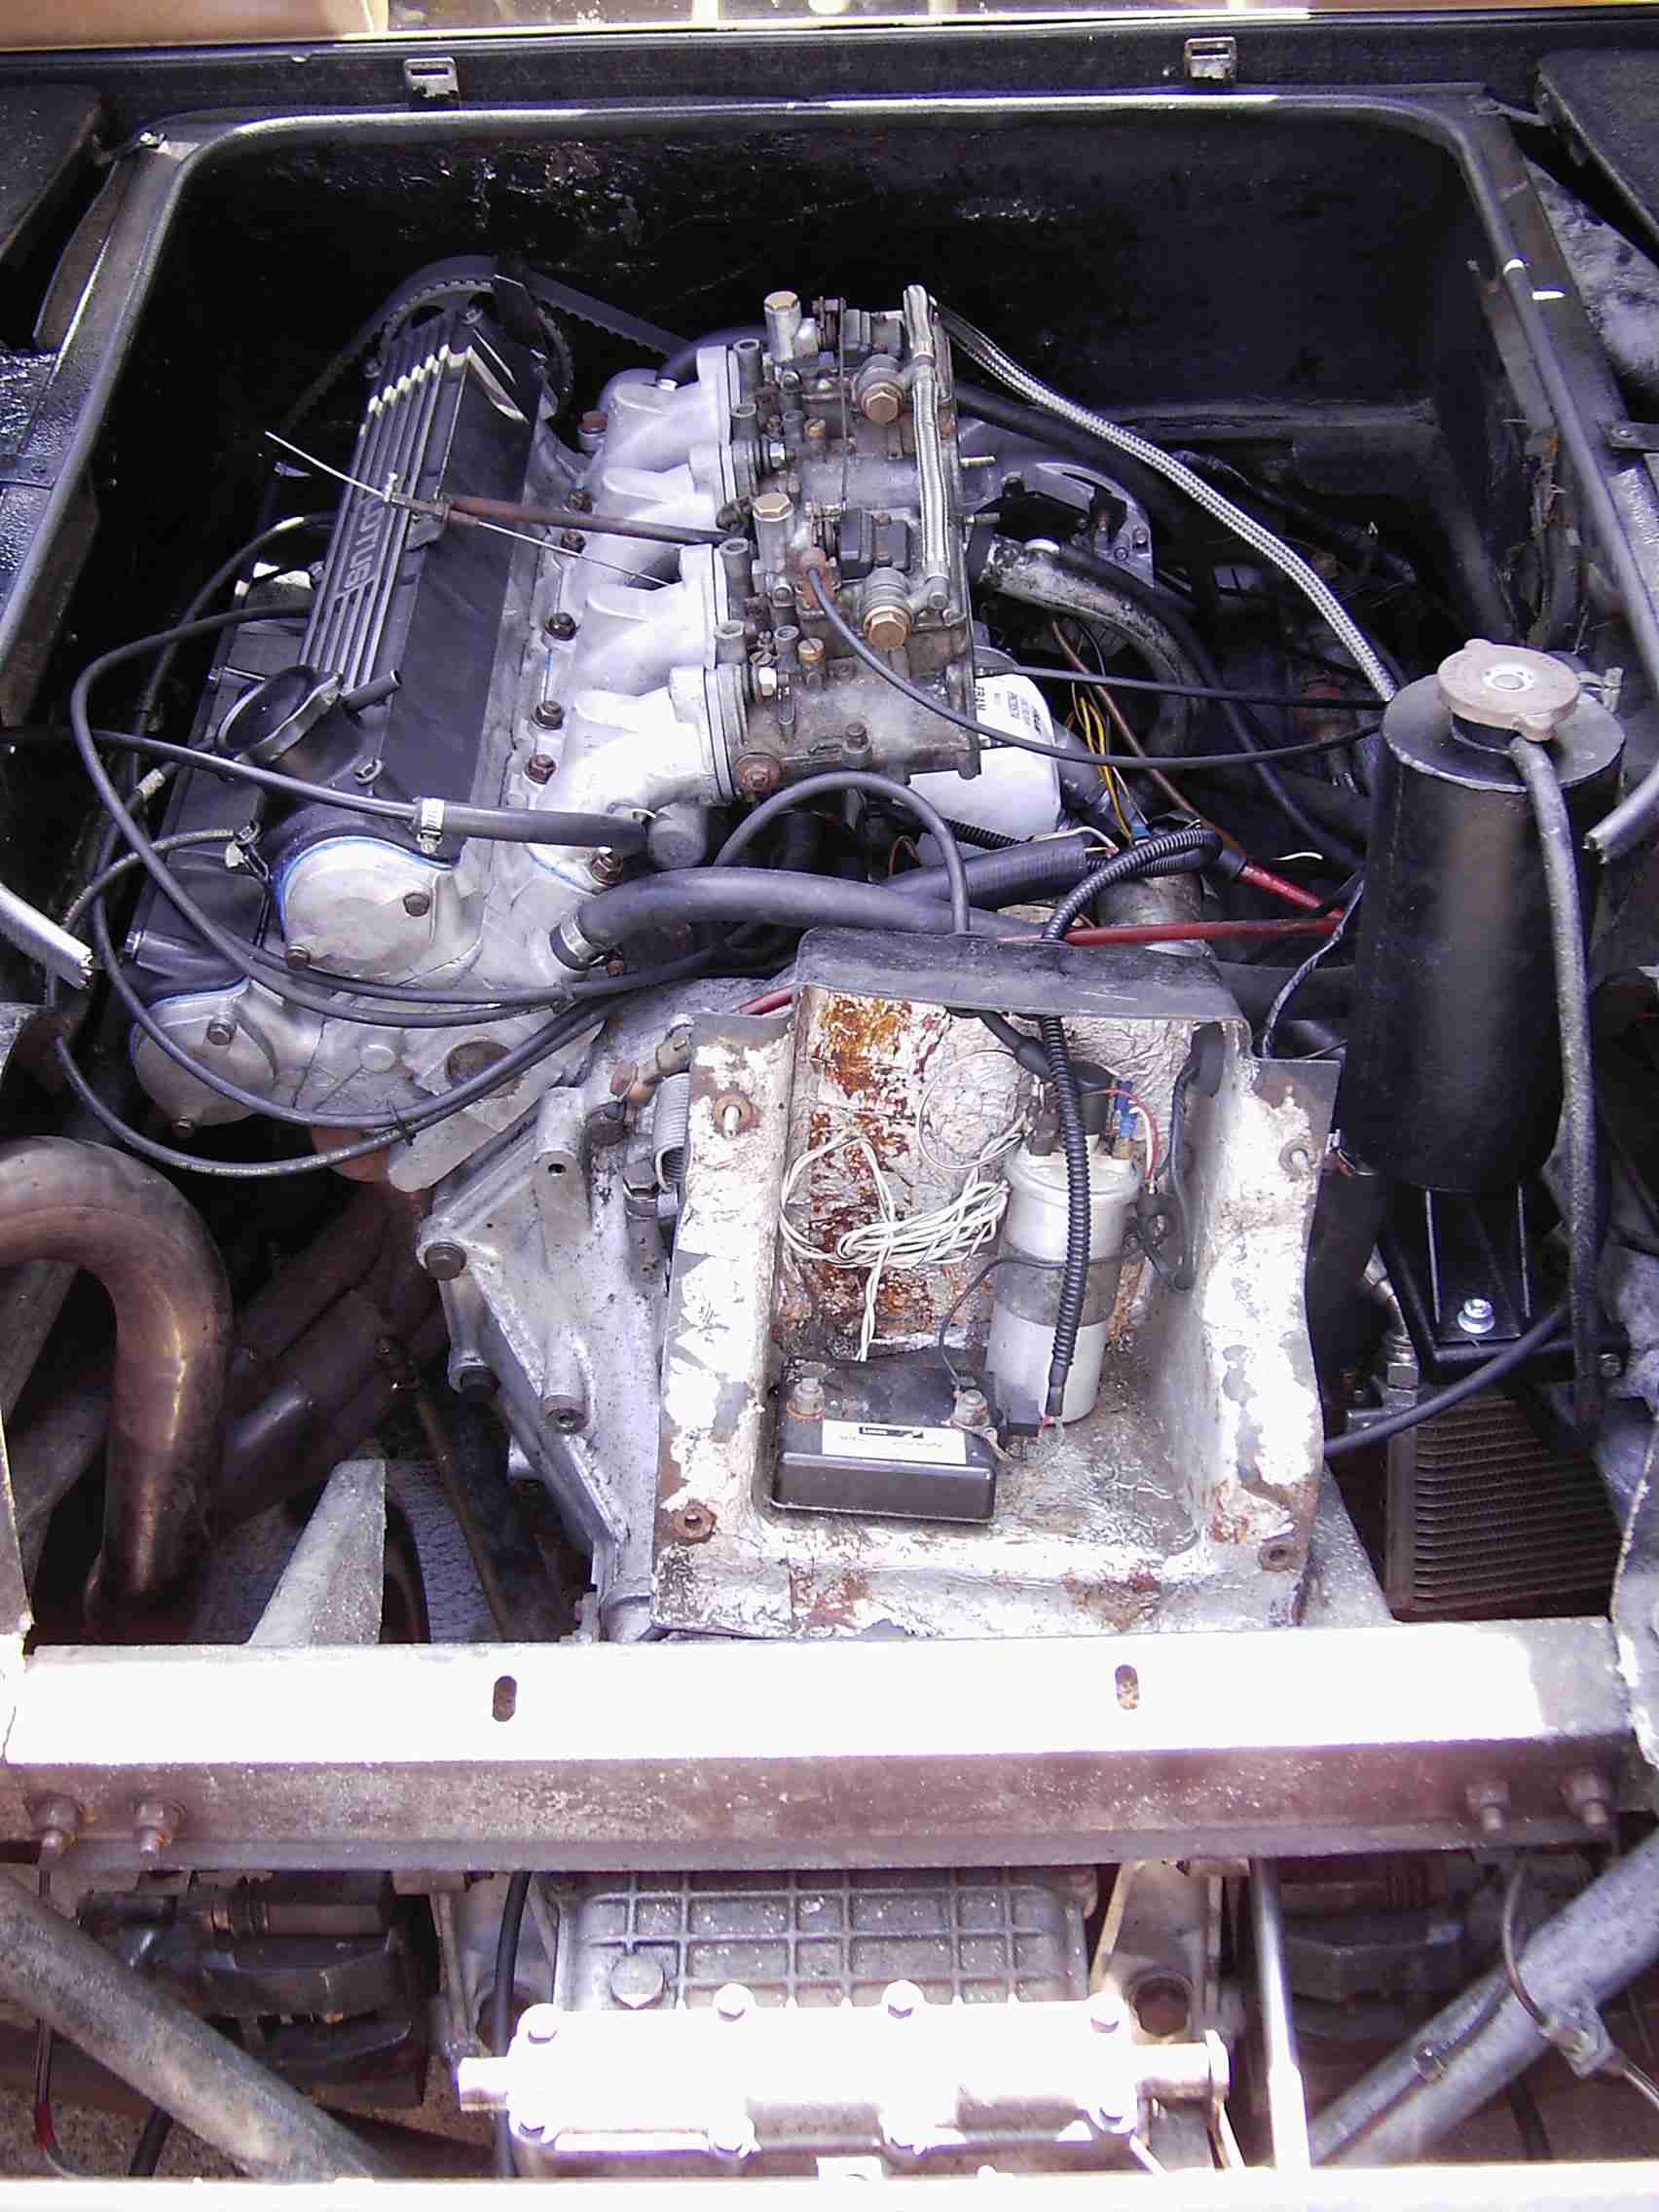
Finally, after more than a year out of action, the Esprit is back together, rolling and what's more, has an MOT too! Here's the rebuilt engine and 'box after installation...
..and once the cams and carriers had been refitted, the new timing belt was wrestled into place...

Gradually the pile of removed parts dwindled as the engine bay filled up again...
I had a few glitches: the first was discovering I'd left a pipe disconnected at the front of the car, from when I drained the coolant...! Next the inlet manifold leaked water: I guess fitting the gasket dry was a bit optimistic :-S Then when I came to refill the engine oil, it was dripping past the new gasket under the inlet cam cover. I tried tightening the bolts but to no avail, so it was stripped off again and the expensive Loctite gasket sealant cleaned away. I was going to try again with the same stuff but decided instead to try blue Hylomar; not something I'd normally use on an oil sealing face but I thought it was worth a try. So far it seems to be holding OK! I was surprised that it was the inlet cam cover that leaked: you'd imagine that it'd be the exhaust cover due to the extra lean.
Suddenly, the time had come! I connected up the battery, turned the key and... no fuel pump. Oh well, it has been stood for ages... A quick clout with a clouting-stick and the familiar tick-tick of the SU was restored. I pulled the choke, turned the key and the Esprit spluttered but wouldn't catch. I'd guesstimated the position of the distributor and it was just not quite close enough. A quick twist and the engine finally burst into life. Once I'd made sure I had oil pressure and nothing was spraying around that shouldn't be, I connected a strobe lamp and fine-tuned the distributor. With the engine warmed-up I whipped out my trusty mercury gauges and balanced the carbs, their adjustment all over the place from trying to correct the rough running last year. This time the columns quickly came to within a couple of mm of each other.
The rebuilt engine has a nice even idle. At the time of writing we are still in the middle of the hottest summer since 1976, but even so the Esprit will start with half-choke for a few seconds then idle quite happily with the choke off... something it would never do before! I've also discovered that quite by chance I've installed the gear linkages in such a way that the action is much better and reverse actually requires use of the detent now, rather than it being just below 5th...! A few more pictures...
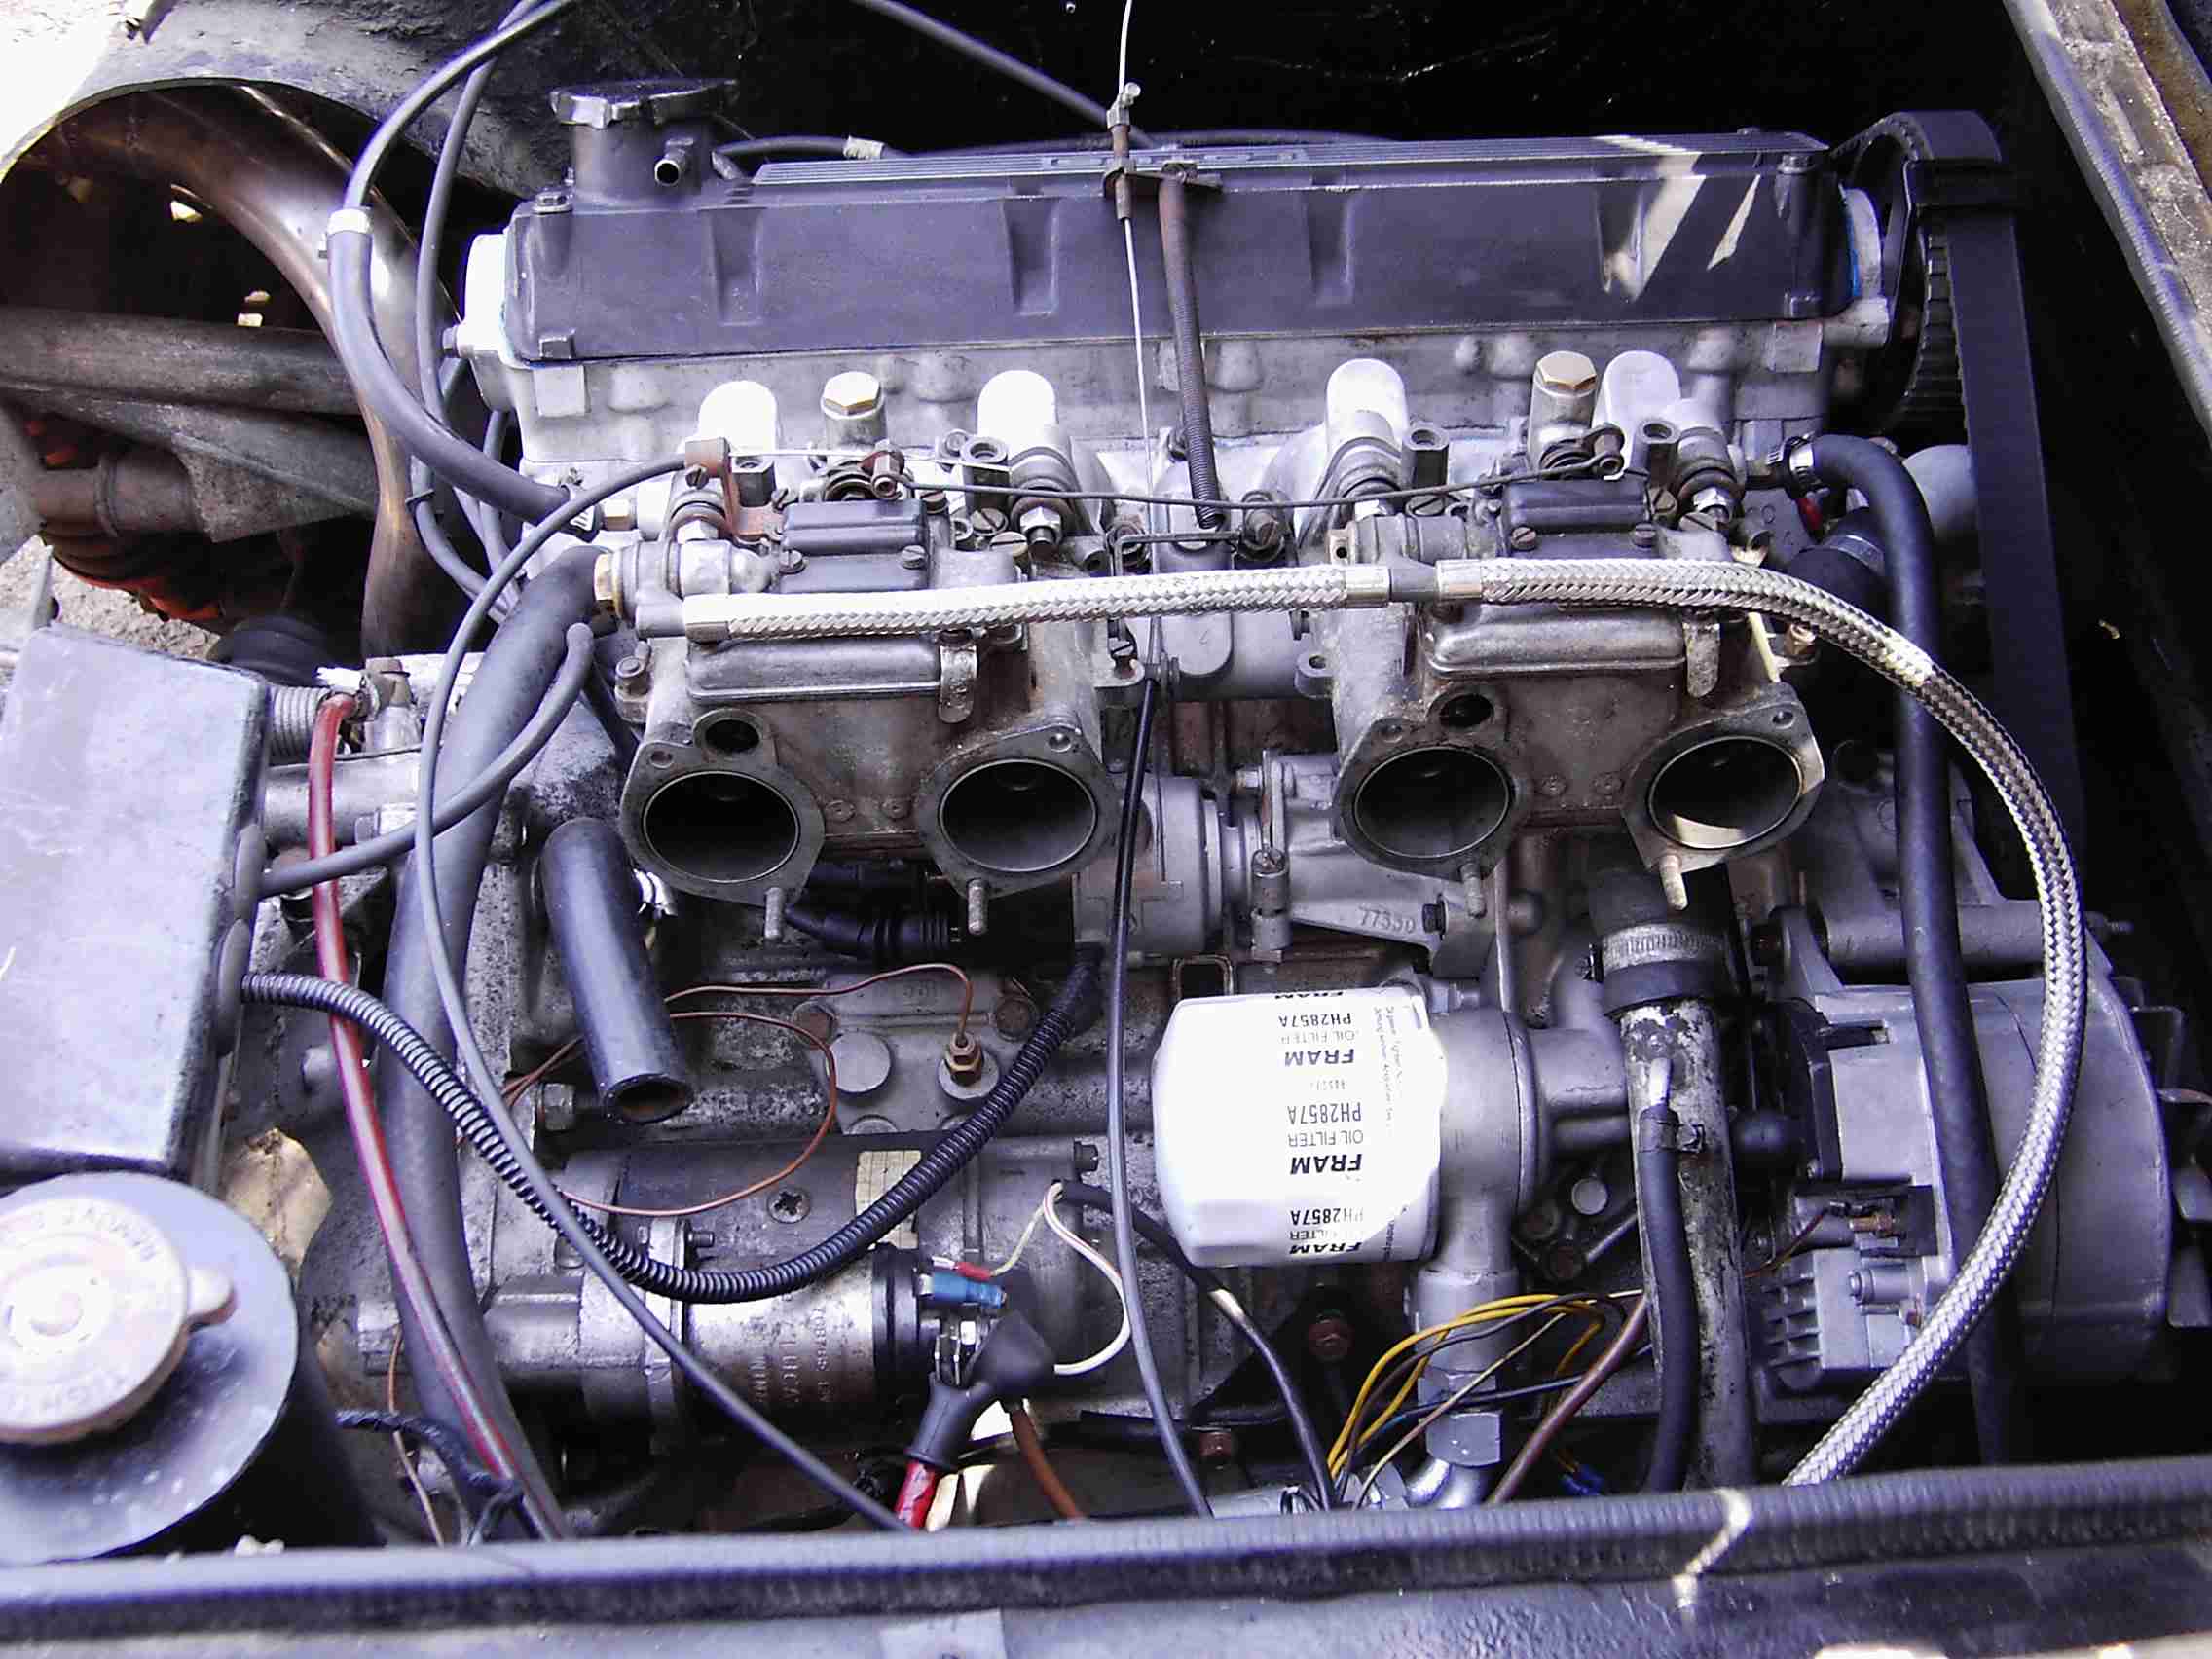
Shame to put grubby carbs back on, but I REALLY didn't fancy cleaning them! Starter motor is a used replacement, I wasn't happy with the original when I stripped it for refurb. Of course I wanted to try the replacement before I spent any time on it so it too went on grubby. Here you can see the blasted and matt black repainted cam covers, powder-coated coolant header and refurbished oil cooler:
You may also be able to make out the newly-cleaned chassis tubes; the chassis is zinc galvanised of course and it gathers an odd coating that, when scraped off, reveals a more or less new appearance!