Milling/ drilling machines (Updated 251224)
Bridgeport 1ES Horizontal Milling Machine
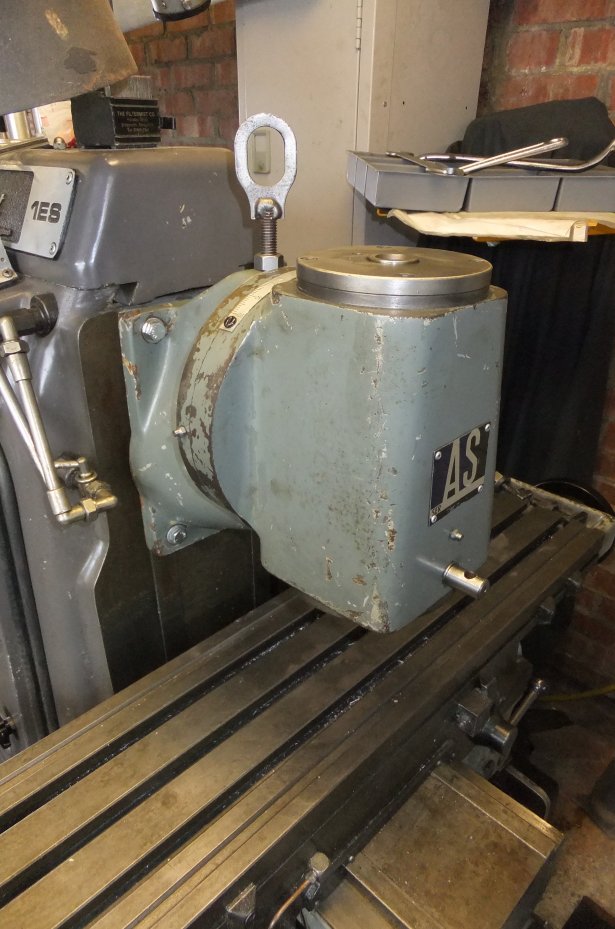
One of the first things I bought via Ebay, and formerly in a Yorkshire college, this 1ES was built in Leicester in 1980. It was originally produced by Adcock & Shipley, who ended up as part of the Textron group which included Bridgeport, hence the badging. It's a horizontal mill with power traverse on the x-axis. The machine weighs in at 1600 lbs and had to be delivered to my workplace and stripped down for removal to the house. I converted it from 3-phase to single-phase electrics with a 3hp motor and new coolant pump. Also via Ebay came the dividing head and 2-axis work vice. Cleaned up and painted a similar shade of grey to the mill, they almost look to be original equipment! I acquired an ER32 collet chuck which is a bit tricky to use on a horizontal mill, you have to think in a parallel universe to work out where the cutter's going. UPDATE Aug 14: After owning the 1ES for about ten years I finally managed to land a vertical head for it! I was just logging-on to Ebay when I spotted it amongst the pictures of items recently listed. I paid more for the vertical head than I did for the mill itself, but that's the way of things. Anyway, some pictures...
1ES complete with tilt & swivel vice, dividing head, Lotus brake caliper, Nokia mobile (2002 vintage) and coffee mug...

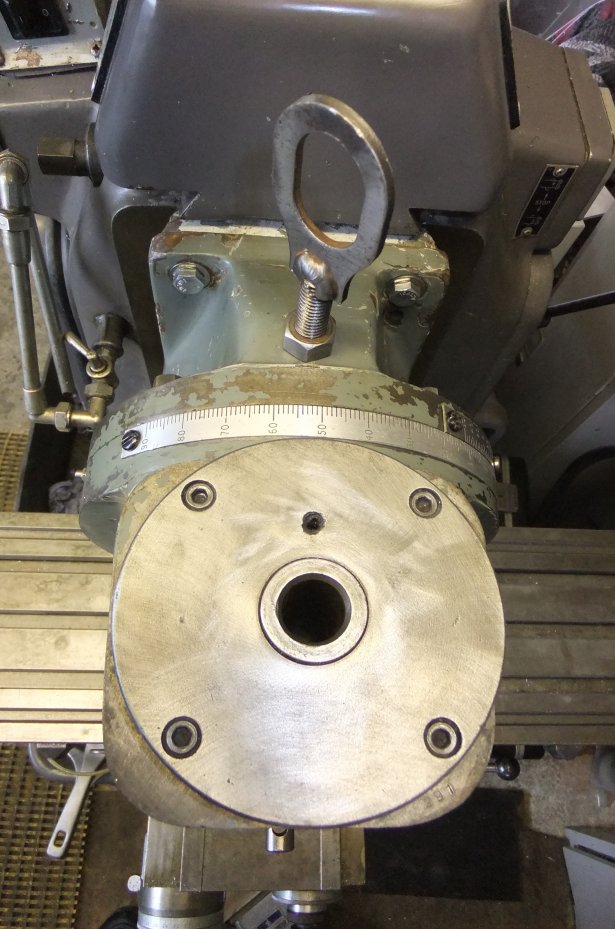
Vertical milling head (in Adcock and Shipley's earlier colour)...
Top view showing tilt scale, lifting eye and drawbar bore...
...and looking from underneath at the business end (DTI mounting bar at top centre):
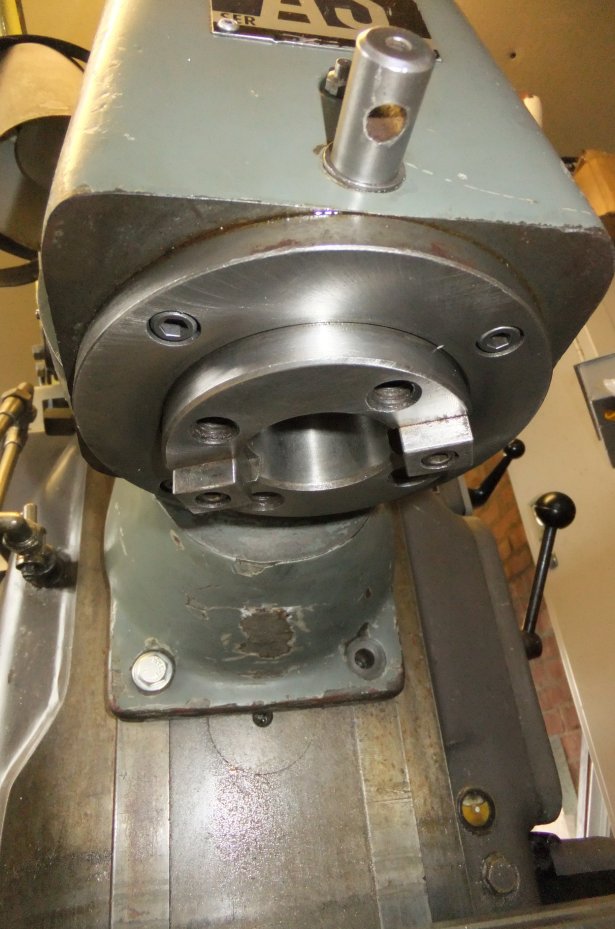
It looks a bit scruffy; this is largely due to machinery makers using large quantities of filler to create smooth surfaces on their castings; unfortunately it's not possible to move 43Kg of cast iron around without incurring some damage to the paintwork! The important parts are in perfect order and it runs smoothly and accurately.
More info on the 1ES can be found here.
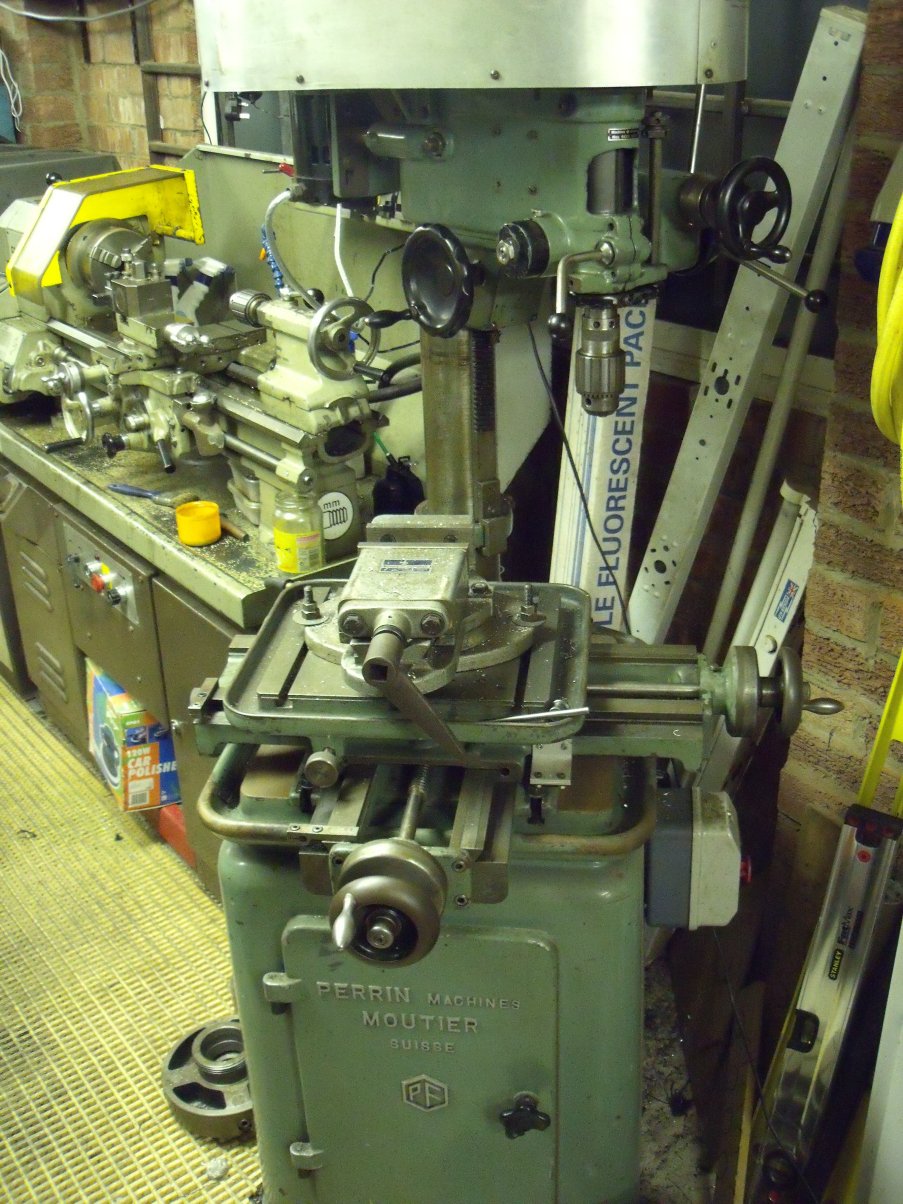
This machine is a bit of a puzzler. I acquired it through my company when we bought out one of our competitors but have been able to discover very little about it or its makers, other than that Perrin are (or were) a respected Swiss company who have produced some very expensive milling machines!
I think it's fundamentally a pillar drill (possibly a 'co-ordinate drilling machine') though with care and light cuts is it capable of being used as a vertical milling machine. I've never seen a pillar drill with a column anything like the size of the one this has (90mm diameter)! The 'head' moves up and down on a rack and pinion and can be swung around the column (but is only locked by friction hence the necessity for light cuts when milling). The x-y table has about 7" of travel in each axis (but no power feeds as on a 'true' mill). A two-stage, 5-step pulley drive is fitted that gives an impressive range of speeds (about 60-10,000 rpm!), and the spindle can be interchanged to give either a threaded nose to which chucks can be attached, or a Morse tapered socket for suitable tooling. A selection of tooling came with it: flycutter, Jacobs chuck, ER25 collet chuck, &Y axes use Imperial leadscrews and are calibrated in thousandths of an inch, the z (quill) axis is Metric! Confused? you will be... and to make matters worse for a modern operator the leadscrews have right-hand threads, which means that when you expect the table to move away from you, it comes towards you...!
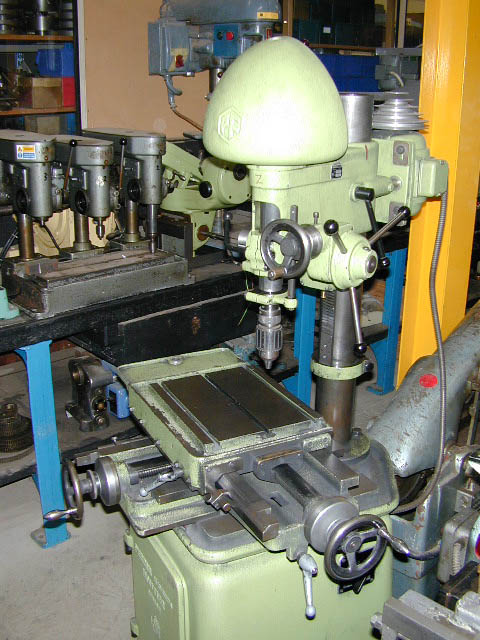
From the few pictures I've been able to find, it appears the Perrin originally ran with its belt drive mostly exposed, with just a cast dome at the front to keep the operator's hair out of the belt, as seen in this picture of a fairly tidy example I found on the 'net:
Mine has had a home-made (or rather, craftsman-made) cover of plywood and sheet alloy added to improve safety, if not visual nicety:
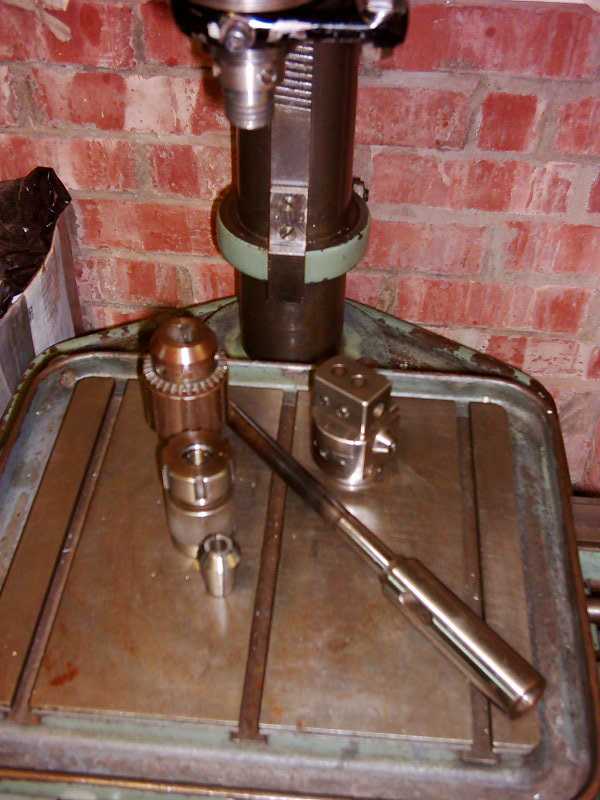
Some of the tooling (Jacobs chuck, ER25 collet chuck, boring head and 2MT spindle):
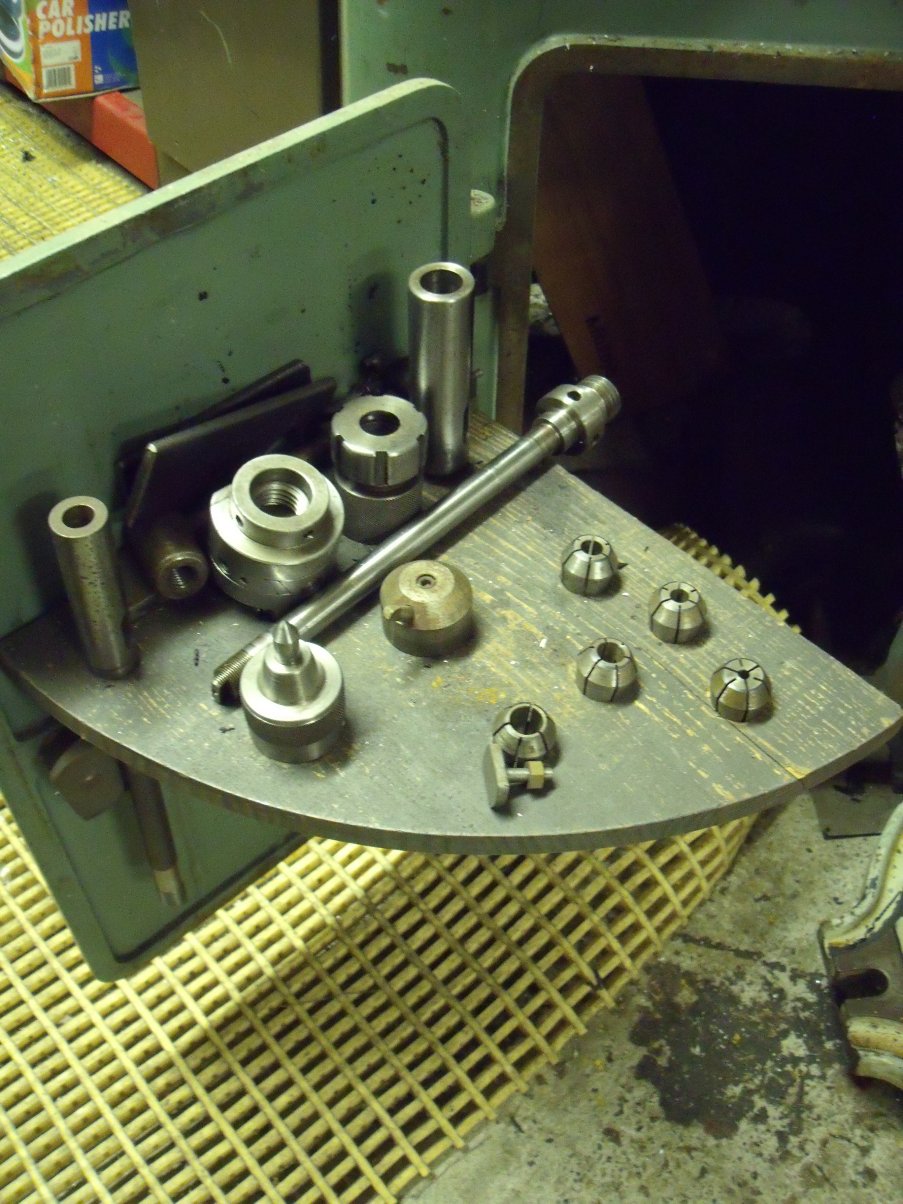
The tooling is stored in the base, on a wooden panel fixed to the inside of the door:
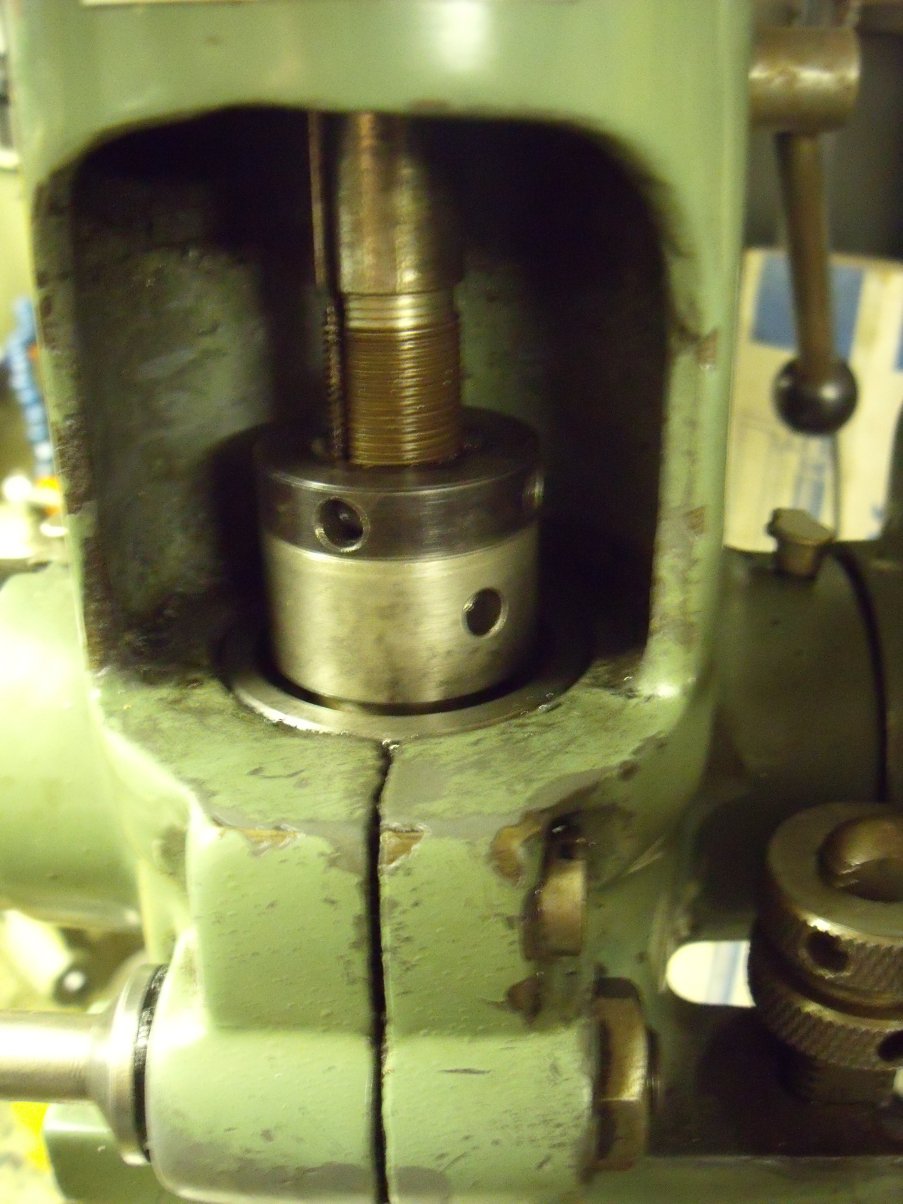
One thing that had perturbed me since I got the Perrin was that the 'universal' spindle (the one with the threaded end to fit the various chucks etc.) appeared to be bent, but I'd never managed to get the locking rings undone to pull it out:
I made some 'C' spanners from 5mm steel plate with sawn-off bolts welded on as pegs and had the spindle out in moments. I put it on Vee blocks and rotated it and sure enough it's bent. Not much, but enough to make it pretty inaccurate! I fitted the 2MT spindle and that runs spot-on. My lathe has a 2MT-fitting Jacobs drill chuck for the tailstock so I plugged that into the Perrin and straight off it drilled better holes! Closer inspection of the 'universal' spindle reveals a selection of marks that imply to me that someone has previously tried to straighten it in a press or similar. As luck would have it, we had a job at work that required the manufacture of several precision parts. I was able to slip the bent spindle in to the machine shop and they produced a new one. I was finally able to mill things with a reasonable degree of accuracy!
DIGITAL READOUTS
The Perrin has been well and truly hauled into the 21st... well OK, the late 20th... century, with the addition of digital readouts! I don't even remember how I came across it, but some guy's website had brief details of how he'd fitted a DRO system to an old mill. Some time was spent surfing the 'net and I ended up buying a system from these people. Three digital scales (like digital calipers) are installed to each axis of the machine and a cable from each feeds the DRO itself. It took some work to get the X and Y axis scales installed; I haven't done the Z (quill) yet as there's so much going on at the front of the Perrin's head that I can't yet see how to mount the scale. I used the machine to make some reference blocks used in the calibration of ultrasonic test equipment and the setup time was vastly reduced compared to the previous blocks I'd made. In the process of installing the slides I found some play in the table gibs that was probably largely responsible for some inaccuracies I've noticed in the past (talking ten-thousandths of an inch here!) and having adjusted the gibs I'm pleased to see an improvement in the finish quality of some slots I milled. With the DRO system in Imperial mode I can easily work to the maximum resolution of the scales (5 ten-thousands of an inch). The DRO unit is a 3-axis one (that no longer seems to be available) and the scales are 150mm and 200mm versions of the vertical types here. The supplier also offers horizontal scales but the ones initially supplied would not work with the DRO so they swapped them for me, once I pointed out that they were 'positive earth' and the DRO needs 'negative earth' signals in order to function correctly. As the scales are mounted underneath the X-Y table of the mill they are inaccessible anyway so it doesn't matter that they are the 'wrong' type. The main drawback of these Chinese-made scales (including most digital calipers) is that they are affected by water; I don't have flood coolant on the Perrin so as long as I'm careful with my squirty bottle of soluble oil I should be OK! I plan to modify the system so that the scales are supplied with DC from the DRO unit, rather than running them on batteries, as they're a bit difficult to get at for battery changes. And besides, I'm a skinflint ;o)
UPDATE 100511
I sourced a 1.5v regulator to power the linear scales, lashed-up a small circuit board and fitted it into the DRO unit. Conveniently, the sockets for each scale input had uncommitted tracks for what I took to be the + feed so it was a quick install. Shame it didn't work :( It transpires that these linear scales are also positive-earth, but the DRO is negative earth. So the scale chassis' are connected to the DRO ground. Consequently the scales did nothing. No problem, thought I, simply reverse the polarity of two wires in the connection cable. This time the scales powered-up but the DRO didn't respond. Er....?! I had a bit of a think. The solution seemed to be to have the new 1.5v supply reversed relative to the DRO ground, but obviously that wouldn't work as the 1.5v regulator used the same ground. What was needed was another power supply! I rummaged in the loft and found an old Nokia phone charger with nominal 5.7v output. I wired it to the 1.5v board, reversed the connections from there to the DRO and hey presto, everything works.. however the display tends to be unstable - which I think was noted by another website author when he tried externally supplying the scales. I found that some suitable suppression components soldered across the edge connector of the scale's PCB cures it. I had a suspicion that the DRO wouldn't like the various electromagnet fields created by the 3-phase inverter and sure enough, when I switched on the mill the displays went haywire. They were perfectly stable when the scales had batteries in them though, so it's 'just' a matter of suppressing the electrical noise now...
UPDATE 291112
Time passed, as it does, so it was only this week that I determined to resolve the issues with the DRO installation. A couple of other websites outlined a technique for modifying the scale units to be negative, rather than positive earth, as a means to help the interference suppression. I dismantled the units, which involved drilling out some brass rivets, made the required changes and reassembled. Testing showed that the original problem remained :(
As a last-ditch attempt, I stripped the scales down again and soldered in some extra capacitors... and, finally, it works! I ran the table from end to end of both axes to determine the maximum travel, then set the table dead-centre and went for a takeaway, leaving the motor running. Three hours later (I eat slowly, OK?!) the DROs were still showing the table dead-centre, with not a flicker on either axis. I can attain 190 mm of travel on the X-axis and 164mm on the Y, restricted by the table hitting the column! I've tried wiggling cables, dropping the mill head to be closer to the table etc., and it's rock-solid. About bloody time :O) Rather than sully this page with pictures of circuit board carnage, I've put together a separate page to illustrate what's involved.
Incidentally, if you happen to look up Perrin on the 'lathes.co.uk' website, there's now mention of this 'co-ordinate drilling machine'... and the two pictures shown on there were shamelessly stolen from this site with the backgrounds edited out (OK, yes I know, I got one of them from elsewhere myself... :D)
UPDATE 130922
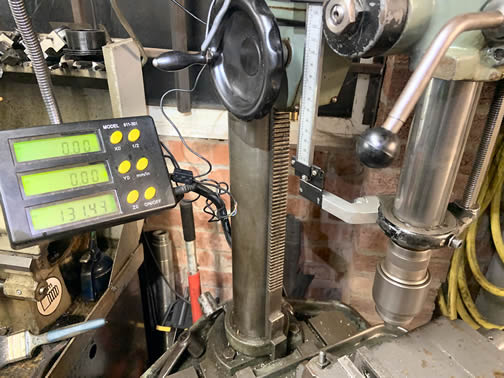
As time went by (all ten years of it!) I noticed that the DRO would frequently start displaying random gibberish, losing the all-important numbers to tell you where you'd got to with the cut :( It would happen even if I was cutting dry so I knew it wasn't coolant getting into the works. Eventually I realised that the connectors on the end of the cables to the scales were responsible, so I've finally got around to chopping the plugs off and hard-wiring the cables, which for the moment at least has restored stable readings.
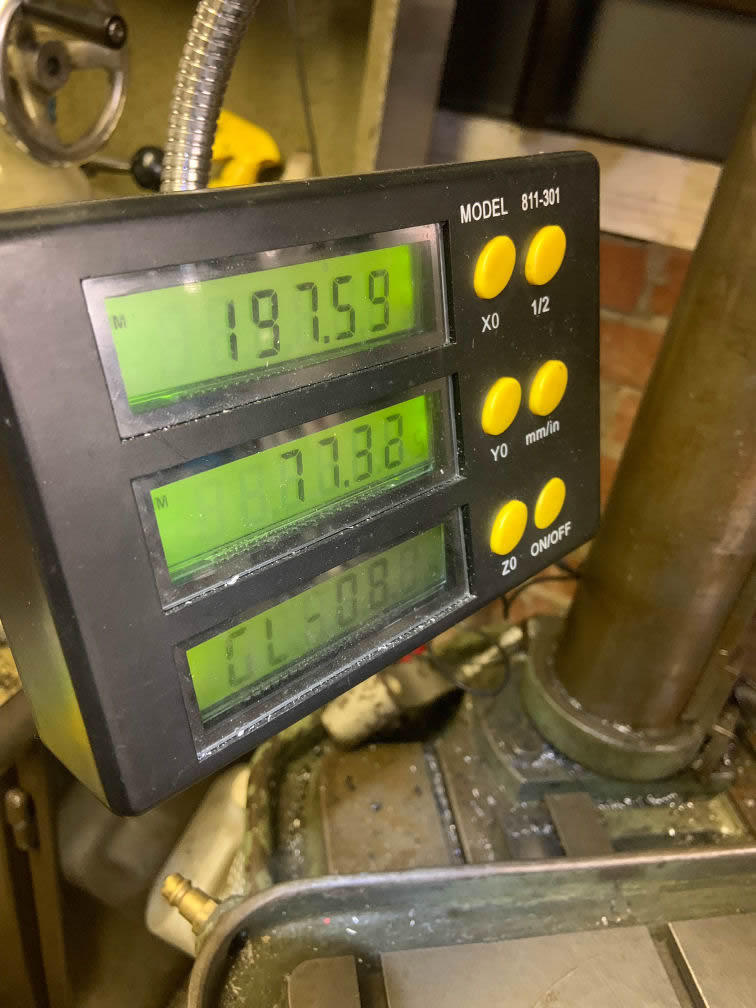
The odd angle is to reduce the amount of light that was being reflected from the display. GL-08 is an error code which the DRO unit shows if there's no digital scale connected; in this case the Z-axis as I still haven't worked out how to mount the scale for it on the front of the Perrin's head! A quick look around the internet shows the 3-axis display is probably no longer available, or at any rate as rare as hens' teeth. Amadeal haven't stocked it for some years and I can only find a couple of companies in the USA who still list it on their websites.
UPDATE 181224
OK, so it took a while to get around to it but I finally made a start on installing the third linear scale to the Perrin to give me DRO on the Z-axis (quill). The issue had always been where to position the scale and how to attach it to both the quill itself and the head of the machine, without interfering with any of the controls or obstructing access to the spindle locking nuts etc. For some reason this time it took but a few moments to realise how it might be achieved, so a piece of 12mm alloy plate was put through the bandsaw to produce a mounting plate for the reading head:
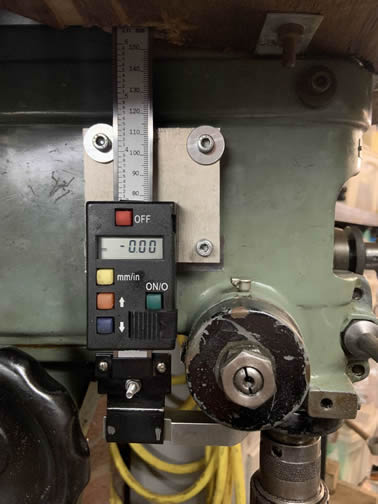
and a bracket to connect the scale beam to the quill.
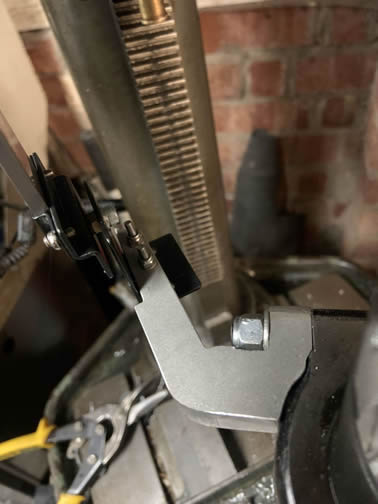
The mounting plate utilises existing threaded holes in the head casting, I think there was a work light mounted there when I bought it. I slotted the upper mounting holes slightly to allow aligning with the quill, hence the two large washers (so the bolt heads don't dig into the plate around the slots). The connecting link uses a length of studding screwed in place of the clamp bolt that secures the depth stop to the bottom end of the quill. Although it would have been visually nicer if the reader head could have been more central on the plate, it had to sit lower in order for the full stroke of the beam to pass the sensing elements, and required offsetting towards the rear to clear the quill return sping housing and so that the top end of the beam, which has to pass through the plywood base of the drive belt guard, can miss the front pulley.
![]()
The slot in the plywood started out quite neat as I cut it with an oscillating multitool thing, but the beam rubbed on the edge slightly and in the process of tickling (ahem) with a chisel the ply splintered and a piece broke away. So apologies to the craftsman who made the guard in the first place :D
So far so good: here you can see the quill at full extent:
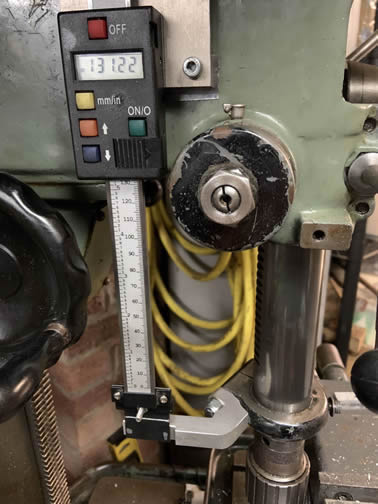
...but there was more to it than that as I had to dismantle it again and modify the reader head to work with the DRO unit as per the other two axes. Didn't take long; also added a capacitor across the battery terminals and a ferrite core to the data lead, but there was still a slight instability in the last digit until I remembered to earth the electronics to the frame - now it's as steady as a rock. Just over 131mm of quill travel (spindle is running in this shot):
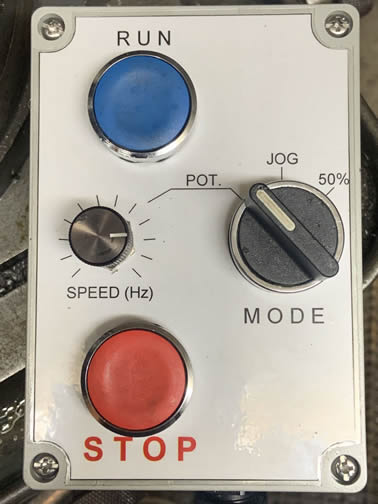
Thus inspired, I decided it was time to revisit my Teco 3-phase inverter (VFD) and make more use of its facilities. The VFD is housed in a wall cabinet with its output routed through a contactor to either the Boxford lathe or the Perrin drill. The contactor is brought into play by a switch on the cabinet and the VFD start/stop control is arranged so that the machines are mutually exclusive - I can't start them both together or start one from the other's controls. Most of the time if I need to alter the lathe's speed I just use its own continuously-variable mechanical adjuster (that's what it's there for!) but sometimes if I'm using the Perrin it would be useful to alter the spindle speed, for example as the drill size gets larger. Swapping belts between pulleys can be a bit laborious. Also, I've been using a rotary switch low down on the side of the Perrin for start/stop which means stooping over the running machine - less than ideal. What I decided I needed was a pendant control, similar to most VFD installations, but in this case only to start/stop the drill, retaining the lathe's existing controls, but also allowing remote speed control that will work with either machine. Most VFDs have the facility to switch in a 'jog' function which drops the output frequency (and hence motor speed) to a few Hertz. Reading the Teco's manual properly revealed that as well as jog it has three other presets which can be programmed in various combinations to suit the job; if, say, it was controlling a pump or fan it would permit switching flow rates. As it happened I had a spare 3-way Telemecanique switch left over from the Colchester control panel I built a decade or more back so I programmed the VFD to give me switchable 6Hz and 25Hz (being the lowest and 50% speeds). A spare diecast box fell victim to a step cutter and the speed control pot was robbed from the wall panel to join a start/stop switch pair. A length of 8-core screened cable and suitable glands were also located.
There was a slight delay while I worked out how to change from the rotary on/off switch on the Perrin to non-latching start/stop buttons. The VFD needs to see an 'on' signal to keep it running. The Boxford takes care of this using one of its original contactors which holds in until you press the lathe's stop button. To replicate this I needed a relay for the Perrin... and that needed a power supply. I couldn't find any information in the VFD manual to tell me how much current its onboard 12V supply (used for the control inputs) can deliver and didn't really want to start hanging relays off it in case it went pop. As luck would have it, whilst up in the loft digging out wrapping paper and the like for Christmas '24, I decided to bin lots of old computer hardware, amongst which was a Digital laptop PSU giving 11V at a couple of Amps - more than enough for the job at hand. The circuitry was duly constructed and - it didn't work. It tried to, but what I was asking the relay to do was switch its own coil feed, so as soon as it tried to change over, it dropped out. Several times a second. I added an electrolytic capacitor across the coil winding and that fixed it, but then there was a very slight delay (<1 sec.) between pressing the stop button and the relay turning off the VFD. I halved the capacitor value and tried again: spot on. With that resolved the whole thing works as intended: select lathe and the VFD starts and stops using only the lathe's existing controls (and all the interlocks, which are still present). As well as its own mechanical speed control, the lathe motor speed can be controlled by the pendant pot and 3-way switch, while the pendant start/stop buttons do nothing. Select the drill, and the lathe won't work; the Perrin now starts and stops and has speed control from the pendant.
Having gone to these lengths, I think the only thing missing is a direct speed readout for the Perrin. Watch this space.. :D
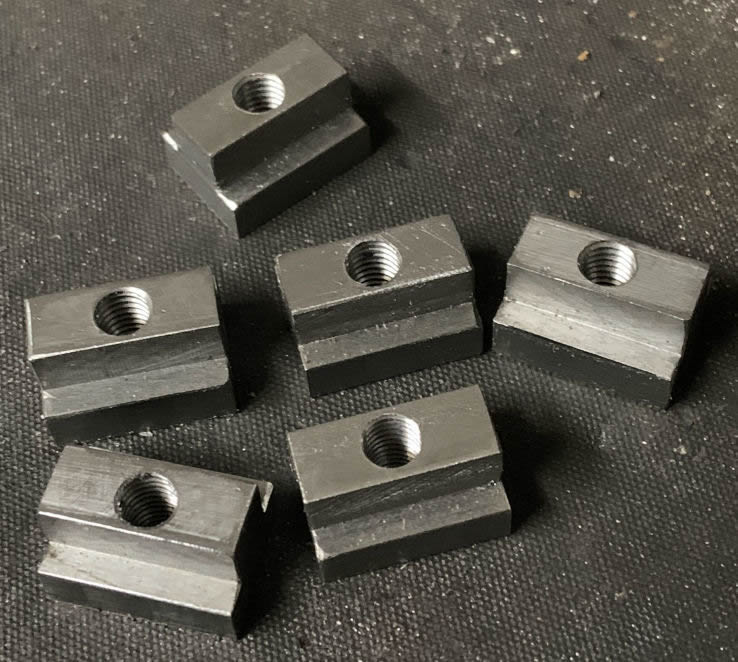
I also got around to another job I'd been meaning to do for years: making some Tee nuts for the Perrin's table.
One day, I was browsing on Ebay (as you do ;-) when I happened upon a Rotary Table. For the uninitiated, that's a cast-iron circular table used to accurately position parts on a mill for drilling etc... and it rotates. So if for example you wanted to cross-drill some brake discs every 'x' degrees, a rotary table will allow you to turn the disc exactly the right amount to line up for the next hole. It's 12" in diameter and badged by Jones & Shipman:-
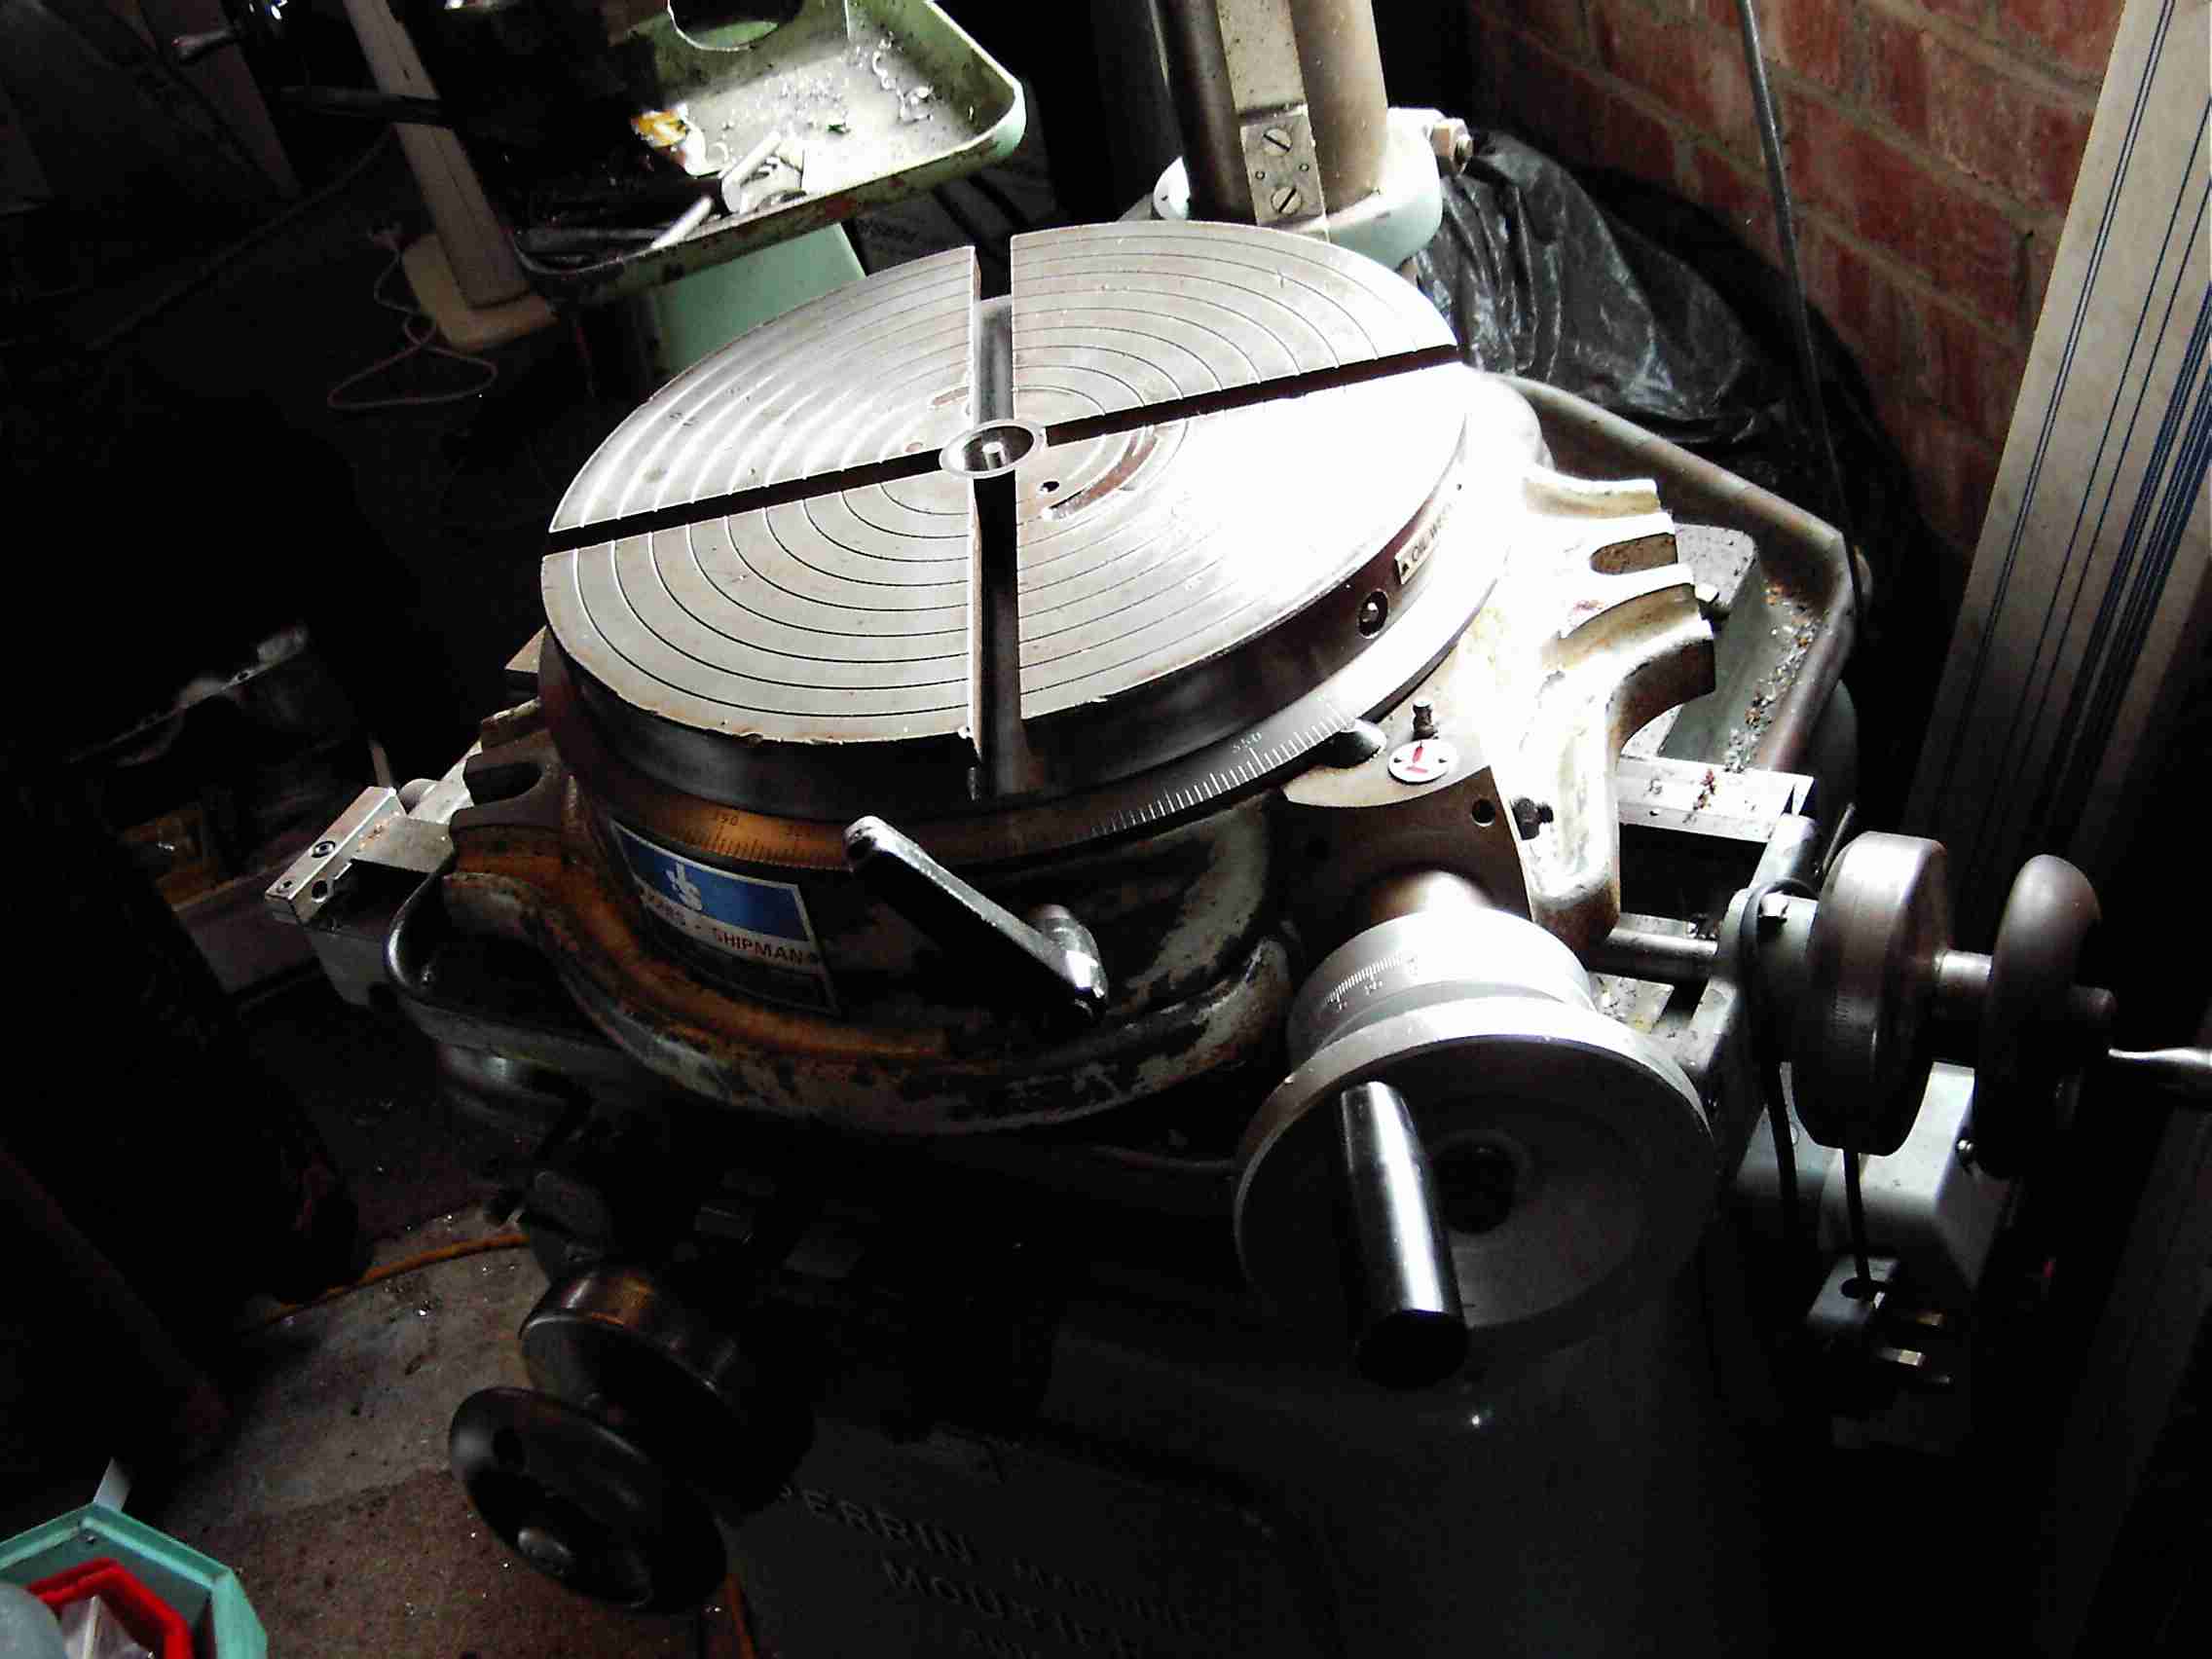
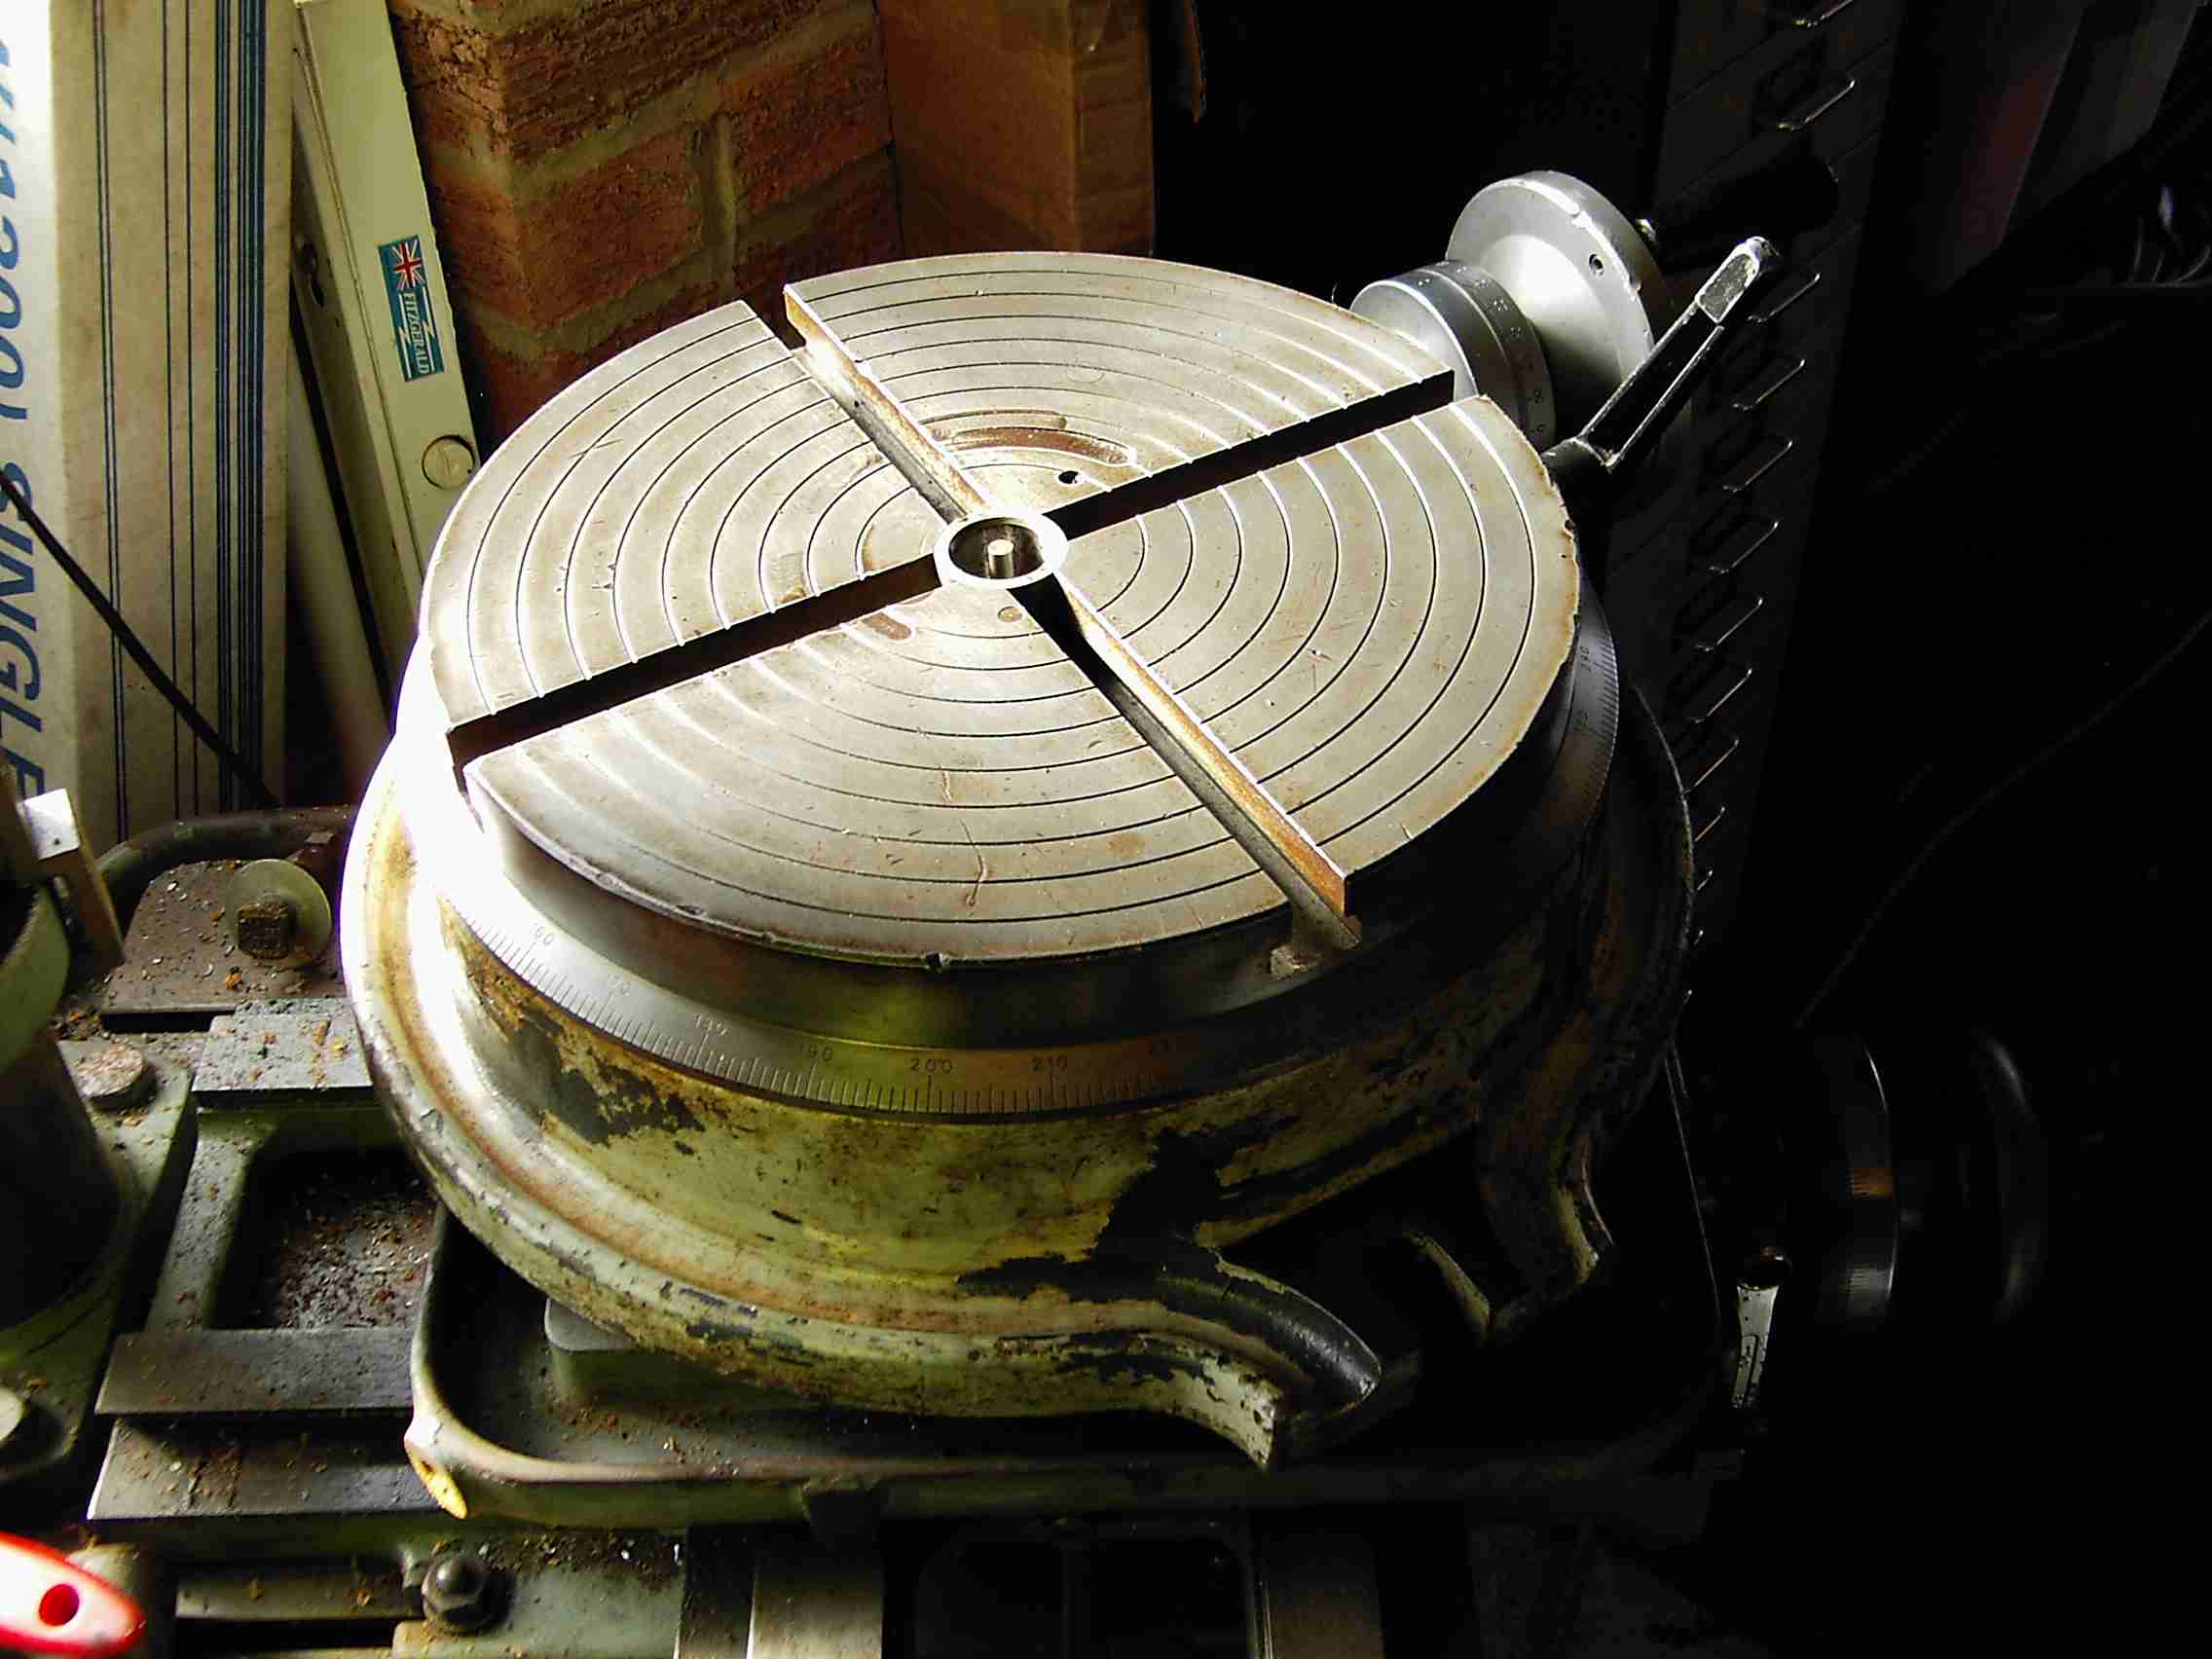
As you can see it's a shade too big for the Perrin, though it's just possible to position it so that the centre of the table is central to the quill, and a large pair of G-clamps seems to keep it in place well enough. The table weighs over 50Kg as it's basically a cast-iron T-slotted platter on a cast-iron base with a reduction gear and a brake.. probably made from cast iron. The table is graduated in degrees and the vernier in minutes of rotation; there's about 4 minutes of lash in the reduction drive which I reckon is acceptable given the jobs I'm likely to have for it. I stripped the table down and cleaned the gunk out: with a liberal squirt of oil it now rotates smoothly with little effort. The price was right too: the seller was out in the sticks about 30 miles from Aberdeen and the table was 'collection only' so I guess it limited his market somewhat. I happened to be in the north of Scotland on business and was able to detour to collect it! The pin you can see in the middle is attached to a plunger that can be used to clear swarf out from the centre hole; in a flash of genius I turned it to a tapered point and with a threaded centre fitted to the end of the spindle it becomes the work of seconds to set or reset the table dead-centre under the quill (though the Perrin's new DRO system now takes care of that anyway!).