Esprit electrics - Come to the dark side!
There is nothing scary about the electrical system of the Esprit... at least, not in pre-injection, pre-Stevens, UK-market form anyway!
Problems tend to stem from the usual ageing/ weathering/ corrosion that affects old cars in general, but also the typical fibreglass-car maladies of bad earths and monkey mechanics.
I was pleased to find that my Esprit was pretty much unbutchered electrically. There was a Vecta immobiliser that had been bypassed; I stripped it out with the intention of working out the resistor combination to 'cut' a new keyfob for it, but given the price of new immobilisers I decided I couldn't be bothered and binned it.
As an aside, back in the early 90s when I worked in auto security, the Vecta was touted - along with its 'insurance guarantee' - as the darling of the car security world. Unfortunately it had a fundamental flaw which, ironically, the thieving scum figured out around the same time as we did... but that's a tale for another part of the site :D
As usual Joe Lucas (Prince of Darkness) supplied most of the components; sometimes the 'donor' car is a bit difficult to identify but after this much time, you're about as likely to find one of them being broken for spares as you are a scrapped Esprit anyway. Since Lucas supplied most of the electrical equipment for most of the British motor industry for most of last century, it's a fairly simple matter to locate, say, a wiper motor with the correct rating, size and basic operation, to be able to make it work, even if it means building one out of two.
The headlamp pod motors are as used in the Triumph TR7. I can't recall when the TR7 was introduced but it must have made things easier for Lotus - the Elite and Éclat used vacuum-operated pods. Maybe the first Esprits did too, I've never looked into it. The thing to remember is that the pod motors are basically just modified wiper motors: they have two park positions instead of one, and a couple of diodes in the gearbox, but the casing and armature, brushes etc. are common with the wiper variant. I've created a stripdown sequence for the pod motors. If the motors are giving trouble you might want to take a look at this page which describes the circuit operation for the TVR; there are slight variations between it and the Esprit but the principle is the same. If anything, the Lotus circuit is simpler.
The S3 has twin cooling fans mounted in a plastic cowling on the radiator. The fans themselves were 'borrowed' from the Ford Fiesta (Mk1 or 2), perhaps the Escort Mk 3 too.
Dashboard switches are the Lucas 182SA-series lever type found on the Austin Princess as well as the TR7 and the TVR wedges. There are actually a few different versions of these switches; they were also used on the later Ambassador I believe, some Reliant Scimitars and probably one or two other cars. The main difference is that the ends of the levers can be either plain or ribbed, and the logo for the switch function can be on the lever end or on a little window in the switch body. Standard for the Esprit was ribbed, with logo on the body. The switches use common parts of course, so it is possible to dismantle them and swap levers, copper contact strips etc. as necessary. These switches come up occasionally on Ebay, as do pod motors. The switches have backlighting by the infamous fibre-optic system also used on the Princess and the TVR wedges. The main lamp-holder for the fibre optics is very fussy about the size and wattage of the lamp; I think it's a 5W globe. The wrong type may not position the filament in the right place with respect to the internal lenses, and too high a wattage might melt the plastics.
The rear light clusters on the S3 were originally Rover SD1; the side indicator repeaters Jaguar XJ6 (though I've seen a Ford item that looks pretty much the same) and the headlamps are 5 and 3/4" sealed beam units. Two types are used: the outer lamps are dual-filament with dipped and main beam functions, the inner lamps are main-beam only. Again these often come up on Ebay, far cheaper than you can get them from, say, Vehicle Wiring Products (although VWP are a useful place to know, they do lots of electrical connectors, wire and so on, to allow you to repair - or even make - wiring looms).
Electric window lifts are Delco units as used on the Jaguar XJ6 (Series 1, the later cars used a different motor) - but a bit of digging suggests they were used on various American cars as far back as the early 1960s! They differ from more modern units in not using permanent magnets; instead they are series-wound using dual field coils wound in opposite 'hands' to provide both directions of rotation. They draw over 9A even off-load so the connections to them need to be in top condition - Lotus fed them directly from the console switches which is a bad idea; they could do with relays to remove the switches from the high-current path. If your windows are sluggish, try disconnecting the lift motors and see if the glass is free to slide in the channels.
I haven't got a positive ID on the source of the electric mirror actuators, but they are different from most modern cars in that instead of using motors, rack & pinions etc., they use four electromagnets to 'pull' the mirrors in the required direction. Each 'click' of the 4-way joystick causes a small movement; repeated clicks are necessary to effect a larger swing. It really sounds and feels agricultural in comparison with modern equipment.
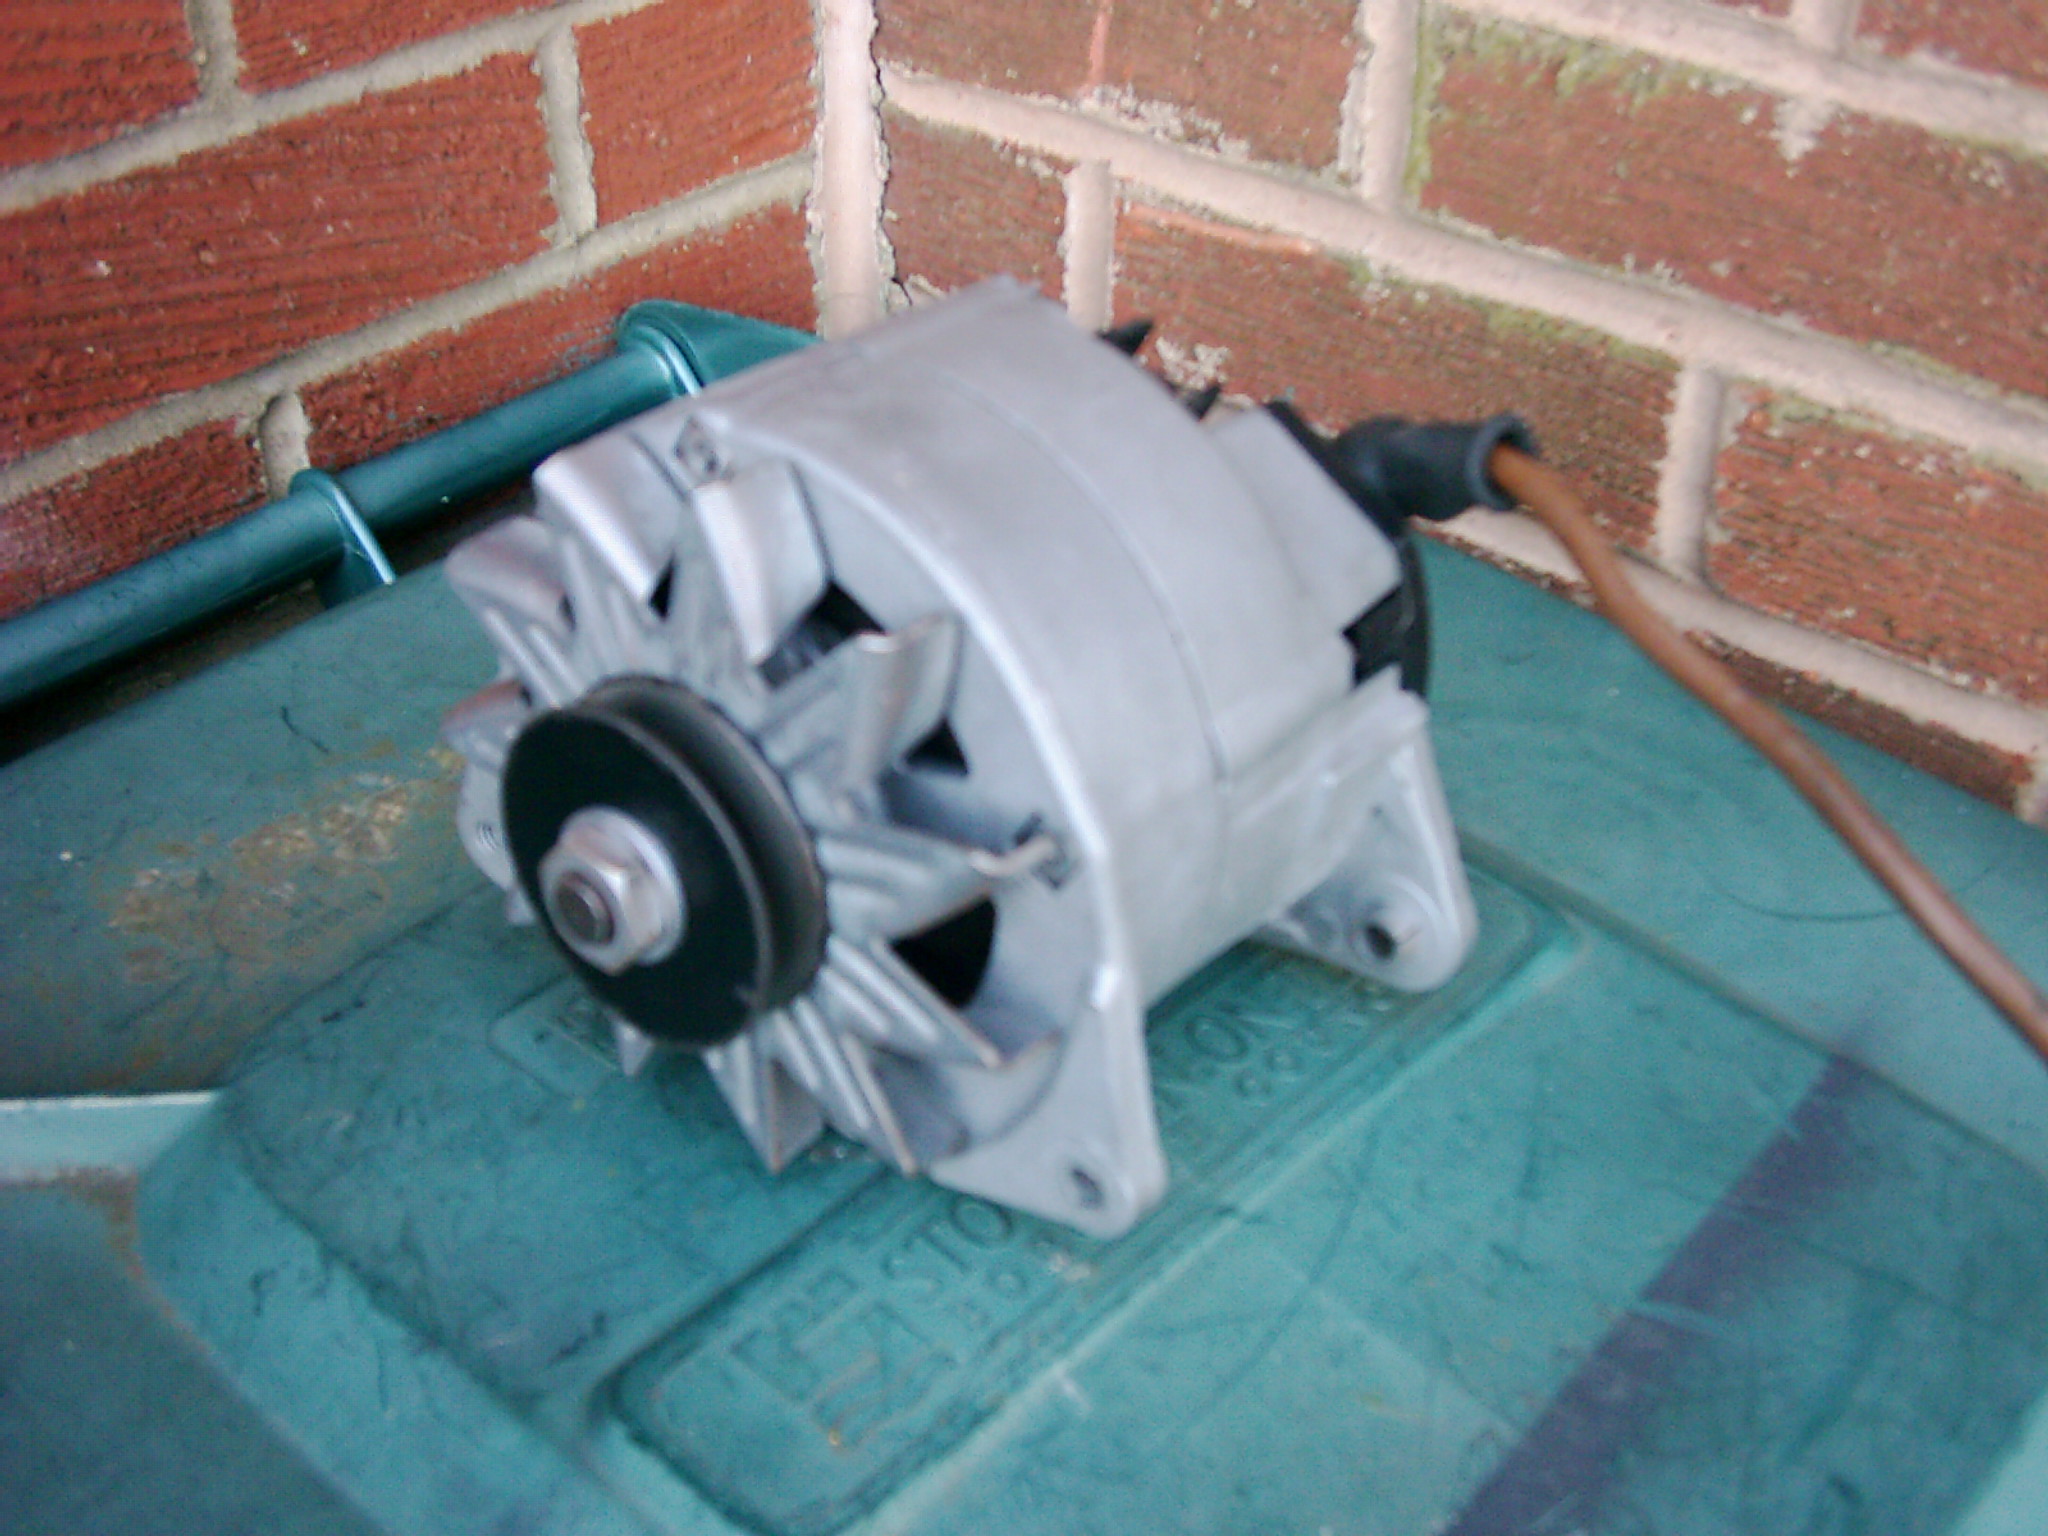
The alternator is a Motorola 70A item; this has an easily-replaceable brushbox and regulator. As the unit on my car had been receiving a shower of oil from the timing belt owing to a leak at the front of the engine (auxiliary shaft seal, I think) it was in a fairly grotty state so I decided to strip and clean it. I planned to take some pictures but the alternator really was horrifically manky and I didn't want to get my digita camera filthy!
The unit is fairly easy to strip: detach the charging lead and suppression capacitor. Find a way to hold the fan securely and undo the pulley nut. Remove fan, pulley, spacers etc. and the Woodruff key.
Remove screws securing plastic cover at rear and lift it off. Remove two screws securing regulator (finned alloy block), detaching its leads as you lift it away. Remove two screws and carefully extract the brushbox. Now it gets ugly!
Find a big soldering iron and unsolder the three leadout wires from the rectifier stack; also the single red wire from the rectifier. Remove two screws and extract the rectifier and a plastic spacer that sits underneath it.
Remove the three screws holding the main bearing retainer plate (at the pulley end), then the four through-bolts that secure the halves of the case. Use a small 2-legged puller to pull the pulley end cover off: it'll be a tight fit around the main rotor bearing but should come off without too much force. Now you should be able to lift out the stator winding, leaving just the rotor firmly held in the rear end cover by the other rotor bearing. Find a sensible way to persuade the cover to come off the bearing!
Now you should be able to change the rotor bearings if necessary; mine had a small amount of play but considering the alternator data plate said 'Week 22, 1983' on it, I wasn't surprised!
With my alternator in bits, the various parts were degreased, either in the tank of Jizer or in a pan full of white spirit (less aggressive than Jizer). Then the various metal parts were bead blasted and the unit reassembled... in reverse order, naturally ;)
A mate of mine with an '81 Esprit Turbo had been having intermittent starting issues; it proved to be arced contacts in the starter motor solenoid. If you experience the same trouble, you can find a guide to stripping and cleaning the solenoid here.
Back to Esprit menu Back to Wedges