Let there be light...
It is in the nature of low-volume makers like TVR that they tend to use off-the-shelf items from mainstream manufacturers' deleted models. In the case of the TVR Wedges prior to the 400SE, the front indicator/ sidelights were initially sourced fom Lucas, then later from Renault (the '12', pre-1975 models). If you want to be precise, the 'Renault' units were made by SEIMA with the model number 427g or 427d (for gauche/droite, if you can remember French!). The 400SE, incidentally, did away with the front bumper and used Peugeot 505 indicator/sidelights, but that need not concern us here. You may also find the ex-R12 units manufactured by Cibie, with a different part number, but lenses are interchangeable with the SEIMA version.
Even by the time TVR started using bits off it, the R12 was seriously old-hat. Renault had passed on the tooling to Romanian company Dacia, who produced the R12 as the 'Denem' up to 1984. Even Dacia moved with the times (some might argue their stylists still haven't!) and moved onto other designs, but in the late 80s good old Reliant then decided that the SEIMA lamps were just what the Robin/ Rialto needed for a facelift - and SEIMA replaced the rot-prone metal backplates with polycarbonate ones. Nowadays these lamps are a bit rare. The lenses come up from time to time on Ebay, but even perusing the European Ebay pages rarely throws up any bargains. Interestingly, SEIMA did a version of these lamps which had full-clear lenses rather than the split clear/orange, so those coupled with coloured bulbs might be a viable alternative - not that the full-clear ones are any easier to find, of course! Watch out for a replica lens that can be found on Ebay (sometimes by Reliant spares sellers): the quality isn't great (very ripply and with some shrinkage at the orange/clear join) but they will do the job - be advised that you can sometimes find the genuine types just as cheaply so if you can hang on, you'll get a better product. Both SEIMA and Cibie versions have the maker's name and part number moulded-in whereas the copies don't... some sneaky sellers show photos of the genuine units but supply the replicas - ask me how I know! One slight buggeration for owners of early cars is that the bumper recesses were moulded to suit the Lucas lamp units and the R12 ones don't fit - the converse also being true of the later 'ribbed' bumpers which were made to suit the R12 lamps. The even-later cars had non-ribbed bumpers, also intended only for the R12 lamps, as here on my 390:
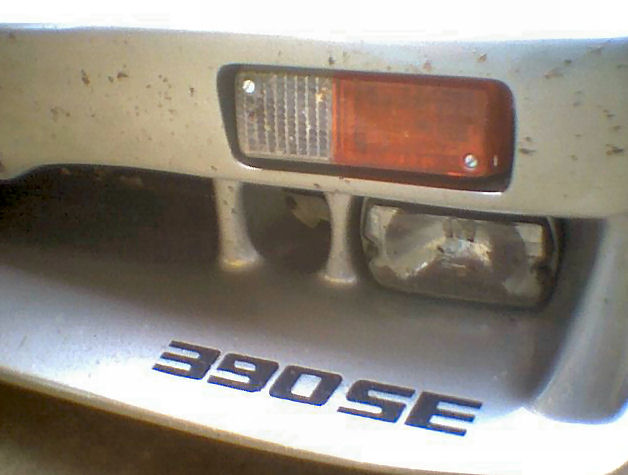
Since the above photo also shows the driving lamp, I'd be as well tell you that it's a Cibie 'Airport 35' series lamp. TVR fitted the 'driving' version rather than the 'fog' lamp which are much more commonly-available (the 'drive' being more long-throw where the 'fog' has the short-range flat-top beam for picking out kerbs. If you're brave enough to hunt for them in France you want the 'longue-portee' version and not the 'anti-brouillard'). But back to the indicators... the light units on my car weren't in the best of health when the offside one was smashed by a flying stone (in about 2002!). Unwilling to pay Renault's silly prices and wait several weeks for delivery, and reasoning that even new units would corrode eventually, I decided to fabricate my own.
I laid-up a few layers of mat and resin in the recess of the front bumper. Lampholders were obtained for a couple of pounds from Vehicle Wiring Products and the new 'base' drilled to accept them. Further resin bonded the lampholders and some 3mm nuts in, a partition was added from an offcut of plastic... which left the lens. I played with a couple of ideas before settling on the solution you see: a lens cut from the diffuser of an industrial light fitting ( I guess a domestic fluorescent would do as well!), an 'inner' diffuser in white plastic which I later opted to leave out for increased brightness, and to get the requisite amber colour I used those bulbs with orange coating that modern cars have. Ironically, they were the most expensive part of the job.The new bases were screwed into the bumper, stainless domed-head hex screws and a bead of silicon sealant used to fix the lenses and keep the rain out respectively. In true TVR fashion, I had to cut two different shaped lenses as the bumper recesses are slightly different. People with beards and anoraks would no doubt pontificate over the lack of 'E' markings on the lens; my riposte would be, if it's acceptable as a domestic light fitting, with all the health and safety nonsense that entails, what's the problem?
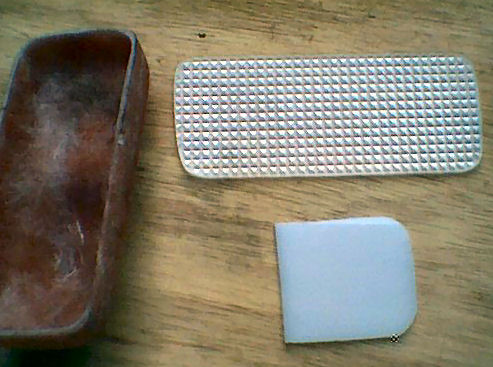
Home-made front indicator parts! Isn't GRP wonderful... ;)
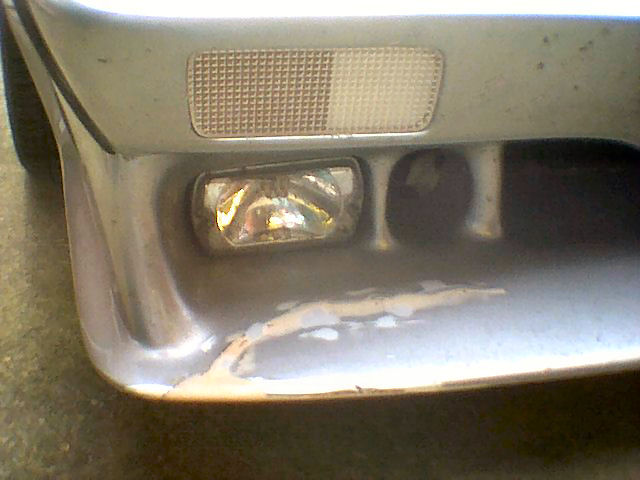
...and the finished item prior to drilling for screws (ignore the spoiler damage!)
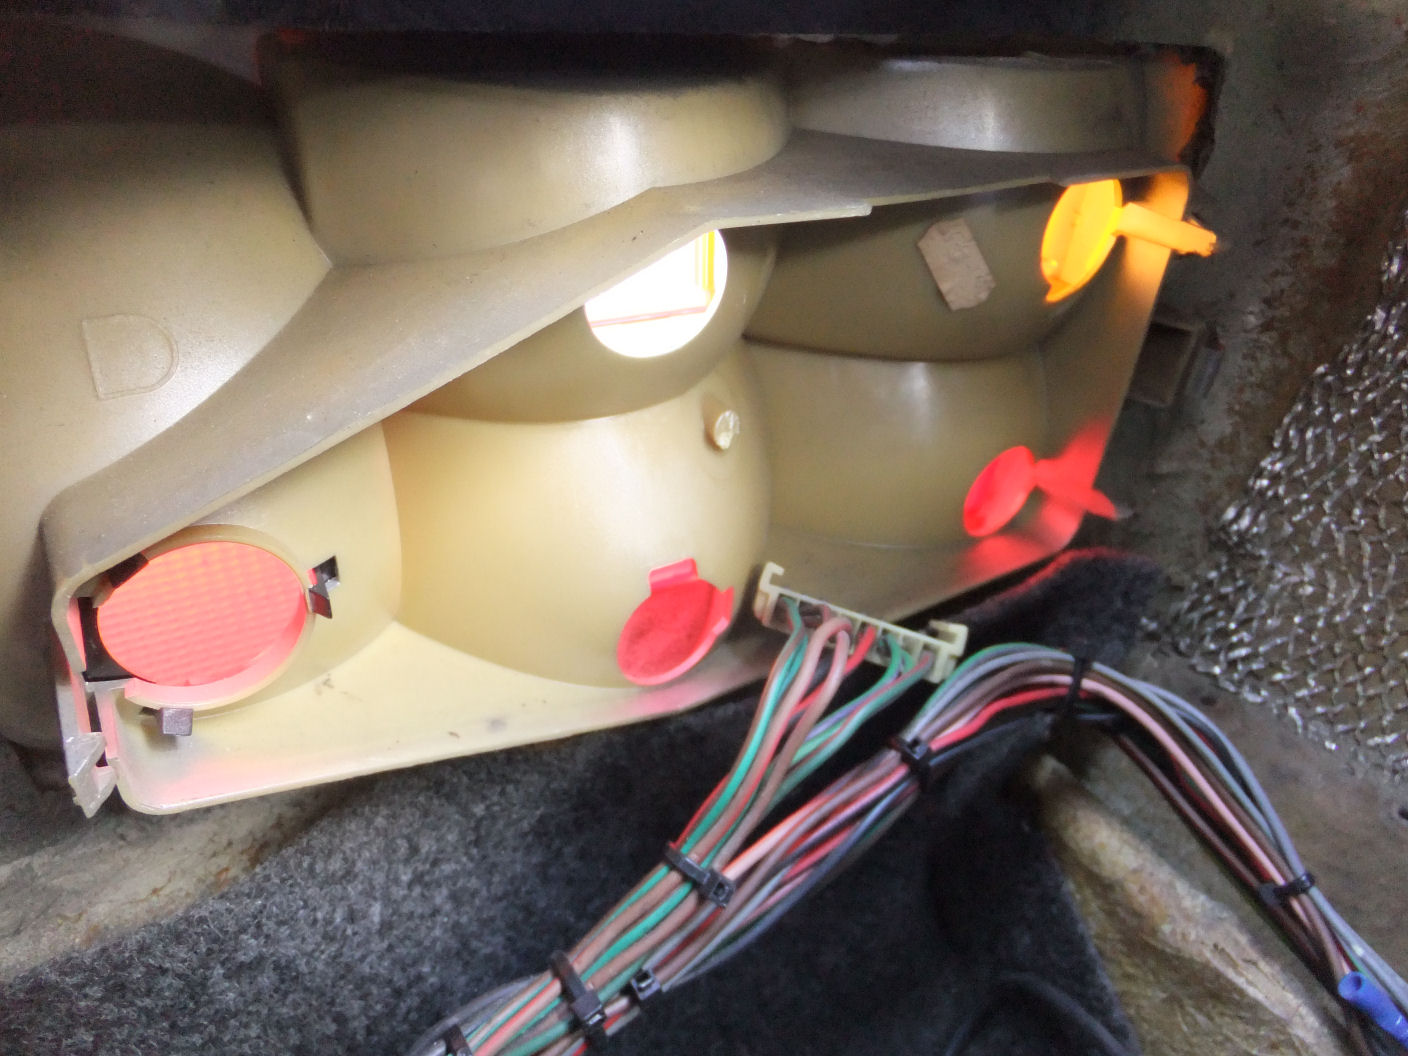
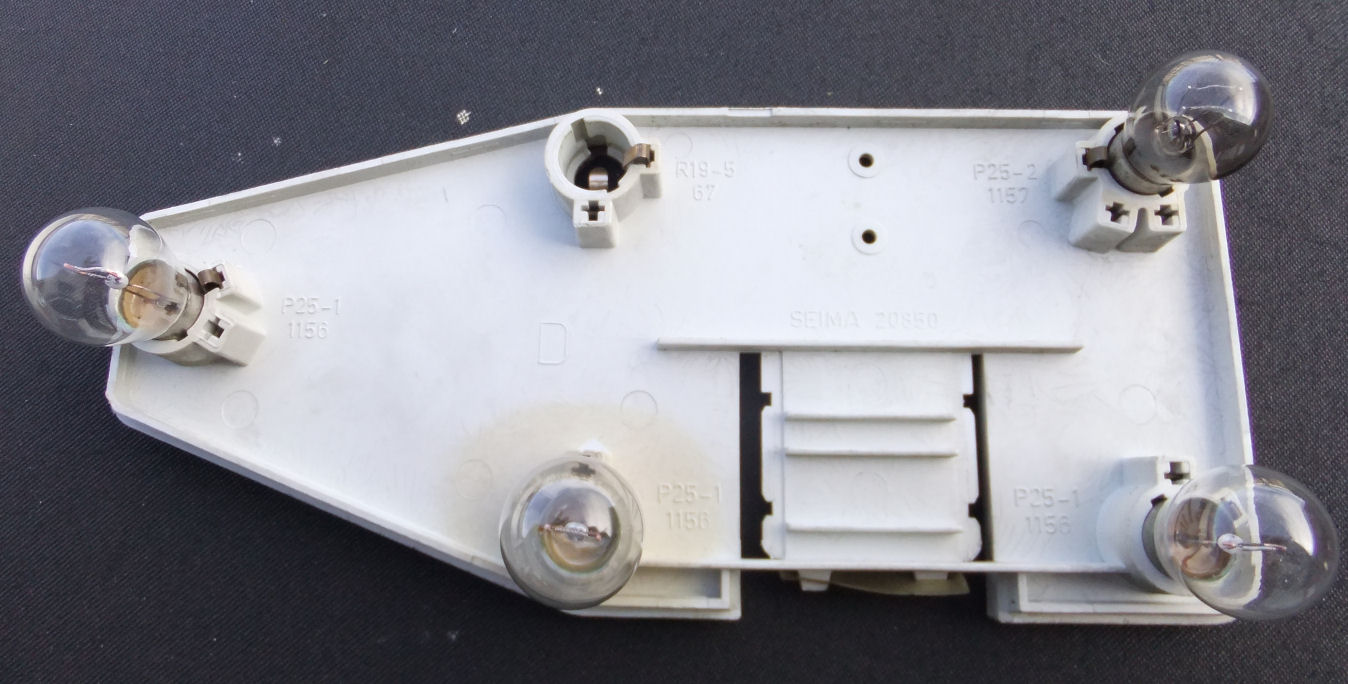
The rear lamp clusters changed over the life of the TVR wedges: initially from the Ford Capri, they were superceded (or superseded if you prefer; I'm never sure what the point of creating words is if you then let someone change the spelling...) by those from the Rover SD1 (well, they robbed plenty of other bits from it as well, so why not) and then, in a blaze of modernisation (which sounds like an Americanism!), the rear lamps from the Renault Fuego were fitted, which required a bit of GRP work to make them a flush fit (and the better the car looked as a result). The Fuego units are actually installed upside down, so the nearside becomes the offside and vice versa (which is Latin, or as near as damn). At the time, electronics were just starting to become important in mainstream cars (previously, the AM radio or the bimetallic flasher unit for the indicators were about as techno as it got) and the Fuego lamp units, along with other Renault installations at the time, were designed for easy maintenance (or so they thought). The lamps are bayonetted into sockets formed as part of a detachable back plate which unclips from the lens housing. Each lamp socket has copper contacts which are pressed-in to the backplate and retained by barbs. The 'fingers' of each contact then press against a flexible membrane 'circuit board' arrangement which has the necessary copper tracks printed on it. Each of the tracks is led to one edge of the 'circuit board', onto which slides the car's wiring loom connector. So to change a bulb, you access the interior of the lamp unit, unclip the backplate, lift it away from the lens unit and there are your lightbulbs. Unfortunately the design has a couple of flaws - well, one main flaw really: as both the lamp socket terminals and the loom connector rely on a combination of 'spring' and friction to keep them in good contact with the membrane, as time goes by both the contacts and the circuit tracks oxidise and this leads to poor connections. You can detach the loom connector by simply sliding it off the backplate, when both the tracks and the contact 'fingers' of the loom connector can be brightened-up by suitable means... I prefer a fibreglass pencil, beloved of electronics techies the world over. It removes cack without removing appreciable amounts of copper, which can't be said of emery boards, sandpaper or files. The contact 'fingers' of the actual lamp sockets are a bit trickier; you can, with care, extract their barbs from the backplate and then clean up the contacts as well as the exposed area of circuit track. It should also be possible to slip a bit of fine wet'n'dry paper between the finger and the track and clean up both, but proceed carefully so as not to unduly bend the 'finger'. Here's the backplate from the Fuego lamp showing the lamp sockets:
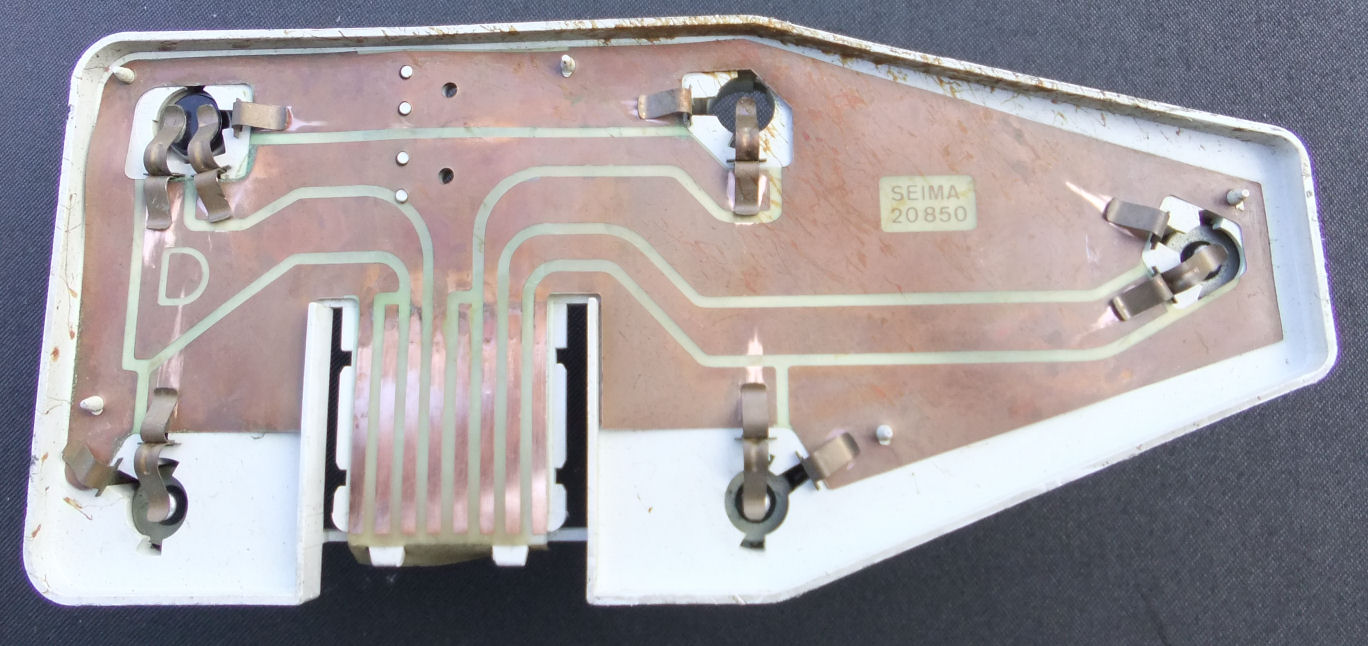
...and the other side with the copper tracks and socket spring 'fingers' (the letter 'D' is for 'droite', this being the right-hand unit from the Fuego, but fitted upside-down on the left of the TVR. The other unit obviously has a G...):
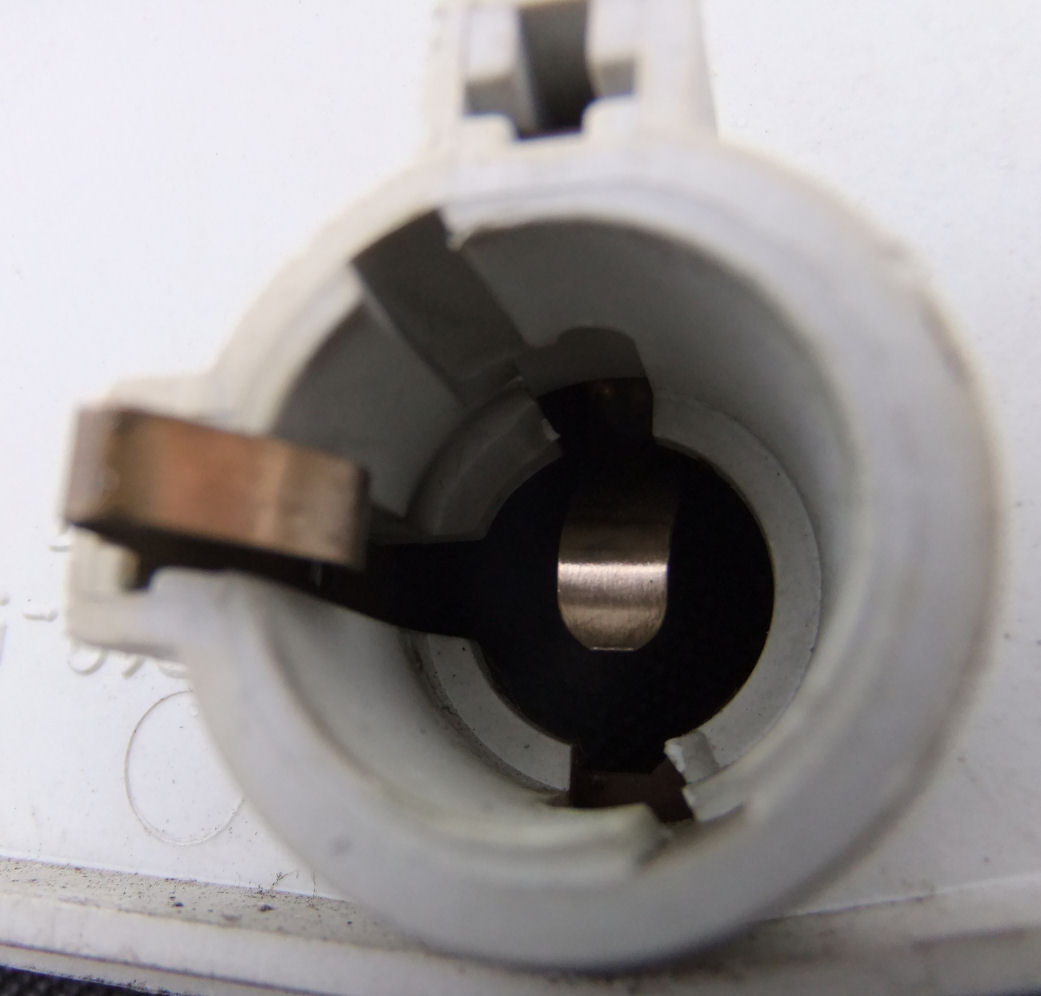
Close-up of the fingers inside one of the lamp sockets:
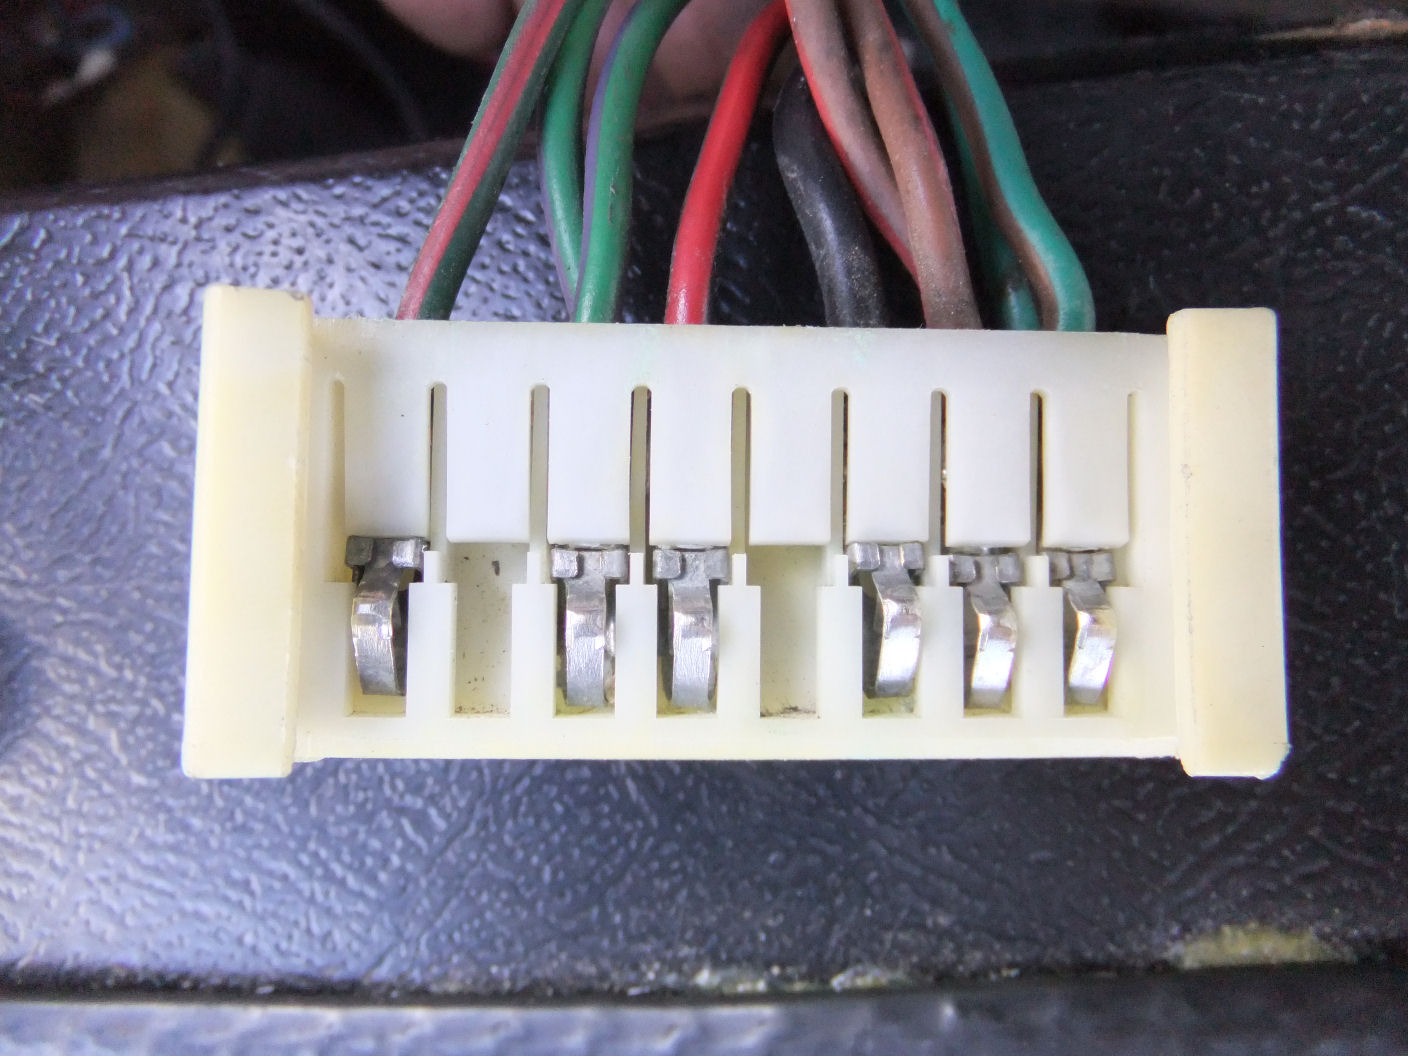
...and the contacts in the loom connector:
This is the rear view of the lamp unit with the backplate removed (the silver mesh at right is the radio aerial's groundplane, glued to the inner wing):